Filler/dispenser installing in a swivel mount - 14, Filler/dispenser installed in a swivel mount, Installing the swivel mount to a vertical – Hardy HI 3010 Filler/Dispenser Controller User Manual
Page 30
HI-3010 Filler/Dispenser/IBC
14
Service Manual
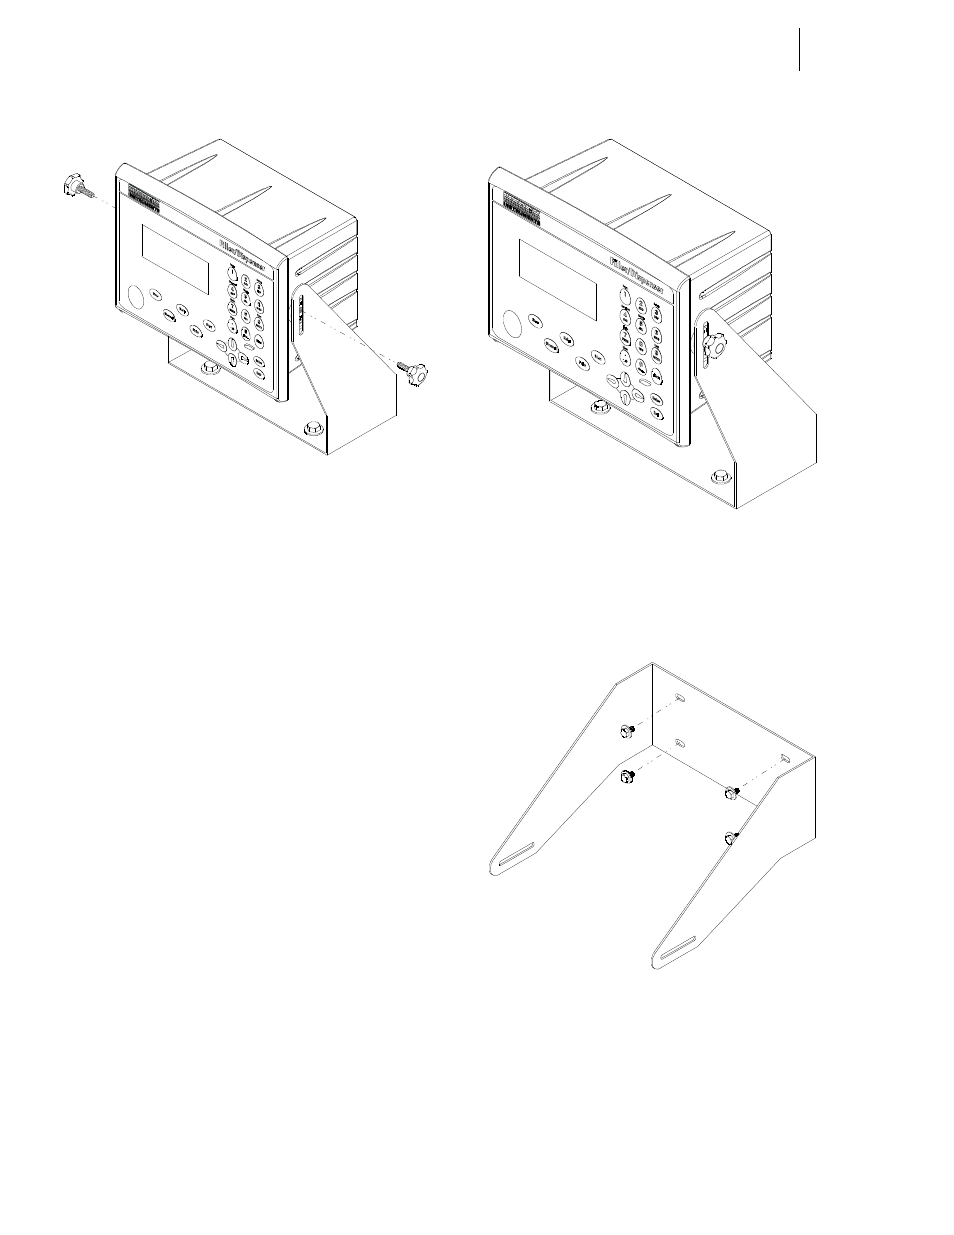
FIG. 3-6 FILLER/DISPENSER INSTALLING IN A
SWIVEL MOUNT
Step 3. Screw the two (2) fastener knobs into the threaded
holes on each side of the Filler/Dispenser until the
brackets are snug against the instrument. (See Fig.
3-6 & 3-7)
CAUTION: D
O
NOT
OVERTIGHTEN
.
Step 4. To rotate the instrument in the swivel mount, loosen
the two fastener knobs.
Step 5. Rotate the instrument to the position you want.
Step 6. Re-tighten the fastener knobs.
FIG. 3-7 FILLER/DISPENSER INSTALLED IN A
SWIVEL MOUNT
Step 7. Use four (4) 1/4 x 20 fasteners to fasten the swivel
mount to a vertical surface. (See Fig. 3-8)
FIG. 3-8 INSTALLING THE SWIVEL MOUNT TO A
VERTICAL SURFACE
Step 8. Place the Filler/Dispenser between the Swivel
Mount brackets so that the threaded holes in the
instrument are aligned with the slots in the Swivel
bracket. (See Fig. 3-9)