Installing the hi 3010 in a swivel/wall mount, About the swivel/wall mount, Nema 4 gasket flush against the front – Hardy HI 3010 Filler/Dispenser Controller User Manual
Page 29: Installing the swivel mount to a
13
CHAPTER 3
Installation
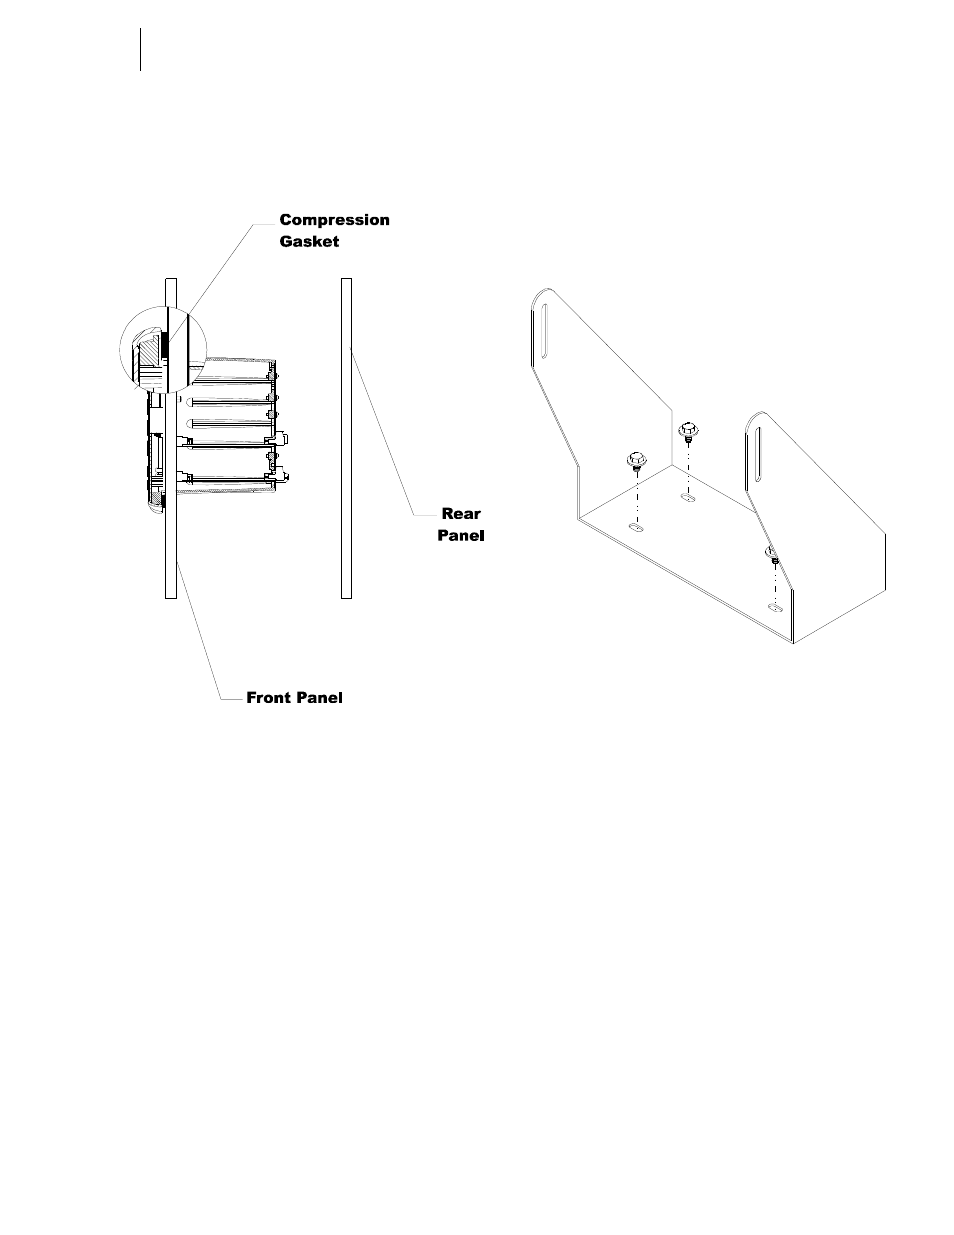
CAUTION:
ONCE
THE
GASKET
IS
COMPRESSED
IT
SHOULD
NOT
BE
USED
AGAIN
.
WHENEVER
THE
FILLER
/
DIS
-
PENSER
IS
REMOVED
FROM
THE
PANEL
,
RE
INSTALL
WITH
A
NEW
GASKET
.
FIG. 3-4 NEMA 4 GASKET FLUSH AGAINST THE
FRONT PANEL OF THE ENCLOSURE
Step 5. Gently slide the Panel Mount Collar over the rear of
the instrument. (See Fig. 3-3)
Step 6. Push the captive screws through the holes in the
Enclosure Front Panel and install the screws into
the tapped holes on the instrument until the screws
are finger tight.
Step 7. Use a slotted head screwdriver and tighten each
screw until the instrument is snug and the compres-
sion gasket is tight against the Enclosure Front
Panel. DO NOT OVERTIGHTEN!
Step 8. The Panel Mount installation is complete.
Installing the HI 3010 in a Swivel/Wall Mount
About the Swivel/Wall Mount
The swivel mounts allows the Filler/Dispenser to mount on a
horizontal or vertical surface. The instrument is mounted in
the swivel which is fastened to a hard surface. The mount not
only supports the instrument but also allows the Filler/Dis-
penser to rotate for a better view of the display and more
convenient access to the front panel key board. The Swivel
Mount also serves as a wall mount. Simply rotate the swivel
mount 90 degrees and attach it to a wall. The swivel allows
the instrument to rotate several degrees, even with cables
and rear cover attached.
Step 1. Use four (4) 1/4 x 20 fasteners to fasten the swivel
mount to a horizontal surface. (See Fig. 3-5)
FIG. 3-5 INSTALLING THE SWIVEL MOUNT TO A
HORIZONTAL SURFACE
Step 2. Place the Filler/Dispenser between the Swivel
Mount brackets so that the threaded holes in the
instrument are aligned with the slots in the Swivel
bracket. (See Fig. 3-6)