About proof switch, Setup menu/discharge parameter, Discharge menu/auto-discharge – Hardy HI 3010 Filler/Dispenser Controller User Manual
Page 49: Discharge menu/ok to discharge, Ok to discharge menu, Discharge menu/proof switch, Discharge menu/switch timer
33
CHAPTER 4
Configuration
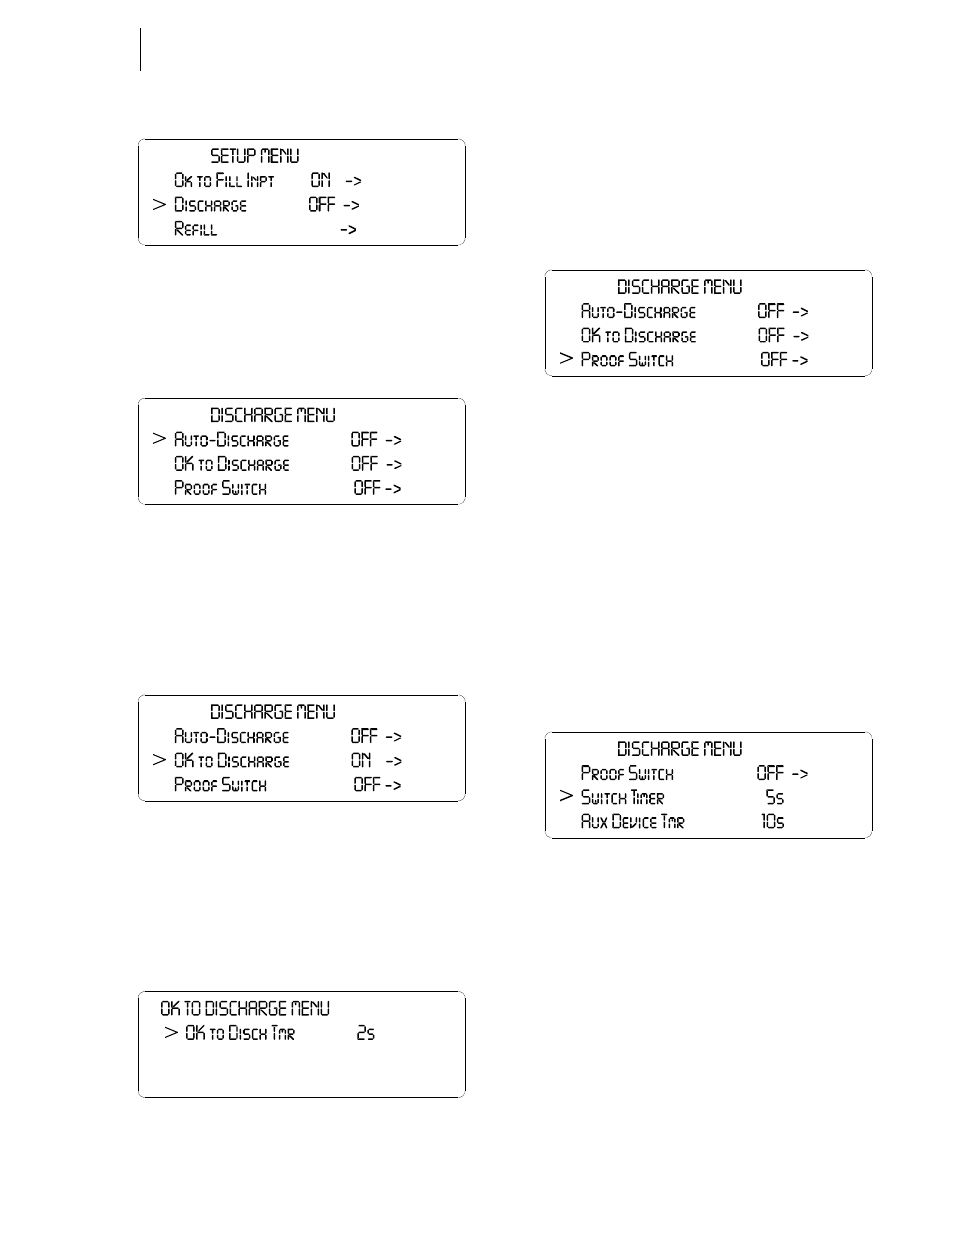
FIG. 4-47 SETUP MENU/DISCHARGE PARAMETER
Step 2. With Discharge toggled ON, Press the Enter button.
The Discharge Menu appears with the cursor in
front of Auto-Discharge. (See Fig. 4-48)
FIG. 4-48 DISCHARGE MENU/AUTO-DISCHARGE
Step 3. Press the right or left arrow buttons to toggle Auto-
Discharge ON or OFF.
Step 4. Press the Enter button to set the entry.
Step 5. Press the down arrow until the cursor is in front of
OK to Discharge. (See Fig. 4-49)
FIG. 4-49 DISCHARGE MENU/OK TO DISCHARGE
Step 6. Press the right or left arrow buttons to toggle the
OK to Discharge ON or OFF.
Step 7. If you toggle the OK to Discharge ON, press the
Enter button. The OK to Discharge Menu appears.
(See Fig. 4-50)
FIG. 4-50 OK TO DISCHARGE MENU
Step 8. Press the right or left arrow buttons to increase or
decrease the OK to Discharge time.
Step 9. Press the Enter button to set the entry.
Step 10. Press the Exit button to return to the Discharge
Menu.
Step 11. Press the down button until the cursor is in front of
Proof Switch. (See Fig. 4-51)
FIG. 4-51 DISCHARGE MENU/PROOF SWITCH
About Proof Switch
When you turn ON the Proof Switch, it senses the state of a
physical actuator or a proximity sensor, for example, to
determine if a gate is open or closed. If the gate is closed
when it should be open or vice versa, an alarm is displayed
that says “NO DISCHARGE PROOF ALARM” depending
on how your system is configured.
Step 12. Press the right or left arrow buttons to toggle the
Proof Switch OFF or ON.
Step 13. Press the Enter button to set the entry.
Step 14. Press the down arrow button until the cursor is in
front of Switch timer. (See Fig. 4-52)
FIG. 4-52 DISCHARGE MENU/SWITCH TIMER
Step 15. Press the right or left arrow buttons to increase or
decrease the time.
Step 16. Press the Enter button to set the entry.
Step 17. Press the down arrow button until the cursor is in
front of Aux Device Tmr (Auxiliary Device Timer).
(See Fig. 4-53)