Auto-tuning interruption and fault codes, Auto-tuning operation example, Yea_ common – Yaskawa CIMR-LU Drives User Manual
Page 73: 4 start-up programming & operation, Auto-tuning of pg-e3 encoder characteristics, Selecting the type of auto-tuning
4 Start-Up Programming & Operation
YASKAWA ELECTRIC TOEP C710616 38F YASKAWA AC Drive L1000A Quick Start Guide
73
S
tart-U
p
Prog
rammin
g
&
Op
er
at
io
n
4
Auto-Tuning of PG-E3 Encoder Characteristics
This feature optimizes the drive settings for the characteristics of the PG-E3 speed-control option card for the ERN1387
encoder (manufactured by HEIDENHAIN) while rotating the motor. Perform Auto-Tuning to obtain accurate position
data from the motor rotor for driving a PM motor. This type of Auto-Tuning automatically sets the characteristics of the
PG-E3 option card for the ERN1387 encoder in parameters F1-66 to F1-81 (Encoder Adjust 1 to 16).
Note: The motor rotates during execution of Auto-Tuning of PG-E3 encoder characteristics. Before starting, refer to the drive technical
manual.
Note: Auto-Tuning of PG-E3 encoder characteristics adjusts the unique characteristics of the ERN1387 encoder connected to the drive
by using a PG-E3 option card. This type of tuning should be performed when setting up the drive or after replacing the encoder or
drive. The signal lines between the PG-E3 option card and the ERN1387 encoder must be connected between the R+ and R-
terminals while this type of tuning is performed.
Note: The setting values of parameters F1-66 to F1-81 are reset to factory default values when A1-03 is set to 2220. The setting values
of parameters F1-66 to F1-81 are modified at completion of Auto-Tuning of PG-E3 encoder characteristics.
■
Auto-Tuning Interruption and Fault Codes
If tuning results are abnormal or the STOP key is pressed before completion, Auto-Tuning will be interrupted and a fault
code will appear on the digital operator.
Figure 36
Figure 40 Auto-Tuning Aborted Display
■
Auto-Tuning Operation Example
The following example demonstrates Rotational Auto-Tuning when using OLV (A1-02 = 2).
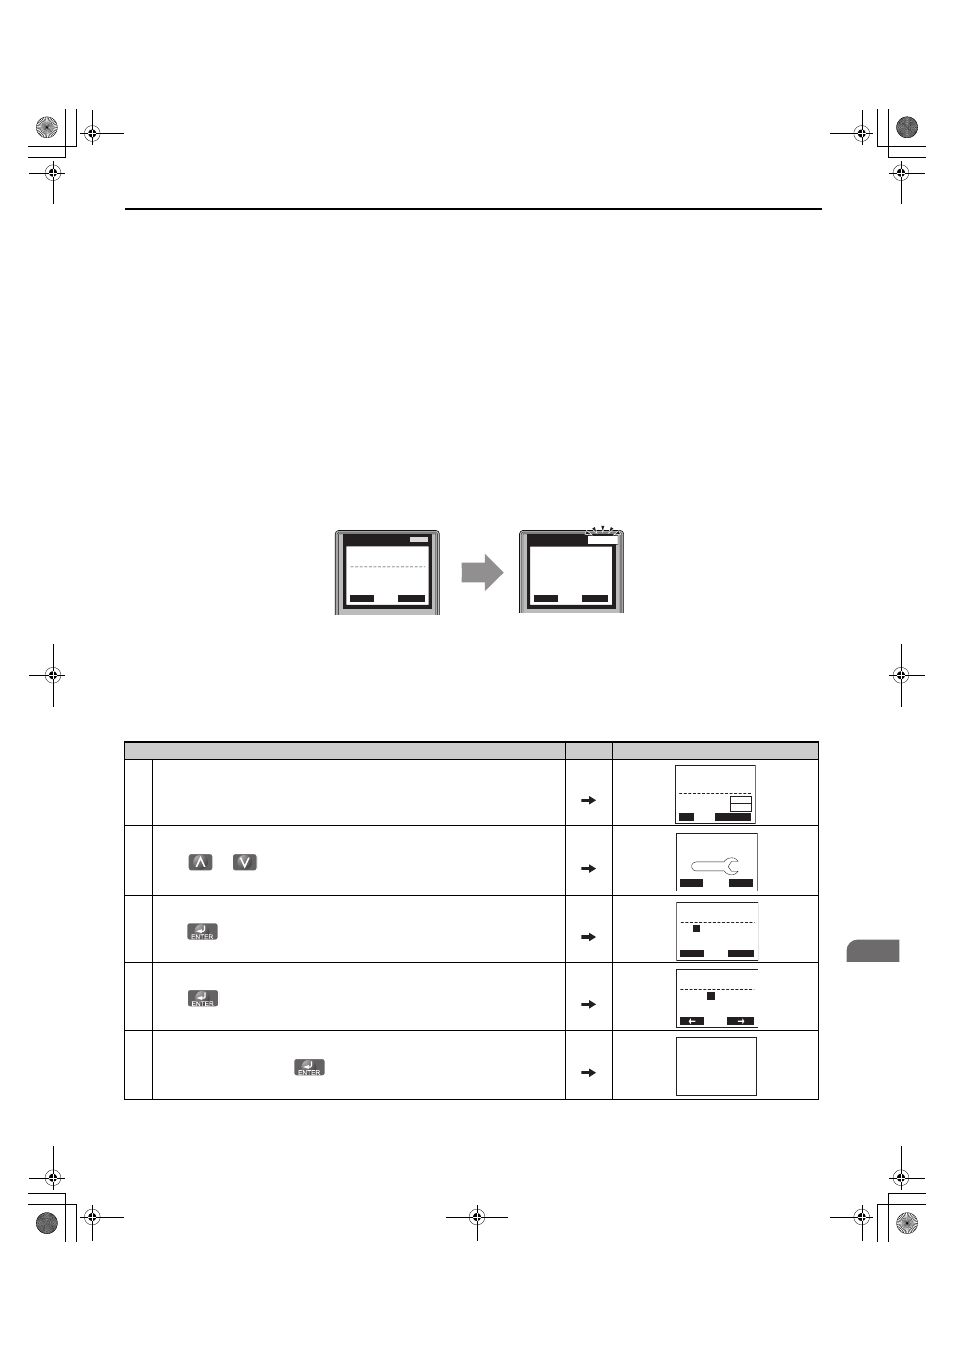
Selecting the Type of Auto-Tuning
Step
Display/Result
1.
Turn on the power to the drive. The initial display appears.
2.
Press
or
until the Auto-Tuning display appears.
3.
Press
to begin setting parameters.
4.
Press
to select the value for T1-01.
5.
Save the setting by pressing
.
DIGITAL OPERATOR JVOP-180
DIGITAL OPERATOR JVOP-180
REV
DRV
FOUT
DRV
ALM
ALM
Auto-Tuning Aborted
During Auto-Tuning
- A.TUNE -
X.XX Hz/ X.XXA
DRV
Tune Proceeding
Rdy
FWD
- MODE -
Er-03
STOP key
DRV
FWD
RESET
YEA_
common
- MODE -
U1-01= 0.00%
U1-02= 0.00%
U1-03= 0.00A
DRV
Speed Ref (OPR)
Rdy
FWD
FWD/REV
RSEQ
LREF
HELP
- MODE -
PRG
Auto-Tuning
DATA
AUTO
FWD
- A.TUNE -
T1-
01
= 0
∗0∗
Standard Tuning
PRG
Tuning Mode
ESC
FWD
DATA
- A.TUNE -
T1-01=
0
∗0∗
Standard Tuning
PRG
Tuning Mode
FWD
“0”
Entry Accepted
TOEP_C710616_38F_5_0.book 73 ページ 2013年12月4日 水曜日 午前9時56分