Hoa keypad remote usage – Yaskawa iQpump1000 AC Drive Quick Start User Manual
Page 40
3.
Gradually take up the slack in the wires and hoist the drive after the wires are stretched tight.
4.
Lower the drive when ready to install in the enclosure panel. Stop lowering the drive when it is near the floor then
begin lowering the drive again very slowly until the drive is placed correctly.
u
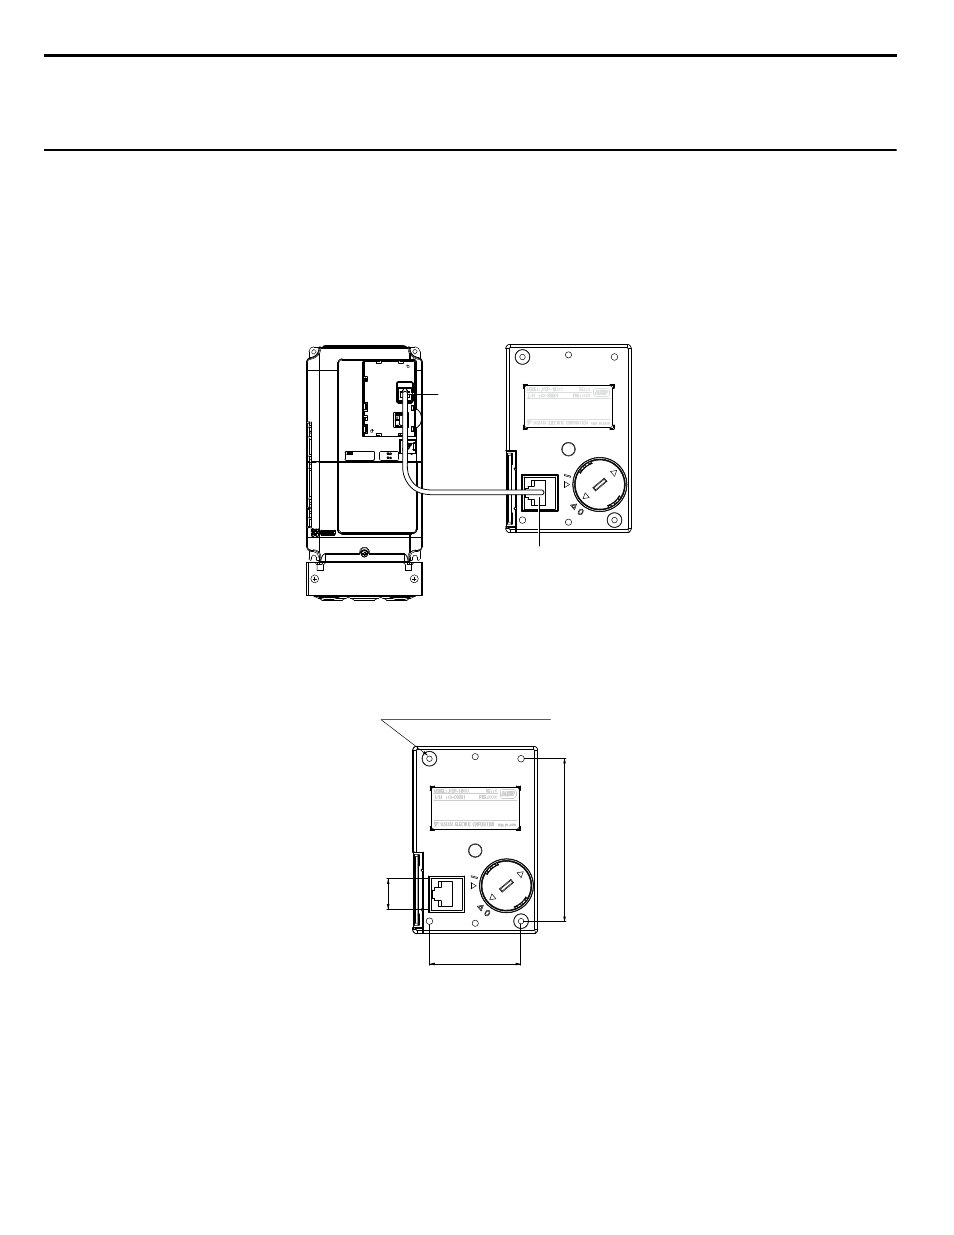
HOA Keypad Remote Usage
n
Remote Operation
The HOA keypad mounted on the drive can be removed and connected to the drive using an extension cable up to 3 m (9.8
ft.) long to facilitate operation when the drive is installed in a location where it can not be easily accessed.
The HOA keypad can also be permanently mounted remote locations such as panel doors using an extension cable and an
installation support set (depending on the installation type).
Note:
Refer to Peripheral Devices & Options on page 297
for information on extension cables and installation support sets.
Drive
Comm Port
HOA Keypad
Communication Cable Connector
Figure 2.9 Communication Cable Connection
n
HOA Keypad Remote Installation
HOA Keypad Dimensions
Unit: mm (in)
Installation Holes (2-M3 Screws, Depth 5)
78 (3.07)
15 (0.59)
44 (1.73)
Figure 2.10 HOA Keypad Dimensions
Installation Types and Required Materials
The HOA keypad mounts to an enclosure two different ways:
• External/face-mount installs the HOA keypad outside the enclosure panel
• Internal/flush-mount installs the HOA keypad inside the enclosure panel
2.1 Mechanical Installation
40
YASKAWA TOEP YAIP1W 01B YASKAWA AC Drive - iQpump1000 Quick Start Guide