Using the spot removal tool – Adobe Photoshop Lightroom CC User Manual
Page 186
181
Processing and developing photos
Last updated 4/20/2015
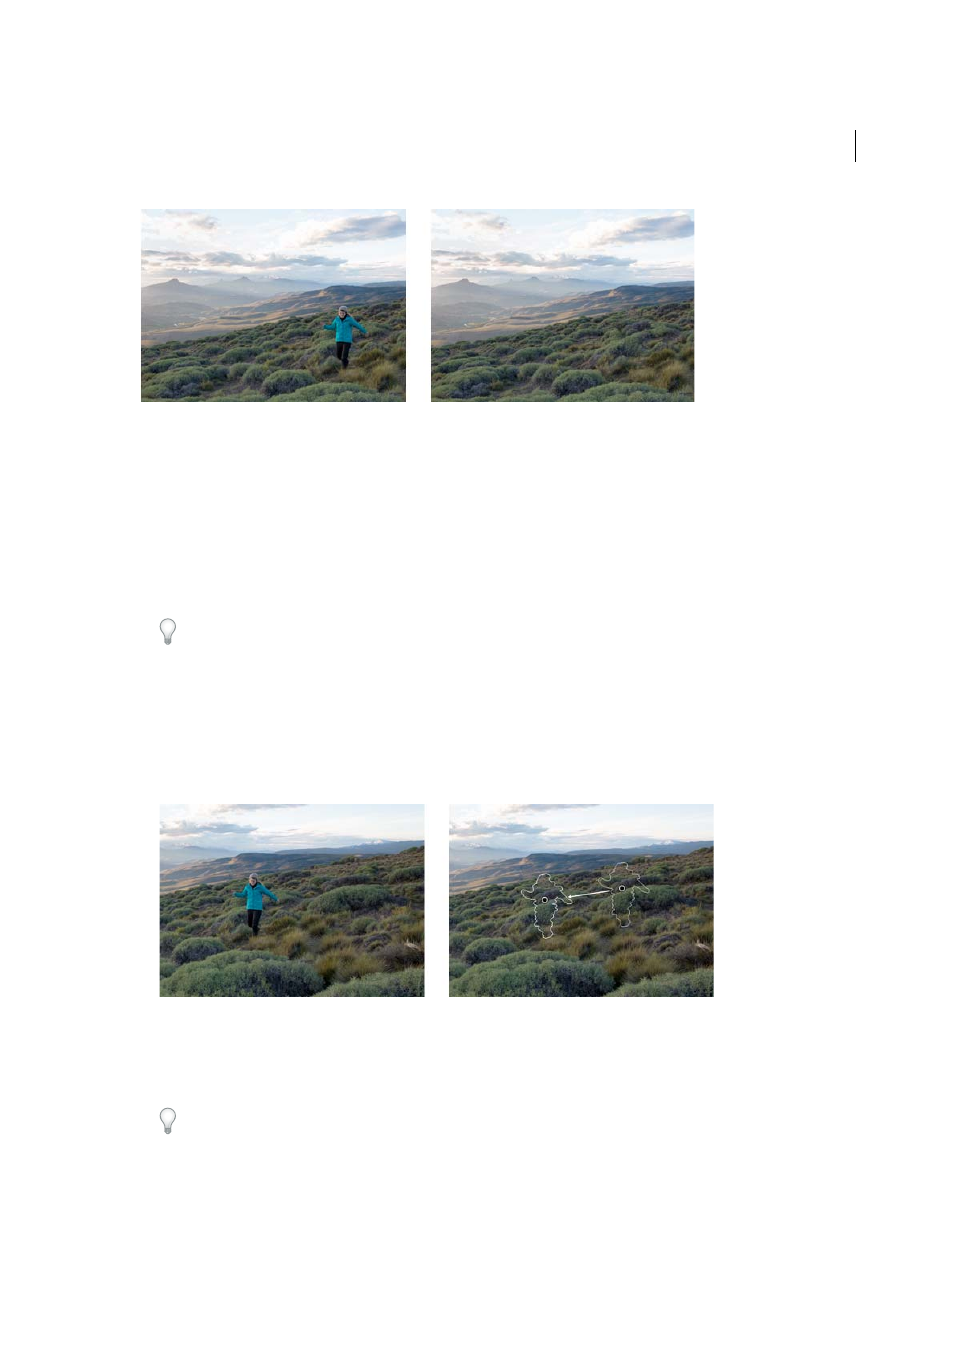
Using the Spot Removal tool
1
In the Develop module, select the Spot Removal tool from the toolstrip, or press Q.
2
Select one of the following:
Heal
Matches the texture, lighting, and shading of the sampled area to the selected area.Clone Duplicatesthe sampled
area of the image to the selected area.
3
(Optional) In the Spot Removal tool options area, drag the Size slider to specify the size of the area that the tool
affects.
You can scroll up/down to increase/decrease the radius of the tool. Or, your can use the bracket keys on your
keyboard to change the brush size:
• Left bracket ([), reduces the tool radius size
• Right bracket (]), increases the tool radius size.
4
In the photo, click and drag the part of the photo to retouch.
• A white marquee area designates your selection area.
• Another white marquee area with an arrow pointing at the selection area designates the sampled area.
5
(Optional) To change the sampled area that is selected by default, do one of the following:
• Automatically. Click the handle of a selected area, and press the forward slash key (/). A new area is sampled.
Press the forward slash key until you find a sample area that fits best.
• Manually. Use the handle of the sampled area to drag and select a new area.
When you select larger portions of an image using longer strokes, the right sample area match is not found
immediately. To experiment with various options, click the forward slash (/), and the tool auto-samples more areas
for you.
6
To remove all the adjustments made using the Spot Removal tool, click the Reset button below the toolstrip.