Adobe Photoshop Lightroom CC User Manual
Page 167

162
Processing and developing photos
Last updated 4/20/2015
If a point on the curve moves up, it becomes a lighter tone; if it moves down, it becomes darker. A straight, 45-degree
line indicates no changes to the tonal scale: The original input values exactly match the output values. You may see a
tone curve that isn’t straight when you first view a photo that you haven’t adjusted. This initial curve reflects default
adjustments that Lightroom applied to your photo during import.
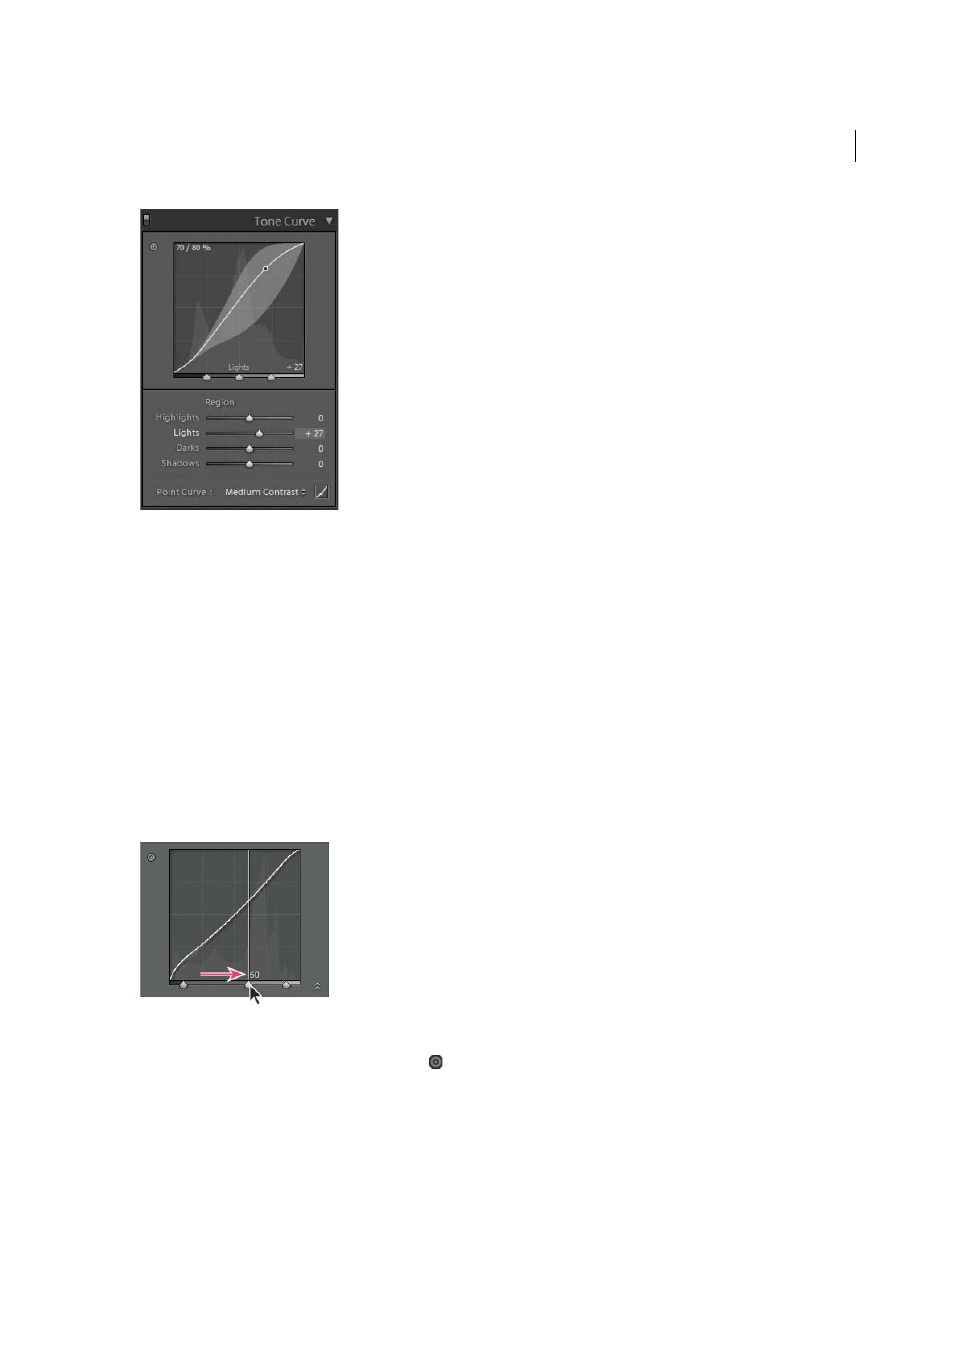
The Darks and Lights sliders affect mainly the middle region of the curve. The Highlight and Shadows sliders affect
mainly the ends of the tonal range.
To make adjustments to the tone curve, do any of the following:
• Click on the curve and drag up or down. As you drag, the affected region is highlighted and the related slider moves.
The original and new tonal values are displayed in the upper-left of the tone curve.
• Drag any of the four Region sliders left or right. As you drag, the curve moves within the affected region (Highlights,
Lights, Darks, Shadows). The region is highlighted in the tone curve graph. To edit curve regions, drag the split
controls at the bottom of the tone curve graph.
• Click to select the Targeted Adjustment tool
in the upper-left of the Tone Curve panel and then click on an area
in the photo that you want to adjust. Drag or press the Up and Down Arrow keys to lighten or darken the values for
all similar tones in the photo.
• Choose an option from the Point Curve menu: Linear, Medium Contrast, or Strong Contrast. The setting is reflected
in the curve but not in the region sliders.
note
: The Point Curve menu is blank for photos imported with metadata and previously edited with the Adobe
Camera Raw tone curve.
