1 installing the dead front, 2 dead front removal, Installing the dead front -2 – SilentKnight 5700 User Manual
Page 31: 2 dead front removal -2
Control Panel Installation
151295
4-2
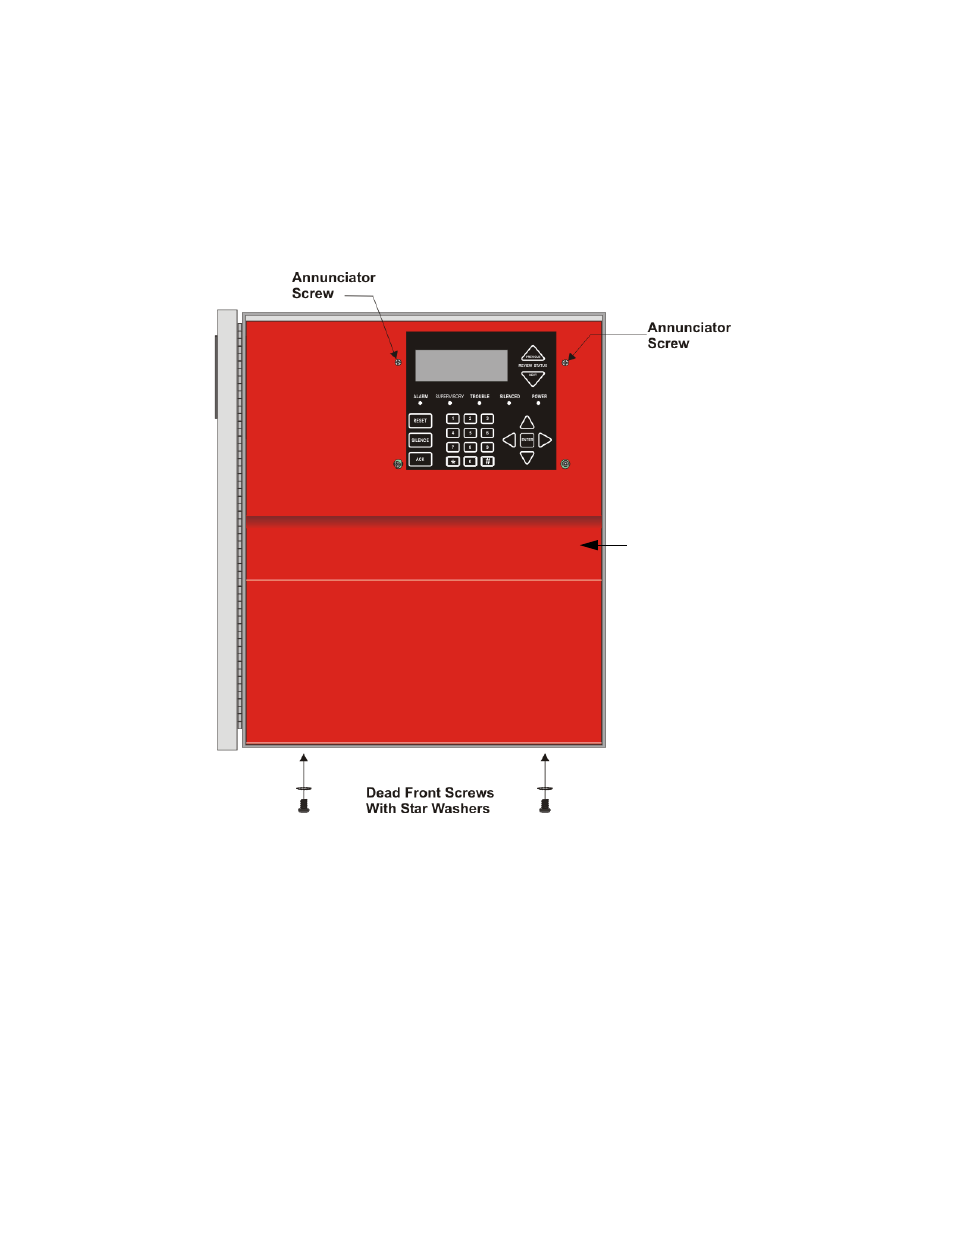
4.1.3.1 Installing the Dead Front
Follow these steps to properly install the dead front panel into the control panel cabinet.
1.
Remove the top two annunciator screws, do not discard them they will be reused. See Figure 4-1 for annun-
ciator screw location.
2.
Set the dead front into the cabinet as shown in Figure 4-1.
3.
Reinsert the two annunciator screws as shown in Figure 4-1.
Figure 4-1 Dead Front Installation and Removal
4.
Insert the two screws with the star washers into the bottom of the cabinet to secure the dead front into place.
See Figure 4-1.
4.1.3.2 Dead Front Removal
Follow these steps to properly remove the dead front panel from the control panel cabinet.
1.
Remove the two annunciator screws, do not discard them. See Figure 4-1.
2.
Remove the two screws and star washers from the bottom of the cabinet. See Figure 4-1.
3.
Remove the dead front panel from the control panel cabinet.
4.
Reinsert the two annunciator screws. See Figure 4-1.
Dead Front
Panel