Replacing the fan and speaker assembly, Removing the fan and speaker assembly – HP A7818-IE002 User Manual
Page 150
Installing Or Replacing Parts And Accessories
Replacing The Fan And Speaker Assembly
Chapter 6
150
Replacing The Fan And Speaker Assembly
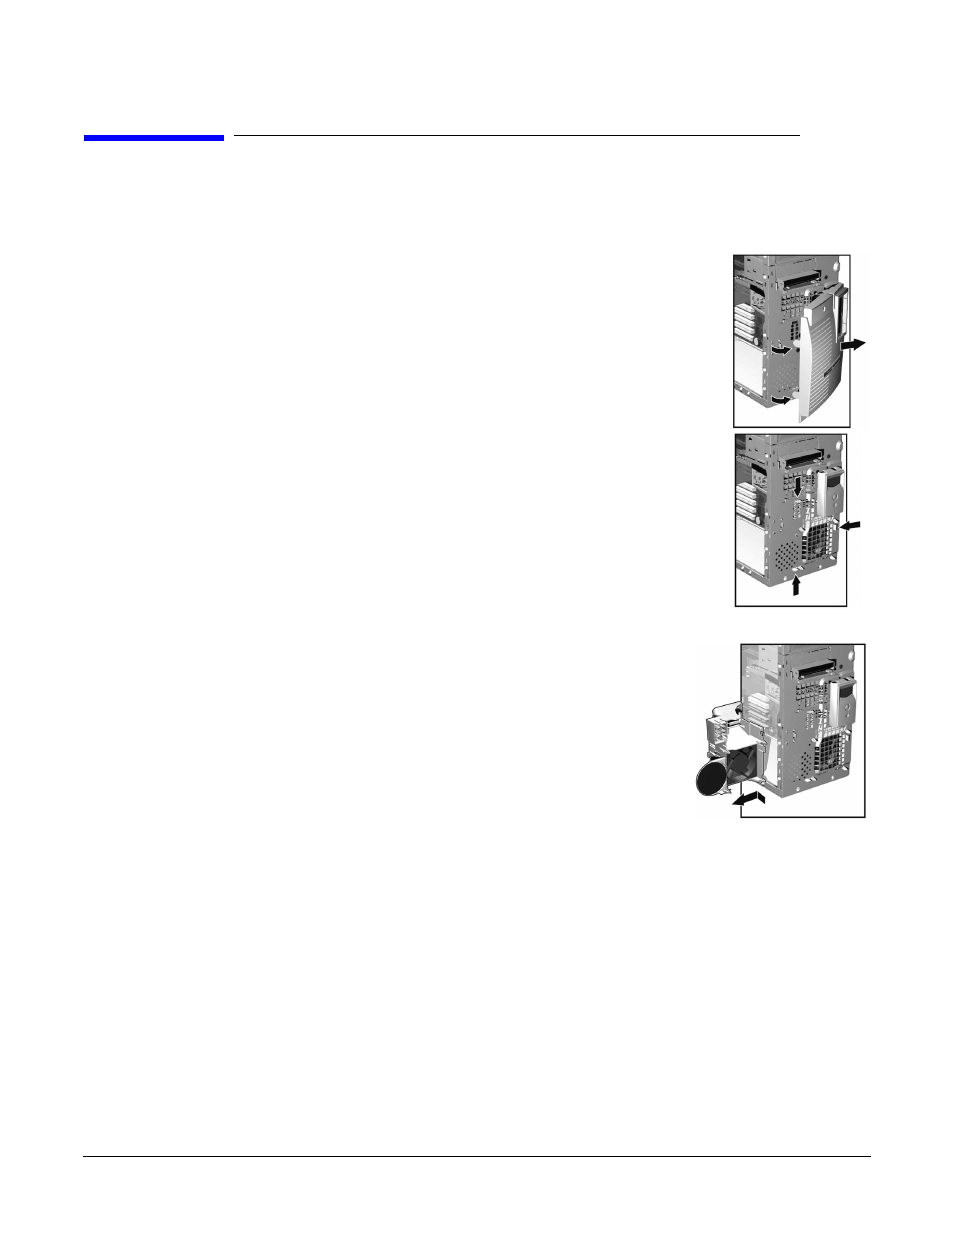
Removing The Fan And Speaker Assembly
1. Switch off the display and workstation. Disconnect all power
cables and any LAN or telecommunications cables.
2. Remove the workstation’s cover and front upper and lower
bezels. Refer to page 119 for these instructions.
3. Disconnect the cables from their connectors located on the
system board.
4. For ease of installation, place the workstation on its side with
the system board facing upwards.
5. Remove the workstation chassis beam.
6. Remove the screw from the front of the chassis.
7. Unclip the three clips on the front of the chassis.
8. Slide the fan and speaker assembly towards the rear of the
workstation until it is clear of the chassis, then remove it from
the workstation.
Replacing The Fan And Speaker Assembly
1. Place the fan and speaker assembly behind the internal
shelves (the speaker should be near the bottom edge of the
chassis and facing towards the front of the workstation).
Ensure all cables are clear of the assembly, then carefully
move the fan and speaker assembly towards the front of
the chassis.
2. Align the clips and guide pins with their appropriate
sockets and slide the assembly forward to secure it into
place.
3. Connect the fan and speaker cables to their connectors
located on the system board.
4. Replace the screw on the front of the chassis.
5. Replace the chassis beam and secure it in place with the retaining screw. Make sure
the Universal AGP Clip is properly adjusted.
6. Return the workstation to its upright position.
7. Replace the front upper and lower bezels and workstation’s cover (refer to page 119).
Reconnect all the power and telecommunications cables.