Native Instruments MASCHINE+ Standalone Production and Performance Instrument User Manual
Page 171
4.
Press
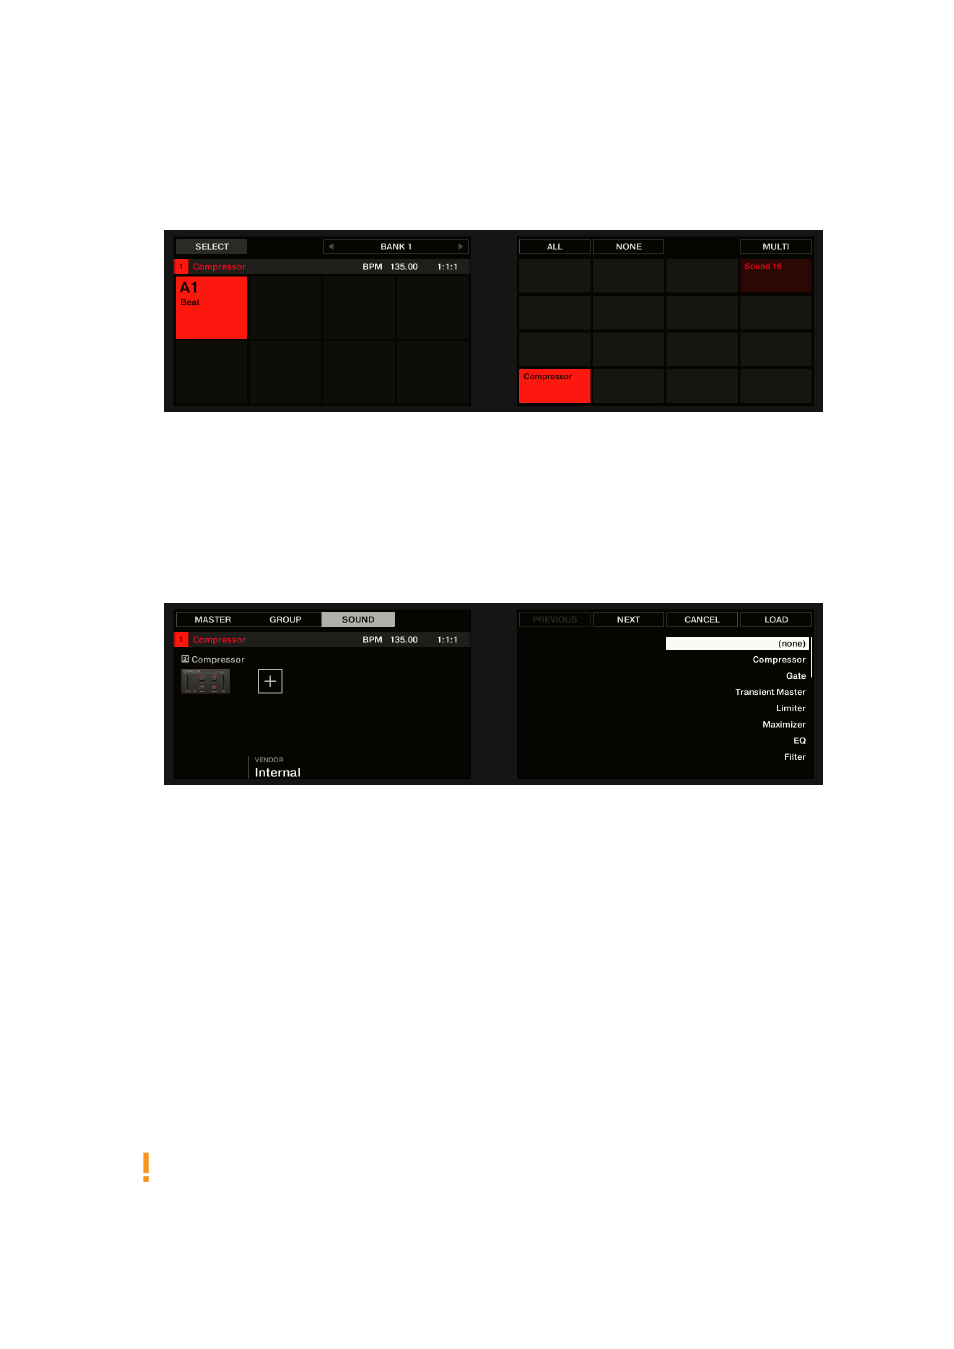
SELECT
+ the unlit pad of the empty Sound you want to use (or simply hit its unlit pad if
pads are in Pad Mode). Since we have selected an empty Sound, you see (
NONE
) under
Button 7/8 and these buttons are inactive (i.e. there are no Plug-ins to navigate yet).
5.
Press
SHIFT
+
BROWSE
to open the Plug-in Browser and browse the available Instrument and
Effect Plug-ins.
6.
On the left display, turn Knob 1 to select the
TYPE
to
Effect
.
→
The right display shows the list of available instruments or effect Plug-ins.
7.
If you have selected the first Plug-in slot of a Sound, turn Knob 2 to select the
VENDOR
from
INTERNAL
, or the name of a vendor, for example,
Native Instruments
.
→
The right display shows only Effect Plug-ins of the type you have selected.
8.
Turn the 4-D encoder or Knob 8 to browse the effects Plug-ins corresponding to your
selection.
9.
When you have found the effect you want to use (for example, the MASCHINE Compressor),
press the 4-D encoder or Button 8 to load it. You can also use Button 5/6 to step through the
list and load each effect directly.
10.
Switch back to Control mode by pressing
PLUG-IN
(or by pressing
SHIFT
+
BROWSE
again).
→
Now you can edit the effect parameters using Knobs 1–8 and the Page buttons as usual (see
Navigating Channel Properties, Plug-ins, and Parameter Pages
. When you load an effect into
the first Plug-in slot of a Sound, MASCHINE+ automatically configures the Sound’s input to
receive any signal(s) coming from other Sounds and Groups in your Project and sends them
through its own Plug-in slots, in other terms, you now have a send effect.
Now that the effect is loaded, we suggest that you rename the Sound slot to the Plug-in name: this
will be of great help when routing other signals to that send effect (see section
For more information on renaming Sound slots, see section
.
USING EFFECTS
164