Raid controller – Avago Technologies Cache Protection for RAID Controller Cards User Manual
Page 79
Avago Technologies
- 79 -
Cache Backup Products for MegaRAID SAS+SATA RAID Controllers User Guide
May 2015
Chapter 2: Installing the Cache Backup Products
Installing the LSIiBBU09 Unit
2.6.2.2
Attaching the LSIiBBU09 Unit to the RAID Controller
Follow these steps to attach the LSIiBBU09 unit directly to the front of the RAID controller.
WARNING
There is danger of an explosion if the battery is incorrectly replaced.
Replace the battery only with the same or equivalent type
recommended by the manufacturer. Dispose of used batteries
according to the manufacturer’s instructions.
1.
Ground yourself, and make sure that the system is grounded.
2.
Remove the LSIiBBU09 unit from the package.
3.
Place the LSIiBBU09 unit front-side-up on a flat, clean, static-free surface.
4.
Place the RAID controller front-side up on a flat, clean, static-free surface.
5.
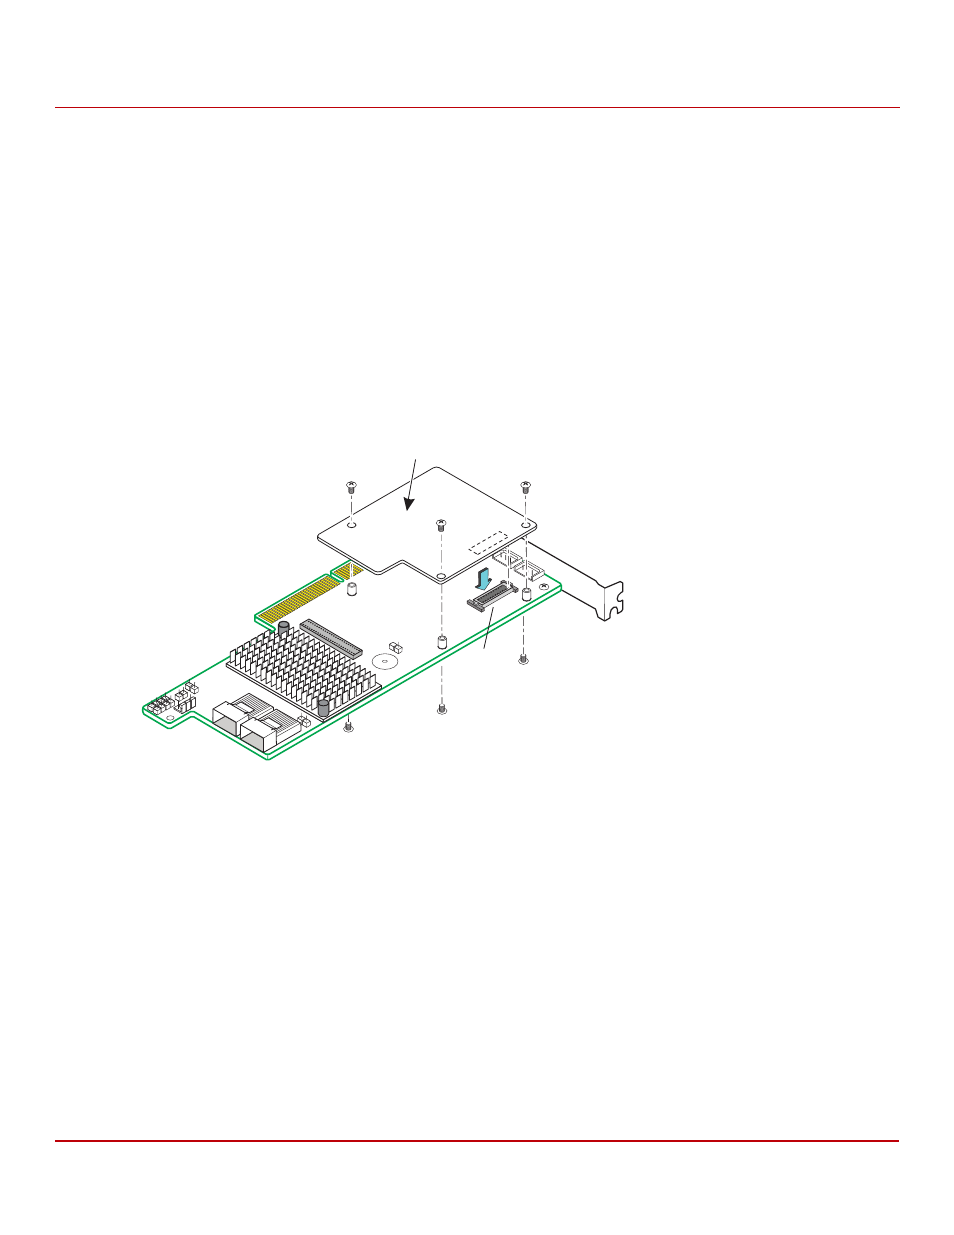
Hold the LSIiBBU09 unit so that the top of the battery is facing upward, and the J1 connector lines up with the
J1A3 BBU connector on the RAID controller, as shown in the following figure.
Figure 50 Attaching the LSIiBBU09 Unit to the RAID Controller
6.
Carefully press the LSIiBBU09 unit onto the RAID controller so that the two connectors are firmly joined.
7.
Secure the LSIiBBU09 unit to the RAID controller with the screws and the standoffs in the three screw holes.
The standoffs are threaded at both ends, and a screw goes into each end. The screw threads from the back of the
controller board into the board-to-board standoffs on the bottom of the LSIiBBU09 unit.
NOTE
Center the screwdriver carefully to avoid stripping the screw heads.
Do not overtighten the screws.
3_00896-00
J1A3
LSIiBBU09