Host computer, Section 2.2.1.4, installing the lsiibb05 nimh, Unit on the raid controller – Avago Technologies Cache Protection for RAID Controller Cards User Manual
Page 18
Avago Technologies
- 18 -
Cache Backup Products for MegaRAID SAS+SATA RAID Controllers User Guide
May 2015
Chapter 2: Installing the Cache Backup Products
Installing the LSIiBBU05 Unit
2.2.1.3
Removing the RAID Controller from the Host Computer
If the RAID controller is already installed in a host computer, follow these steps to remove it before you install the
LSIiBB05 unit:
1.
Shut down the computer, turn off the power, and unplug the power cords.
2.
Remove the cover from the computer according to the instructions in the system user’s manual so you can access
the RAID controller.
3.
Ground yourself before touching the RAID controller.
4.
Unplug all cables from the RAID controller, remove the screw that attaches the bracket to the computer case, and
carefully remove the RAID controller from the slot.
5.
Place the RAID controller on a flat, clean, static-free surface, and continue with the next section.
2.2.1.4
Installing the LSIiBB05 NiMH Unit on the RAID Controller
Perform the following steps to mount the LSIiBB05 unit directly to the RAID controller using the daughtercard. (All
components are installed on the bottom of the card. The battery is installed on the top. The maximum height of
components installed on the LSIiBBU05 is 0.125 in.
1.
Ground yourself, and remove the LSIiBB05 daughtercard from the package.
2.
Insert the battery pack harness connector at the end of the 5-pin cable into the 5-pin J2 connector on the back
side of the LSIiBB05 unit.
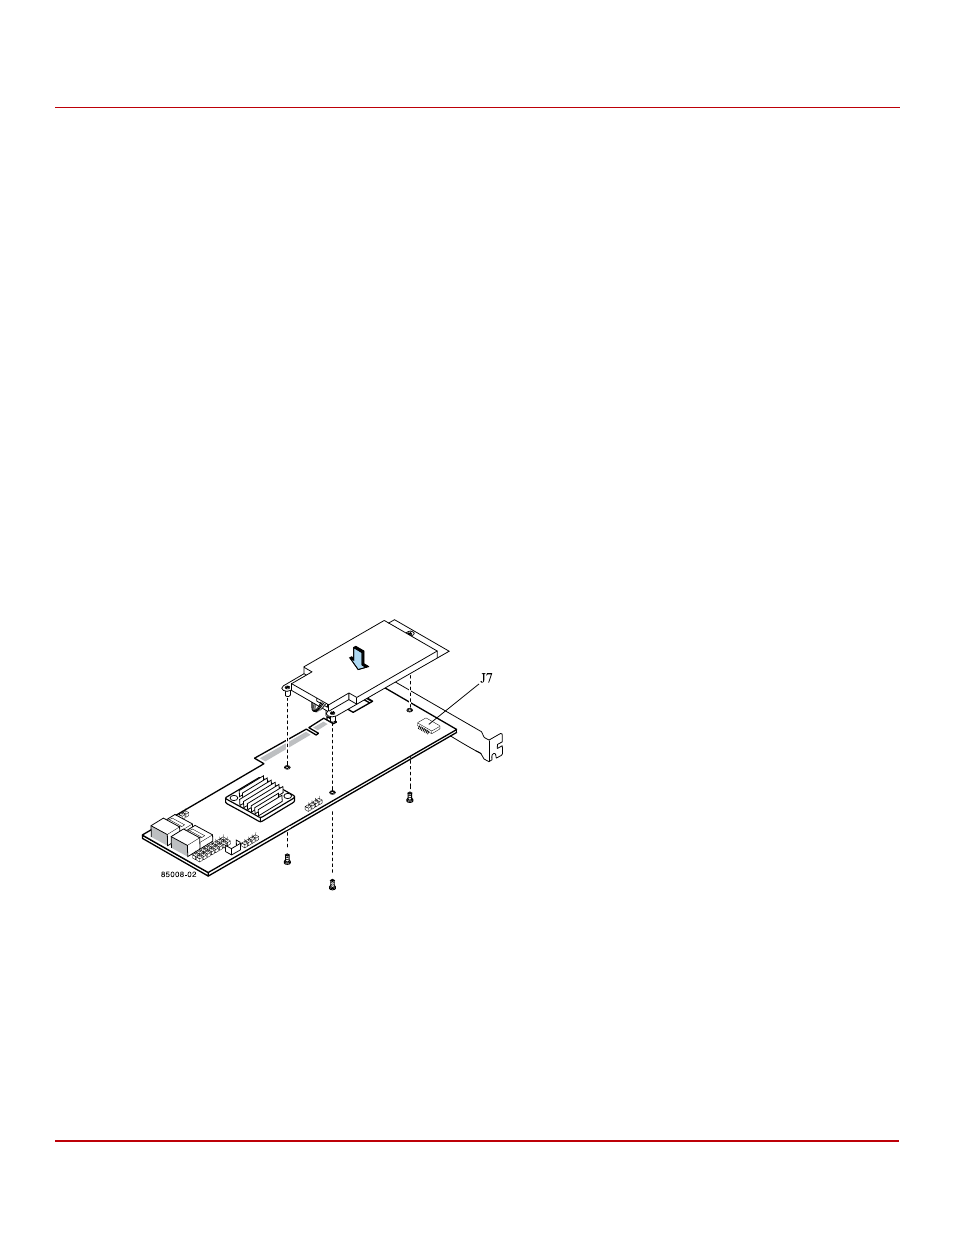
3.
With the RAID controller on a flat, clean, static-free surface, hold the LSIiBB05 daughtercard so that the battery
side is facing upward, and the J14 board-to-board connector lines up with the J7 BBU connector on the RAID
controller, as shown in the following figure.
Figure 6 Installing the LSIiBB05 Daughtercard on the MegaRAID SAS 8708ELP RAID Controller
4.
Carefully press the LSIiBB05 unit onto the RAID controller, so that the two connectors are firmly joined.
5.
Use the Phillips-head screws that are provided to secure the unit to the controller with the M2.50-0.45 x 5-mm
screws, and the 6-mm standoffs in the three screwholes.
The standoffs are threaded at both ends and a 6-mm screw goes into each end.
NOTE
Center the screwdriver carefully to avoid stripping the screwhead.
Do not overtighten the screws.