Cooling fan replacement: 5a0062 to 5a0242 – Yaskawa AC Drive Z1000 AC Drive HVAC Fan User Manual
Page 174

3.
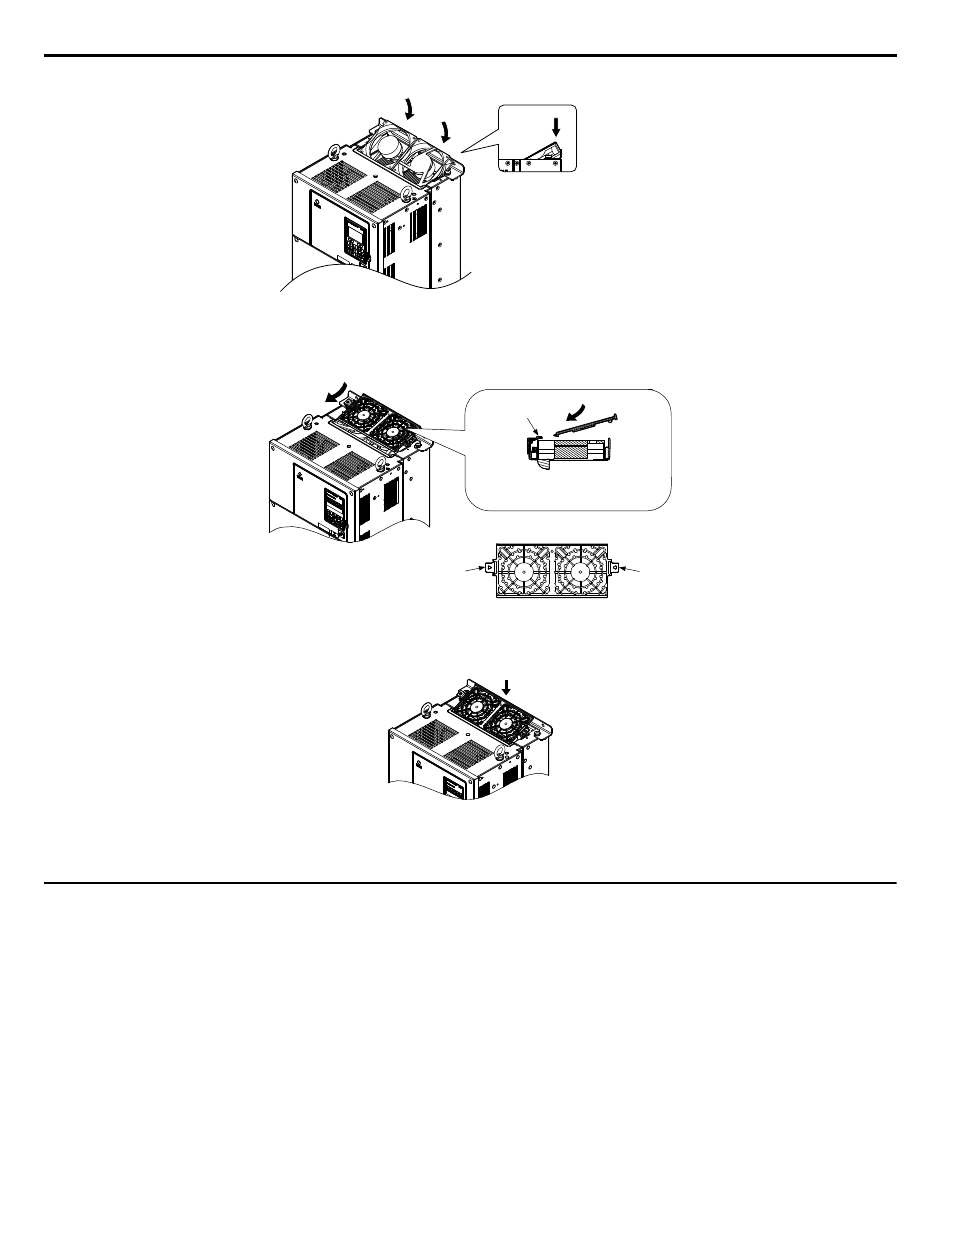
Install the replacement fan into the drive.
Insert the fan at an angle so that
it tilts towards the front of the
drive. Next press down on the
back of the fan that still protrudes
from the drive so that the fan
snaps into place.
Figure 2.12 Install the Cooling Fan: 5A0041 and 5A0052
4.
Tilt up the back end of the fan finger guard and slide the fan finger guard into the opening near the front of the drive,
then guide the fan finger guard into place.
Insertion area
Front of drive
Back of drive
Front of drive
Fan finger guard
Back of drive
Hook
Hook
Cross-Section
Figure 2.13 Reattach the Fan Cover: 5A0041 and 5A0052
5.
Press in on the hooks of the left and right sides of the fan cover and guide the fan finger guard until it clicks into place.
Figure 2.14 Reattach the Fan Finger Guard: 5A0041 and 5A0052
6.
Turn on the power supply and set o4-03 to 0 to reset the Maintenance Monitor cooling fan operation time.
u
Cooling Fan Replacement: 5A0062 to 5A0242
These models allow access to the fans from the front of the drive for fan replacement.
WARNING! Electrical Shock Hazard. Do not connect or disconnect wiring while the power is on. Failure to comply can result in serious
personal injury. Before servicing the drive, disconnect all power to the equipment. The internal capacitor remains charged even after the
power supply is turned off. After shutting off the power, wait for at least the amount of time specified on the drive before touching any
components.
CAUTION! Burn Hazard. Do not touch a hot drive heatsink. Failure to comply could result in minor or moderate injury. Shut off the power
to the drive when replacing the cooling fan. To prevent burns, wait at least 15 minutes and ensure the heatsink has cooled down.
NOTICE: Follow cooling fan and circulation fan replacement instructions. Improper fan replacement may cause damage to equipment. When
installing the replacement fan into the drive, make sure the fan is facing upwards. Replace all fans when performing maintenance to help
ensure maximum useful product life.
NOTICE: When dismounting the fan bracket sub-assembly on Flange Type Enclosure (NEMA 12 Backside) drives, ensure that the gasket
attached to the mounting surface of the fan bracket is not damaged. If the gasket is damaged, contact a Yaskawa representative or the
nearest Yaskawa sales office for replacement gasket.
Refer to Gasket Replacement for Flange Type Enclosure (NEMA 12 Backside)
for gasket replacement parts and procedures.
2.5 Drive Cooling Fans
174
YASKAWA ELECTRIC SIEP YAIZ1U 03A YASKAWA AC Drive – Z1000 Programming Manual
