Geoid height map, Figure 79: load grace gravity model 02, Figure 79) – NavCom StarUtil-3000 Rev.G User Manual
Page 77
StarUtil 3000 User Guide
– Rev G
4-75
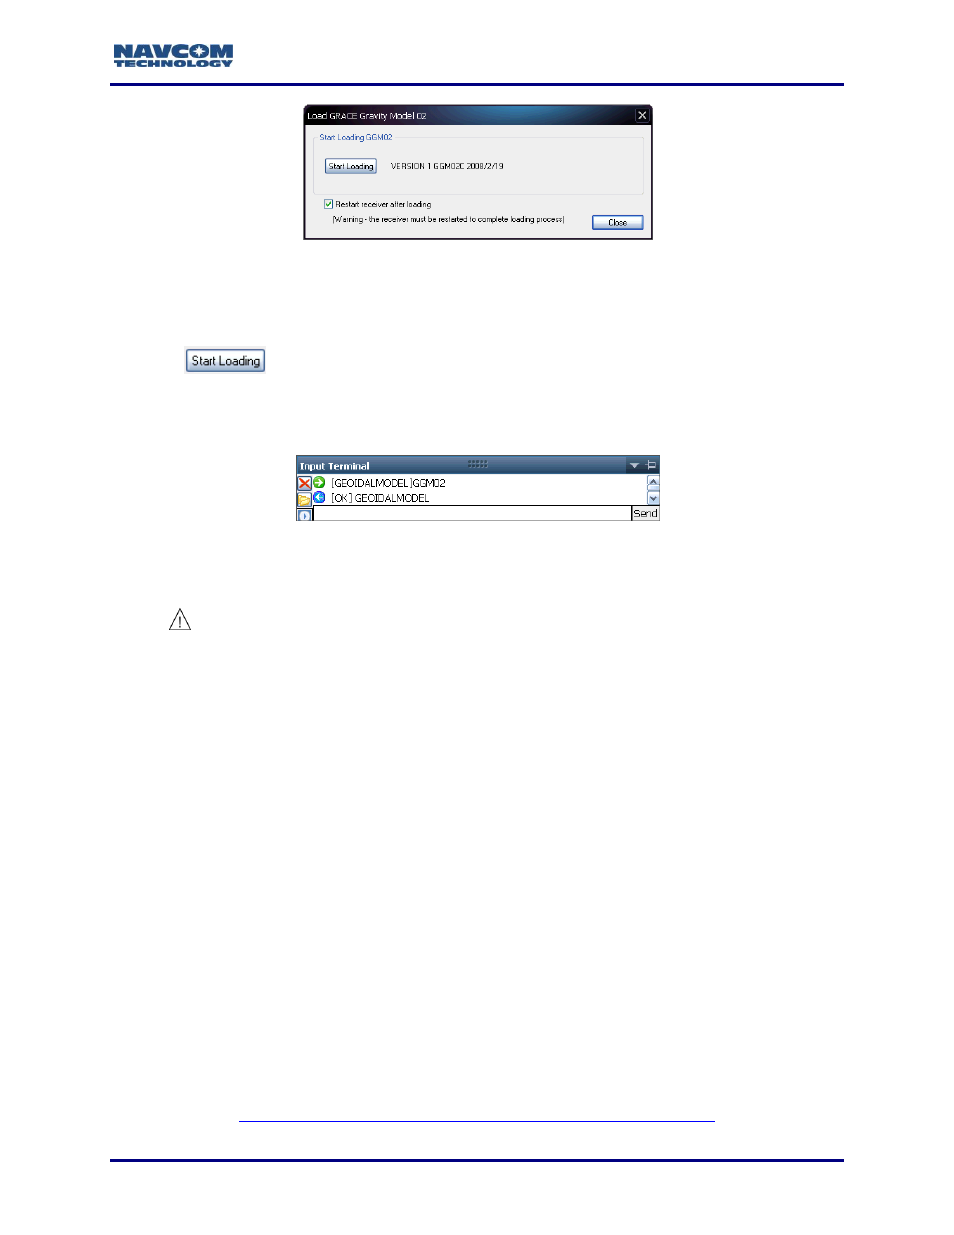
Figure
79
: Load Grace Gravity Model 02
4. Ensure that Restart receiver after loading (default) is checked so that the receiver will
perform a warm start (resets the receiver) after the upload is successful. (The user receives
no indication of the warm start. It is a background process.)
5. Click
. An upload progress window opens. At the end of upload, a confirmation
box opens. Click OK.
6. Type [GEOIDALMODEL]GGM02 in the Input Terminal and click the Send button (see
Figure
80
: [GEOIDALMODEL]GGM02 Command and Response
7. View the PVT window on either the Dashboard or the PVT tab to confirm the successful
upload. GGM02 is identified as the current GEOID (see Figure 75).
GGM02 is not maintained as the Geoid Model through a receiver power cycle
in version 1.0.0.4 navigation firmware. This is corrected in later versions of
the firmware. To reset GGM02 as the Geoid Model, reload the appropriate
user profile or input [GEOIDALMODEL]GGM02 via the Input Terminal.
Geoid Height Map
This section provides
The GEOIDAL99 format and file requirements. The Geoid Height Map is based on the
GEOIDAL99 format.
Instructions for uploading a user-defined Geoid Height Map into the receiver
The Geoid Height Map is used to obtain more precision in a small area than the
GGM02 database can provide.
The user may create the Geoid Height Map, or download a Geoid Height Map from
the NOAA web site (URL below). The total number of points in the map must be <
262,000 (number of rows of latitude x number of columns of longitude).
If the total number of points is
262,000, the file upload is denied (see
). The user is responsible for extracting the appropriate portion of the
original data set. A software extraction tool, XNTG.EXE, is also available from
the NOAA web site: