Before uploading a user profile, Verify profile in use, Figure 95: example user profile – NavCom StarUtil-3000 Rev.G User Manual
Page 100: Port] commands at end of user profile, Figure 96: input of new baud rate, Figure 95)
StarUtil 3000 User Guide
– Rev G
6-98
[OUTPUT]PANICA,ONCHANGE,,ETH2
[2DNAVMODE]AUTO,0.0000
[PDOPLIMIT]10.0
[RTKTIMEOUT]15.0
[RTKFLOATTIMEOUT]300
[RTKMODE]rover,NCT,1
[PRDGPSMODE]RTCM1,OFF
[PRDGPSMODE]WAASEGNOS,ON
[PRDGPSTIMEOUT]RTCM1,300
[PRDGPSTIMEOUT]WAASEGNOS,300
[REFSTNPOS]0,0,0.000000,0,0,0.000000,0.000000
[L1FALLBACK]OFF
[PORT]2,19200,8,1,NONE
[PORT]3,57600,8,1,NONE
[PORT]4,57600,8,1,NONE
[PORT]1,115200,8,1,NONE
Figure 95: Example User Profile
– [PORT] Commands at End of User Profile
Before uploading the user profile:
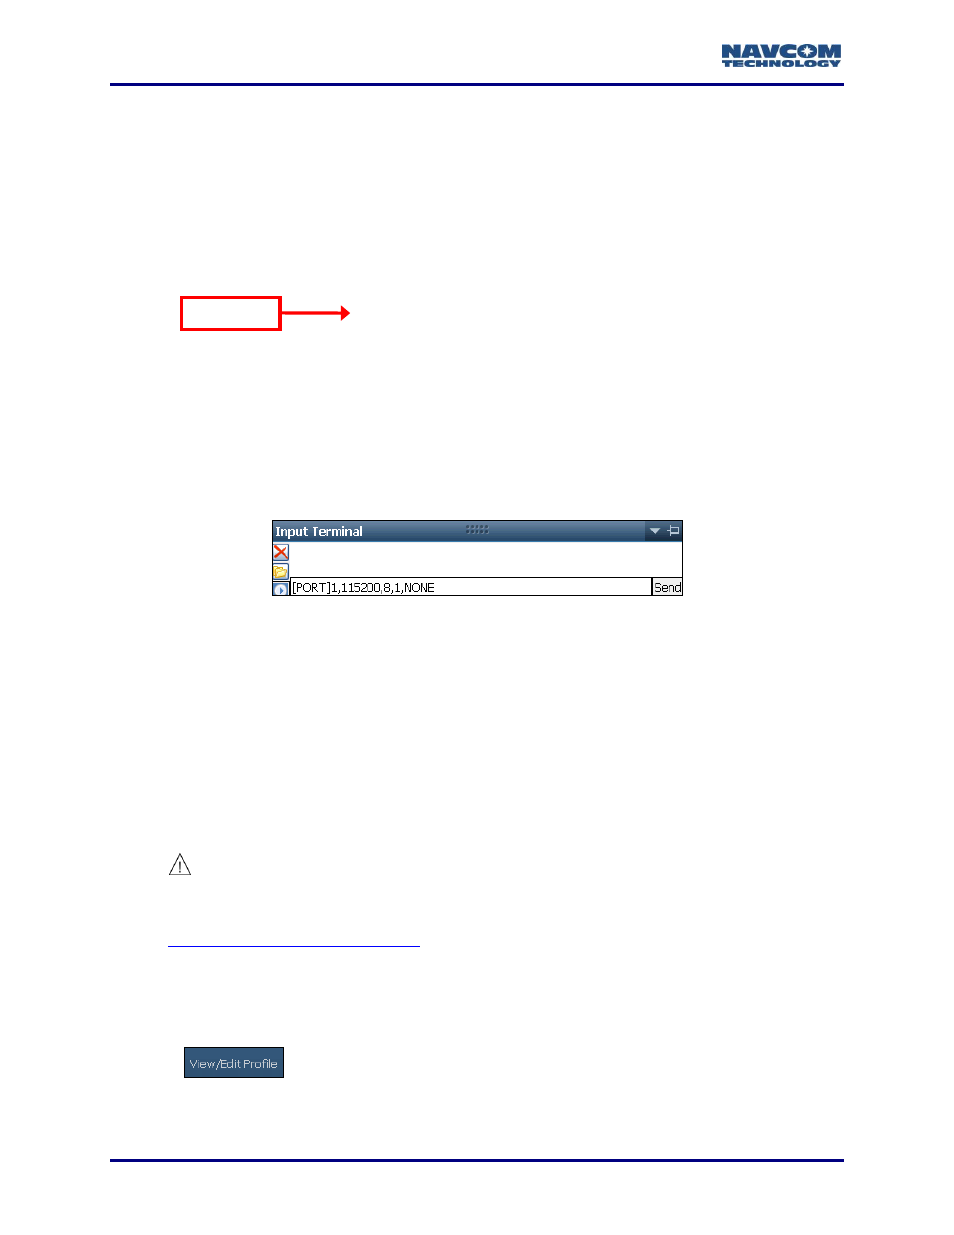
Input a new baud rate. From the user profile, copy the command string for the control
port, for example, [PORT]1,115200,8,1,NONE.
Paste the command string into the Input Terminal window in StarUtil 3000 (see the
example in Figure
Figure
96
: Input of New Baud Rate
Click the Send button.
Re-establish communication between the PC and the receiver at this new baud rate.
Upload the user profile.
Because the PC baud rate matches the receiver baud rate in the user profile, the
entire user profile loads without communication errors.
Before Uploading a User Profile
Before uploading a user profile, it is important to preview the user profile in a
text editor, such as Microsoft Notepad (see Edit User Profile).
Check the control port baud rate specified in the user profile. Refer to the section
Avoiding User Profile Loading Errors
, above, for details.
Ensure that the user profile meets the requirements of the current application.
Verify Profile in Use
Refer to Figure 97 for the steps below:
1. Click
on the shortcut bar at the top of StarUtil 3000.
Control Port