Measurement Computing WaveBook rev.3.0 User Manual
Page 78
3-46 WBK Expansion Options,
ch03Dn 6-21-99
WaveBook User’s Manual
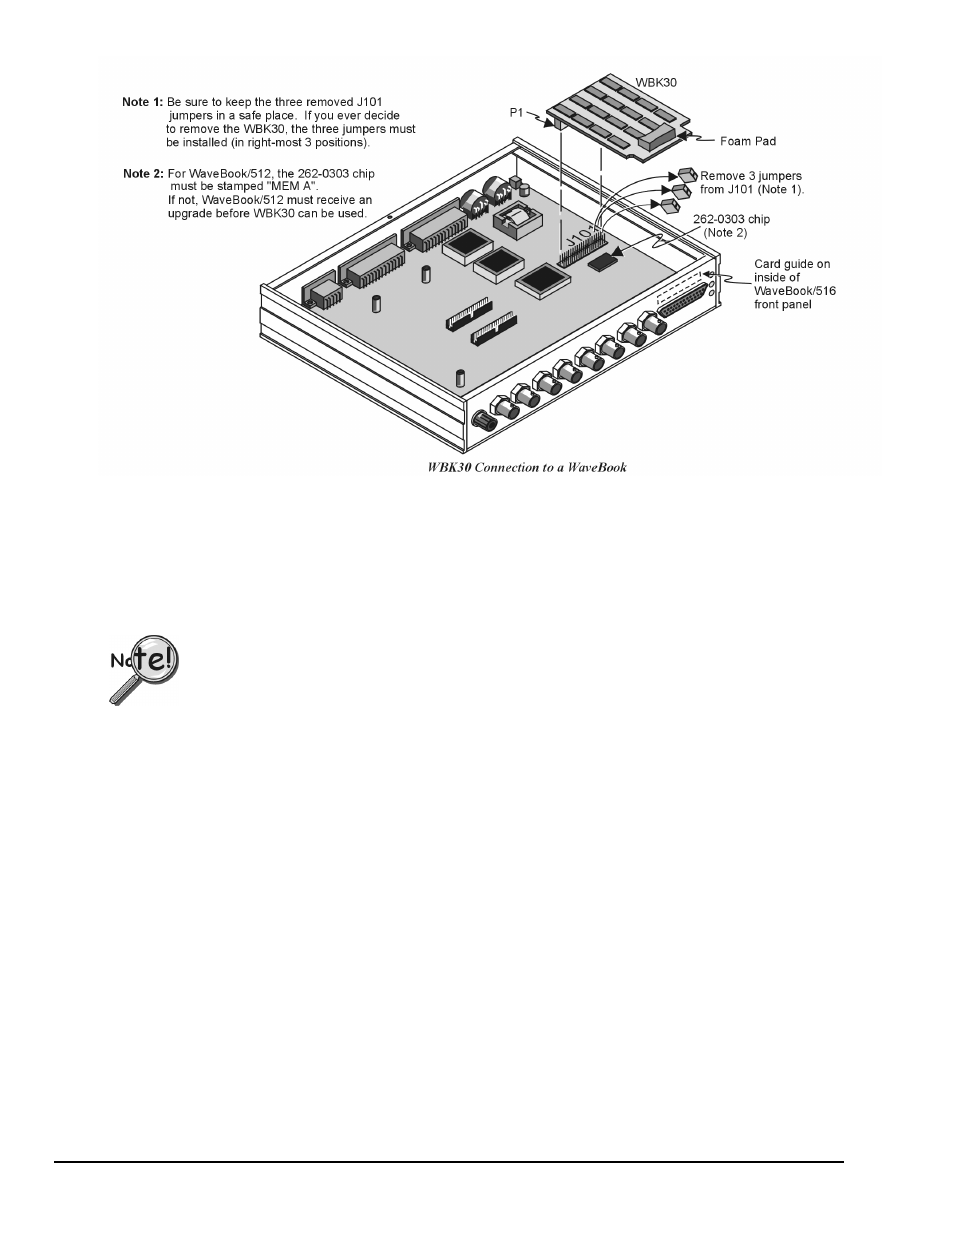
Use the following steps to install WBK30 into a WaveBook.
1. Turn off all system power, and unplug the power adapter from the WaveBook.
2. Remove the WaveBook's top cover plate.
3. WaveBook/512 users only. Verify compatibility. WBK30 is compatible with all upgraded
WaveBook/512s. To determine WaveBook/512 compatibility, locate p/n 262-0303 (the FPGA IC) on
the WaveBook's motherboard (see figure).
For WaveBook/512 users only, if the 262-0303 chip lacks a "MEM A" stamp, then the WaveBook/512
is not compatible with the WBK30 memory option.
WaveBook/512s with the following serial numbers are not compatible:
148010 and below, 148253, 149322, 150411-150413, 150415, 150418, 151597, 153335.
If a compatibility issue exists, you can contact the factory to arrange upgrading your WaveBook/512.
Note that after a WaveBook/512 is modified for WBK30, it must have a WBK30 to work properly,
as the internal FIFO is no longer available.
4. Remove the three jumpers from the WaveBook's 40-pin connector (J101).
5. Align WBK30 so its P1 connector is directly over J101. [In a WaveBook/516, before pressing the
connectors together, slip the opposite end of WBK30 into the plastic card guide above the D-sub
connector on the front panel.] Gently press the connectors together—be careful to avoid pin damage.
Note: In WaveBook/512, the foam pad helps brace WBK30 against the top cover plate.
6. Replace top cover plate, and power up the system.