Measurement Computing WaveBook rev.3.0 User Manual
Page 13
WaveBook User’s Manual,
6-24-99
Quick Start QS-5
2. Turning on a channel allows it to be sampled during an acquisition. To begin acquiring data with WaveView, turn on only
those channels that have signal connections. You can do this by either of the following methods:
(a) Double-click on the channel’s “On/Off” cell to select the proper status. This action toggles the On/Off status.
or
(b) Click once on the channel’s “On/Off” cell, then select “On” or “Off” from the listbox above the spreadsheet.
3. Select the appropriate parameters for each channel. The spreadsheet entries can be changed for all channels by clicking
once on the column label at the top of the spreadsheet to highlight the column, and then making the appropriate entry
within the selection box that appears above the spreadsheet:
• Gain and offset are selected by choosing an entry from the Range entry box.
• A name may be assigned to each channel by editing the Label box for that channel.
• Volts, millivolts, or mX+b for each channel may be selected within the Units column.
4. Select Acquisition Configuration from the View pull-down menu. When the Acquisition Configuration window is
displayed, enter values for Pre-trigger, and/or Post-trigger [scans or time periods] as desired. The timebase for the
acquisition can be set to Frequency or Period. The desired trigger source and parameters are selected in the Trigger
selection box.
5. To read data from WaveBook:
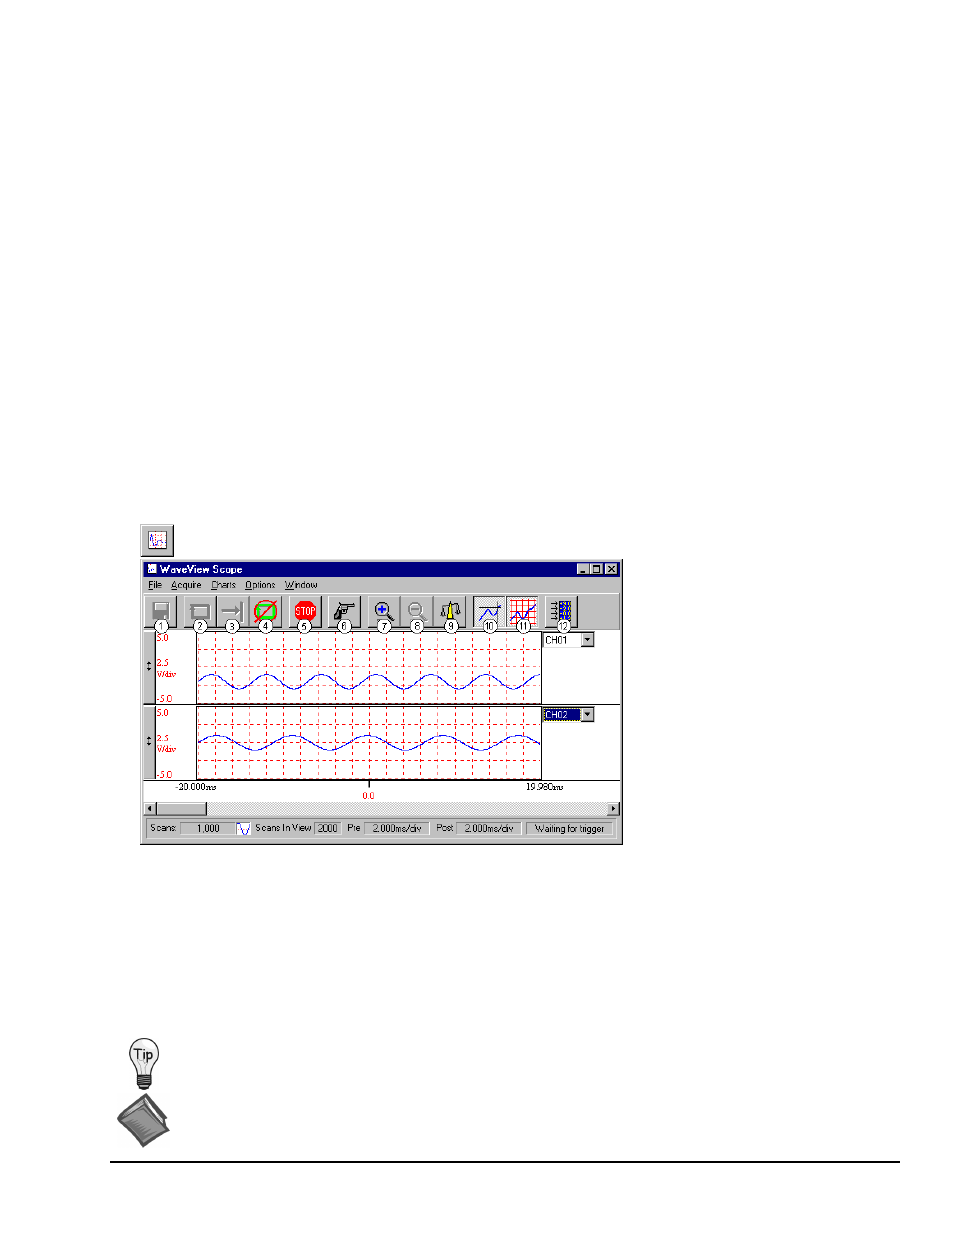
(a) Select Scope from the View pull-down menu. (The next figure shows a sample Scope screen).
(b) Click the Acquire One Shot button, or the Acquire Continuously button.
(c) Click the Manual Trigger button.
6. If desired, save collected data to disk by clicking on the Save button (“floppy disk” icon (1)),
or use the save option in the File pull-down menu.
WaveView Scope Button and Window
Item
Description
Item
Description
1
Save Data
7
Zoom In
2
Acquire Auto-Rearm
8
Zoom Out
3
Acquire One Shot
9
Scale All Charts
4
Stop After Acquisition Complete
10
Toggle Cross Hairs
5
Stop Immediately
11
Toggle Grids
6
Manual Trigger
12
Open Configuration Window
To view additional channels in Scope Display, simply change the entry in the Number of Charts selection
of the Charts pull-down menu. In Scope Display, you can simultaneously view up to eight channels.
Reference Note:
For detailed WaveView information, refer to Chapter 5.
Chapter 5 includes material on WaveView Scope.