Butterfly – Futaba 18MZ 2.4GHz User Manual
Page 123
123
85%
Butterfly
Model 1
Normal
+0%
+0%
+0%
+0%
Mixing Rate
Speed
Differential Rate
Cond. Delay
Offset
15%
Group
OFF
Switch
Cut SW
OFF
0
0
0
0
0
0%
+
Delay
ACT
AIL
In
Out
AIL3
AIL2
AIL4
AIL
+0%
+0%
+0%
+0%
FLP3
FLP2
FLP4
FLP
FLP
INH
Gr.
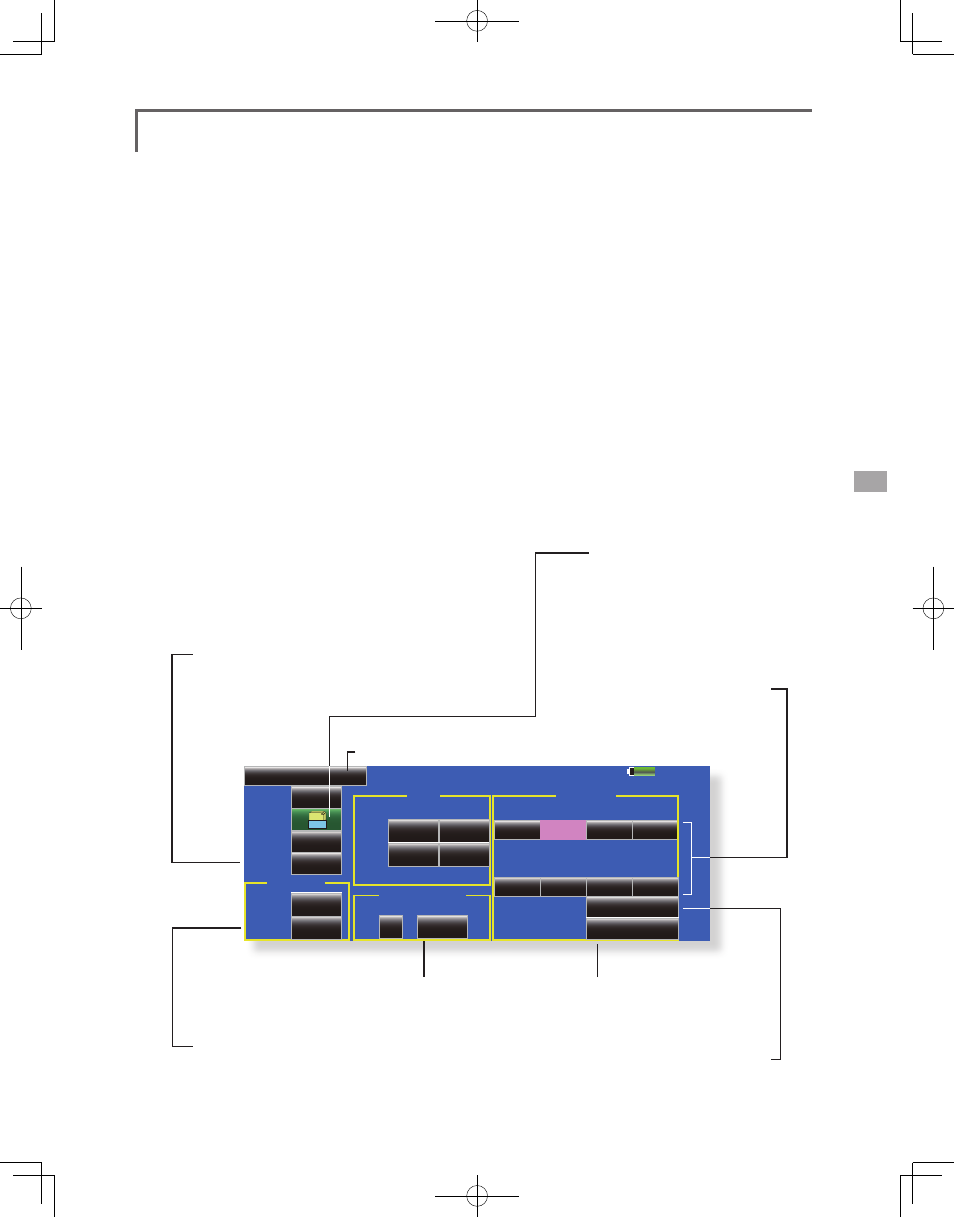
Butterfly AFR
ELE Setting
Butterfly
[Corresponding model type]: Glider, 2 ailerons or more
This function allows powerful brake operation
by simultaneously raising the left and right
ailerons and lowering the flaps (camber flap,
brake flap).
Butterfly (Crow) produces an extremely
efficient landing configuration by accomplishing
the following:
1. Slow the aircraft’s velocity.
2. Provide washout at the wing tips to reduce
the tendency to tip stall.
3. Create more lift toward the center of the
wing allowing it to fly at a slower speed
● Mixing during flight can be turned ON/OFF by
setting a switch. (Always ON at "ON" setting)
● The ailerons, flaps, and elevators operation speed
can be adjusted. (IN side/OUT side)
● A delay can be set for each condition. A cut
switch which can turn OFF the delay function can
also be set.
● The differential rate can be adjusted.
*When servo binding occurs when setting the ailerons and
flaps in butterfly mixing, use the AFR function to adjust the
rudder angle.
●Return to Model Menu
● When offsetting the butterfly operation
reference point, operate to the point you
want to change and then touch the Offset
button. The reference point displays 0%.
When [Yes] is touched, the reference point is
changed. Then, is "Initialized elevator curve? "
is heard, it chooses in which.
● Differential rate
adjustment
● To elevator correction
setup screen
It is not displayed in a
flyingwing.
● Calls the Butterfly AFR (D/R) setup screen
● Aileron and flap servos speed
setting
● Condition delay setting and cut
switch setting
● Group/single mode switching
(Gr./Sngl)
●Touch the Mixing Rate AIL and
FLP buttons and adjust the
mixing rates.
● Touch the [Butterfly] button in the Model Menu
to call the setup screen shown below.
(The display screen is an example. The actual screen depends
on the model type. The screen shown below is for 4 ailerons
and 4 flaps.)
● Touch the ACT button and set the function to
ACT (ON).
● When setting a switch, touch the SWITCH [ON]
button to call the
select the switch and set its ON direction.