Dynojet 424x: Installation Guide User Manual
Page 98
In Ground Model 424x/424xLC
2
Automotive Dynamometer Installation Guide
C H A P T E R 4
Pit Covers
4-14
4
Using the support leg as a template, mark and drill the two holes needed to
secure the leg to the floor.
5
Install two Red Head anchors. Refer to Appendix A for installation instructions.
6
Secure the leg to the floor using two 3/8-16 x 1.5-inch hex bolt and two 3/8-inch
flat washers.
7
Place the pit cover and leg into the pit. Place the leg near the 4WD bridge.
Verify the edge of the pit cover sits on the floor.
Verify the side of the pit cover is 26.04 cm (10.25 in.) from the pit wall.
Verify there is a 1.27 cm gap (0.5 in. +/- .01 in.) between the cover and the closest
bridge rail.
8
Place the second pit cover so that it butts up to the first pit cover.
9
Secure the second pit cover to the leg using one 3/8 x 1-inch hex bolt.
10 Using each foot as a template, mark and drill each hole needed to secure the six
feet to the floor.
11 Install six Red Head anchors. Refer to Appendix A for installation instructions.
12 Secure each foot to the floor using one 3/8 x 1.5-inch bolt and one 3/8-inch flat
washer.
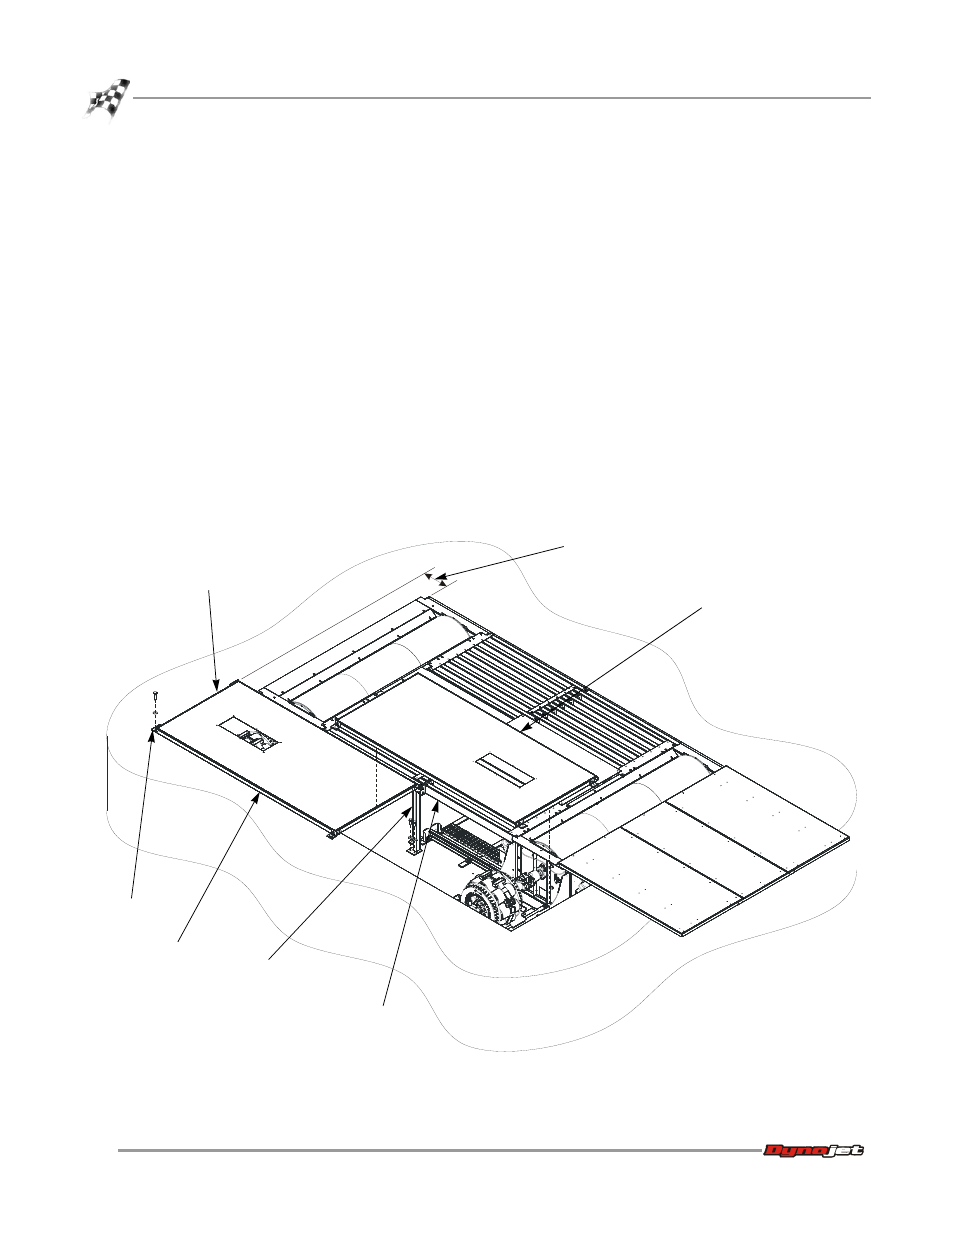
Figure 4-15: Install the Pit Covers
AD447
second pit cover
first pit cover
leg
bridge
foot
edge of pit cover
sits on the floor
26.04 cm (10.25 in.)
pit wall to side of cover