Installing the track assembly – Dynojet 424x: Installation Guide User Manual
Page 43
4 W D D Y N O I N S T A L L A T I O N
Track Assembly
Version 7
In Ground Model 424x/424xLC
2
Automotive Dynamometer Installation Guide
3-7
I
NSTALLING
THE
T
RACK
A
SSEMBLY
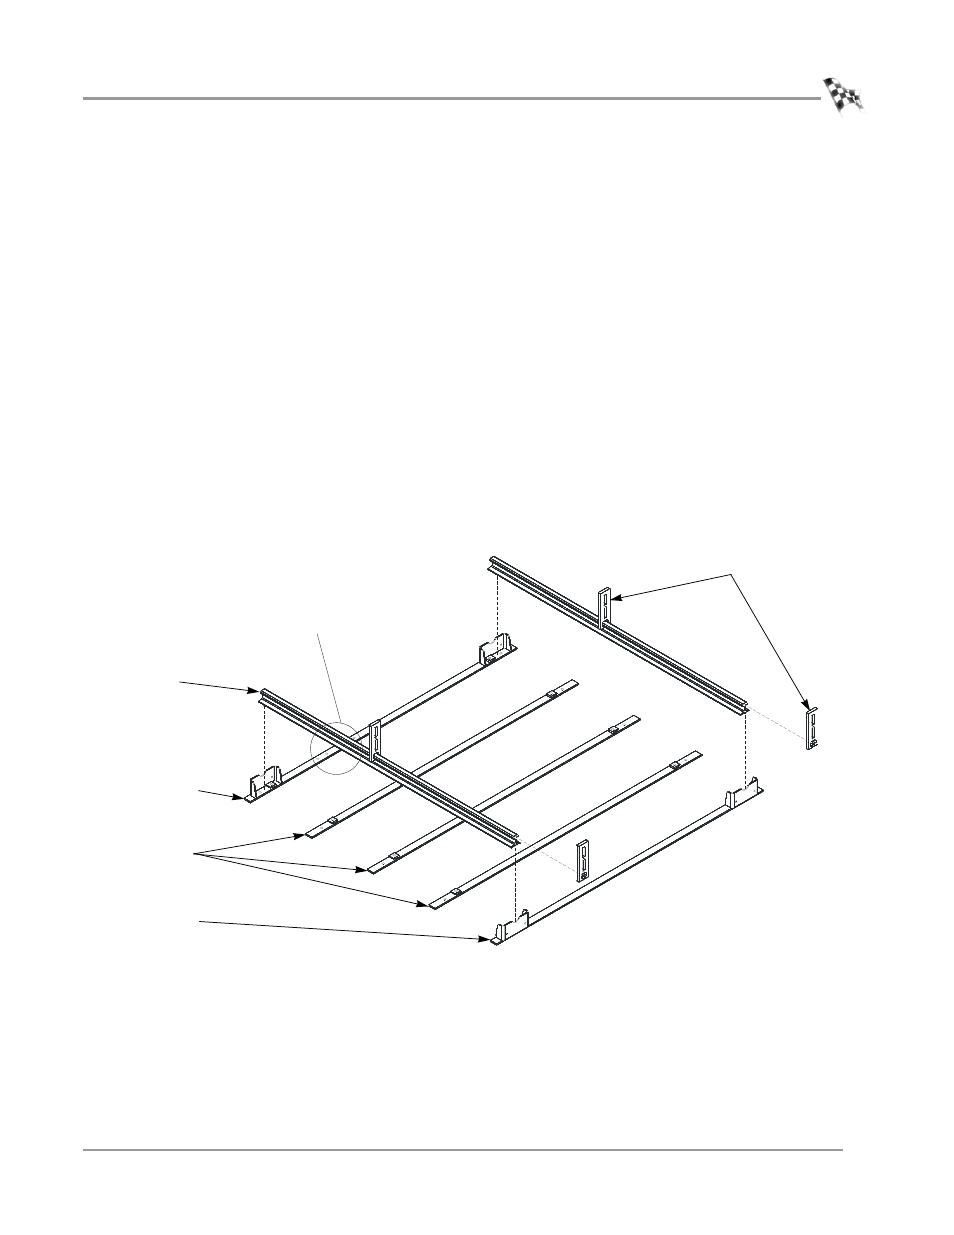
Once all the holes are marked and drilled, install the track assembly.
You will need the following parts:
• 21514282
Rail (2)
• 21716400
Rail Tie (3)
• 31619500
Rail Clip (10)
• 36582471
Bolt, 3/8-16 x 1.5", Flange-Hex (10)
• 61314300
Rail Tie Assembly (2)
• 61314700
Rail Clamp (4)
1
Layout the first and last rail tie assemblies and the rail ties. Use the holes you
marked and drilled for placement of the rail tie assemblies and rail ties.
Note: The first rail tie has four holes for securing the cable track assembly. Verify
this rail tie assembly is closest to the stationary dyno.
2
Place the rail clamps over the rails.
3
Place the rails into the rail tie assemblies.
Note: For clarity, the pit and stationary dyno are not shown.
Figure 3-3: Install the Track Assembly
AD045
rail clamps
rail
first rail tie
assembly
last rail tie
assembly
rail tie
holes for cable
track assembly