Install pom and harness – Great Plains NTA2007HD Predelivery Manual User Manual
Page 68
64
Great Plains Manufacturing, Inc.
NTA607HD
166-283Q
02/09/2011
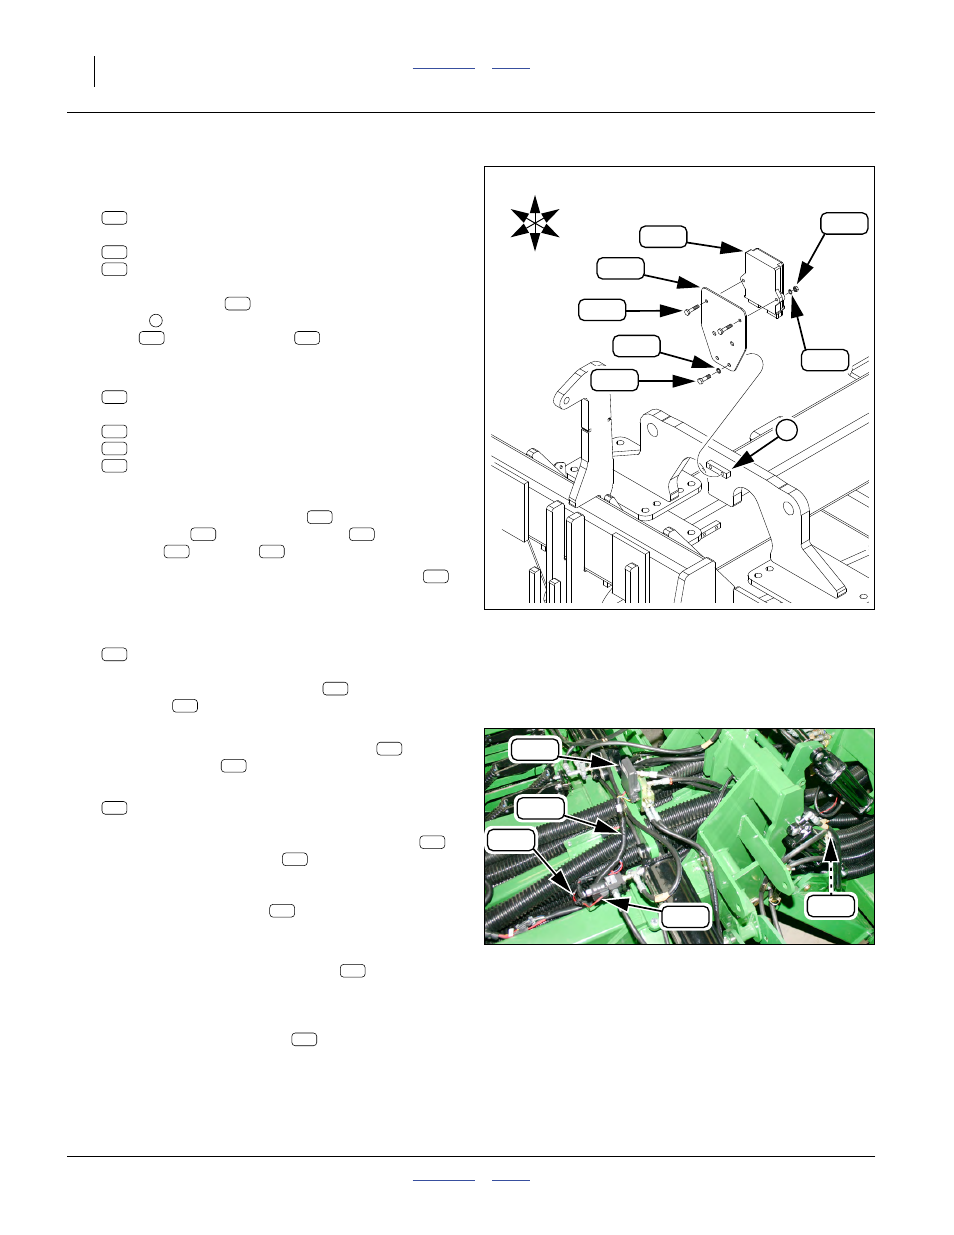
Install POM and Harness
Refer to Figure 114
262. Select one:
160-762D WSMB MODULE MOUNT PLATE
and two sets:
802-705C HHCS 5/16-18X5/8
804-009C WASHER LOCK SPRING 5/16 PLT
Position the plate
in front of the threaded
mount
on the center fold cylinder lug. Secure with
bolts
and lock washers
at the lower holes
of the plate.
263. Select one:
467982000S1 PLNTR CNTRL OUTPUT MODULE(POM)
and two sets:
802-224C HHCS 1/4-20X1 1/4 GR5
804-006C WASHER LOCK SPRING 1/4 PLT
803-006C NUT HEX 1/4-20 PLT
With the receptacles facing down and the mounting
ears forward, mount the POM
on the upper rear
face of plate
. Secure with bolts
, lock
washers
and nuts
.
Note: The middle holes, and front face, of the plate
are reserved for an option (marker sequence valve;
see manual 113-850M).
264. Select one:
467983502 DJ 2SOL YP24LIFT/HITCH FCM HRN
Connect this harness assembly
to the monitor
extension
Refer to Figure 115
265. Plug the 12-pin connectors of this cable
assem-
bly into the POM
.
266. Select one:
467980485 TWO SOLENOID Y HARNESS
Plug the common connector of this Y-harness
into POM cable assembly
.
Connect one side of the Y to the lead at the right
wing fold solenoid valve
.
Refer to Figure 110 on page 62
267. Route the other side of the Y through the bottom
right clip of right hitch portal clamp
(shared with
the lift switch cable).
Connect this side of the Y to the lead at the right
cart transfer solenoid valve
(not visible in
Null4:
Null4:
Figure 114
Install Solenoid POM
Q0076
126
5
U
D
F
B
L
R
199
221
203
220
194
169
126
199
221
126
199
221
169
194
220
203
169
126
194
220
203
126
170
170
153
Null4:
Figure 115
POM Connections
Q0077
169
170
166
258
258
170
169
166
166
170
258
258