Install radar, Step 56 – Great Plains NTA2007HD Predelivery Manual User Manual
Page 25
Great Plains Manufacturing, Inc.
Cart Assembly
21
02/09/2011
166-283Q
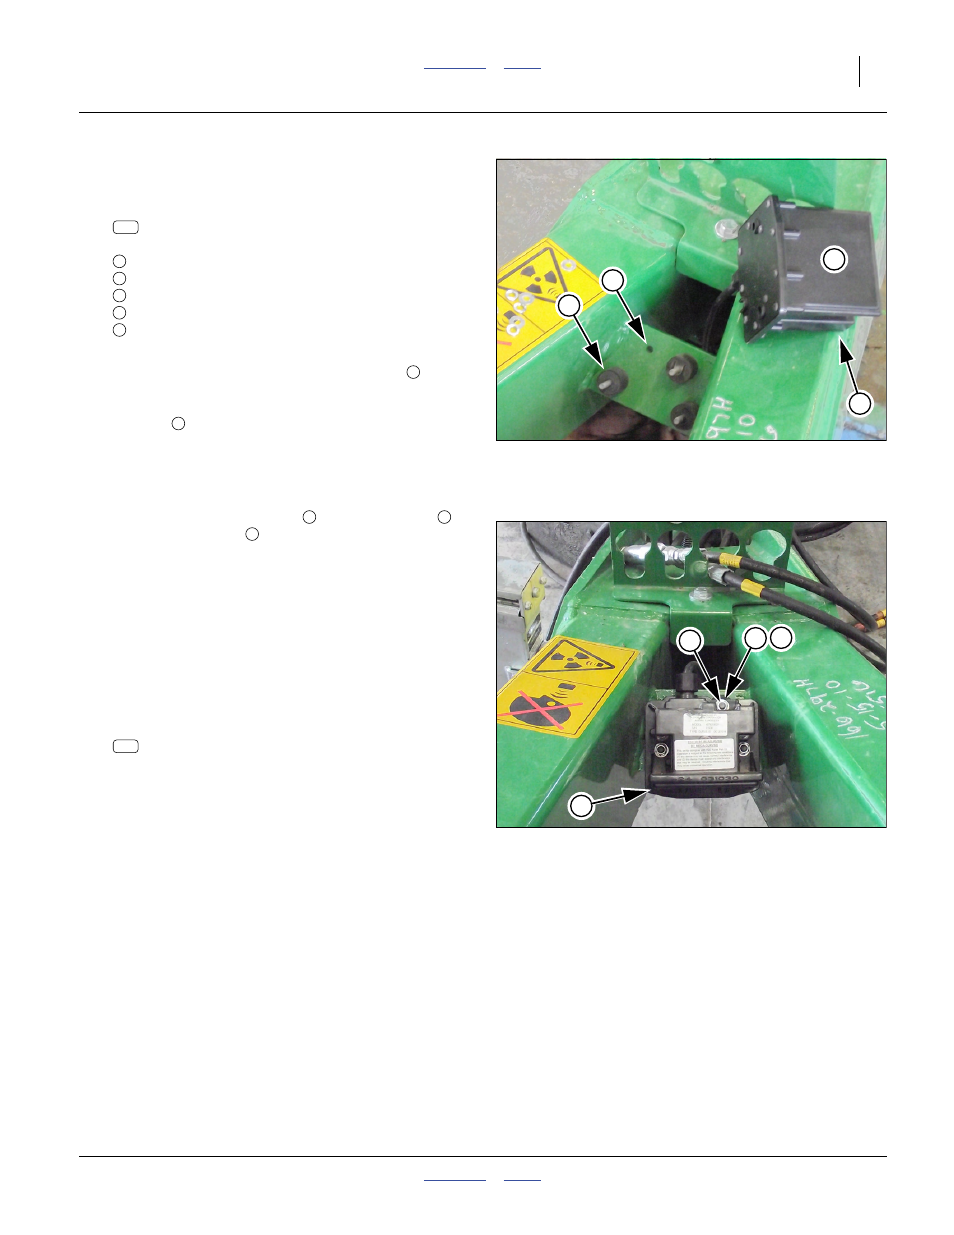
Install Radar
Refer to Figure 27 and Figure 28
53. Select one:
467833000S1 DJ RVSIII W/ ISOLATION MOUNTS
which includes:
qty. 1 DICKEY-john
®
RVS-III radar transceiver
qty. 3 6mm isolation mounts
qty. 6 6mm flat lock washers
qty. 6 6mm split ring lock washers
qty. 6 6mm nuts
11001-1419B RVS-III Installation Instructions
54. From above the tongue, place two mounts
in the
bottom two holes of the front tie plate. Place the
third mount in the upper right hole. Leave the upper
left hole
empty.
Secure each mount to the plate with a flat washer,
lock washer and nut, tightened to a torque of:
3.0 to 3.5 N-m (30 to 35 ft-lbs)
55. Place the radar transceiver
onto the mounts
,
with the blank face
pointing down and to cart
rear.
Secure the transceiver to each mount with a flat
washer, lock washer and nut, tightened to a torque
of:
3.0 to 3.5 N-m (30 to 35 ft-lbs)
56. Route the cable under the tongue. Secure the cable
connector to the fish tape or line from step 44.
57. Pull the radar cable through the right tongue tube.
58. Select one (not shown):
463500123 3 PIN WP TO AMP ADAPTER 1 FT
This adaptor cable may already be connected to the
cart harness, in which case skip to step 59.
Connect the linear 3-pin WesPac end of the adaptor
cable into the speed/radar lead of the harness.
59. Connect the circular AMP ends of the adaptor cable
and the radar cable.
60. The radar angle is pre-set by the design of the tie
plate. The angle needs no adjustment.
61. Save the 11001-1419B manual for the customer.
Null4:
Figure 27
Radar and Mounts
Q0037
1
2
6
7
161
1
2
3
4
5
Null4:
Figure 28
Radar Mounted
Q0038
3 4
5
156