Mount tongue, Install hitch fittings, Attach tongue jack – Great Plains NTA2007HD Predelivery Manual User Manual
Page 23: Hose and harness routing, Mount tongue install hitch fittings
Great Plains Manufacturing, Inc.
Cart Assembly
19
02/09/2011
166-283Q
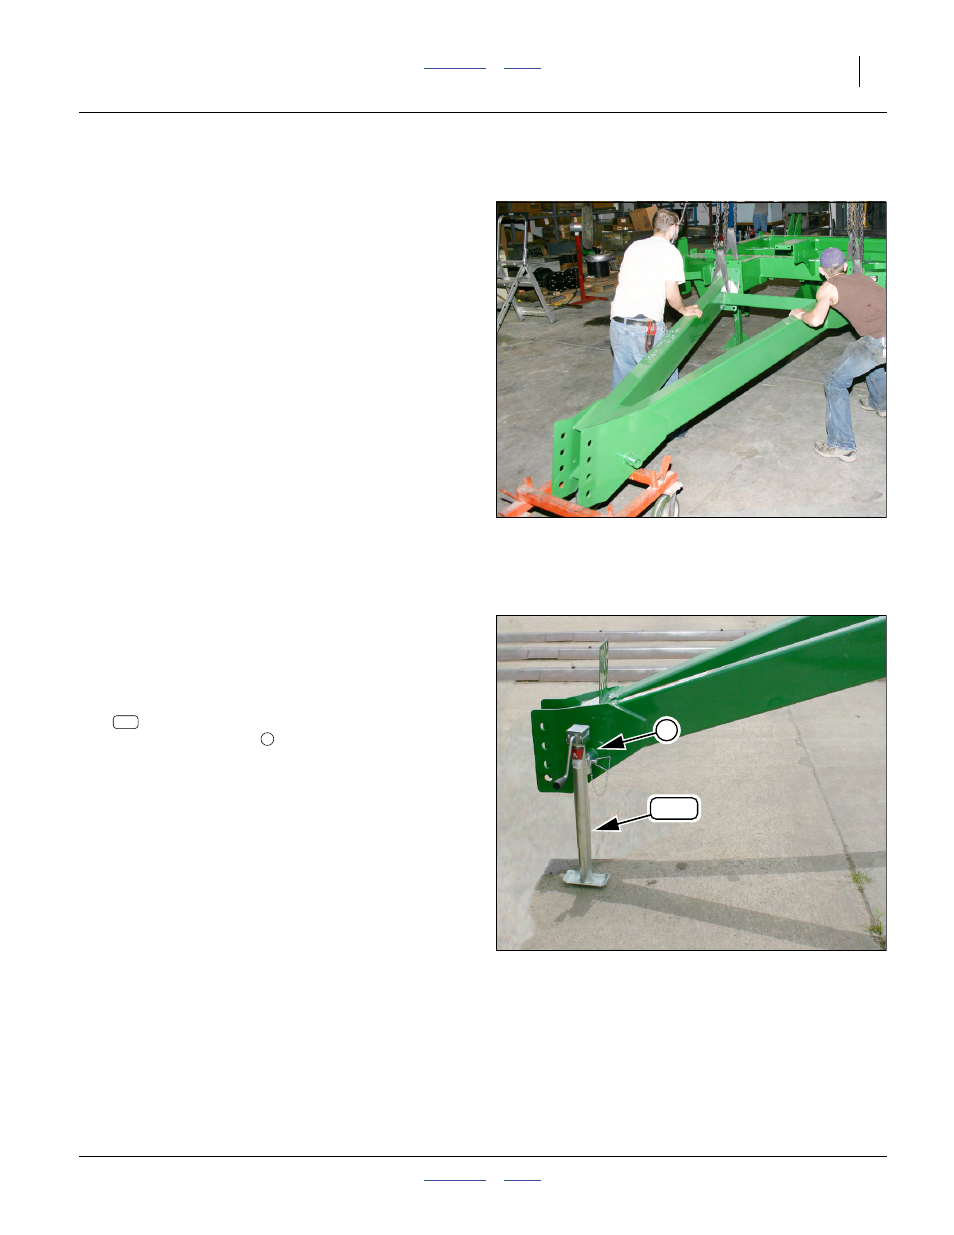
Mount Tongue
Refer to Figure 24
(depicting a cart at an earlier stage of manufacture, with no
hoses or harnesses present)
41. Protect the bottom of the hitch end of the tongue. In
the figure, a dolly is used to both protect the hitch
and allow easy movement.
42. Use hoists at both sides of rear end of tongue, and
at front of cart frame. To align flanges, it is usually
necessary to elevate the front of the cart.
43. Remove ties securing coils of hoses and harnesses
to flanges at front of cart frame.
44. Attach a fish tape or stout line to the end of the left
tube hose/harness bundle. It will be used at step 56
to route the radar cable back to the cart.
45. Align the tongue and cart flanges. Route hoses and
harnesses into the tongue tubes as tongue is
brought into contact with frame.
46. Make sure all hoses and harnesses are visible at
front of tongue. See table at bottom of column.
47. Secure tongue to frame with saved bolts, washers
and nuts (not shown).
Install Hitch Fittings
Attach Tongue Jack
Refer to Figure 25
48. Locate the tongue jack:
890-246C SCREW JACK 5000# 15-30 SD-WND
Pin it to the jack stob
on the tongue.
Hose and Harness Routing:
Null4:
Left Tube
Right Tube
• Fold / Transfer hydraulic
hoses (one pair)
• Lift hydraulic hoses
(one pair)
• Markers
a
hydraulic
hoses (one pair)
• SUMP hydraulic hose
• Lighting harness
a. Marker hoses are present on cart whether markers are
installed or not.
• Monitor harness
• Fan Case Drain hose
• Hydraulic Brake hose
b
• Air brake hoses
c
b. Option: hose present only if hydraulic-hydraulic brakes
installed.
c. Option: hoses present only if air-over-hydraulic brakes
installed.
Null4:
Figure 24
Mount Tongue
Q0014
Null4:
Figure 25
Tongue Jack
Q0035
2
304
304
2