Install contact drive spring, Install drive actuator – Great Plains NTA2007HD Predelivery Manual User Manual
Page 28
24
Great Plains Manufacturing, Inc.
NTA607HD
166-283Q
02/09/2011
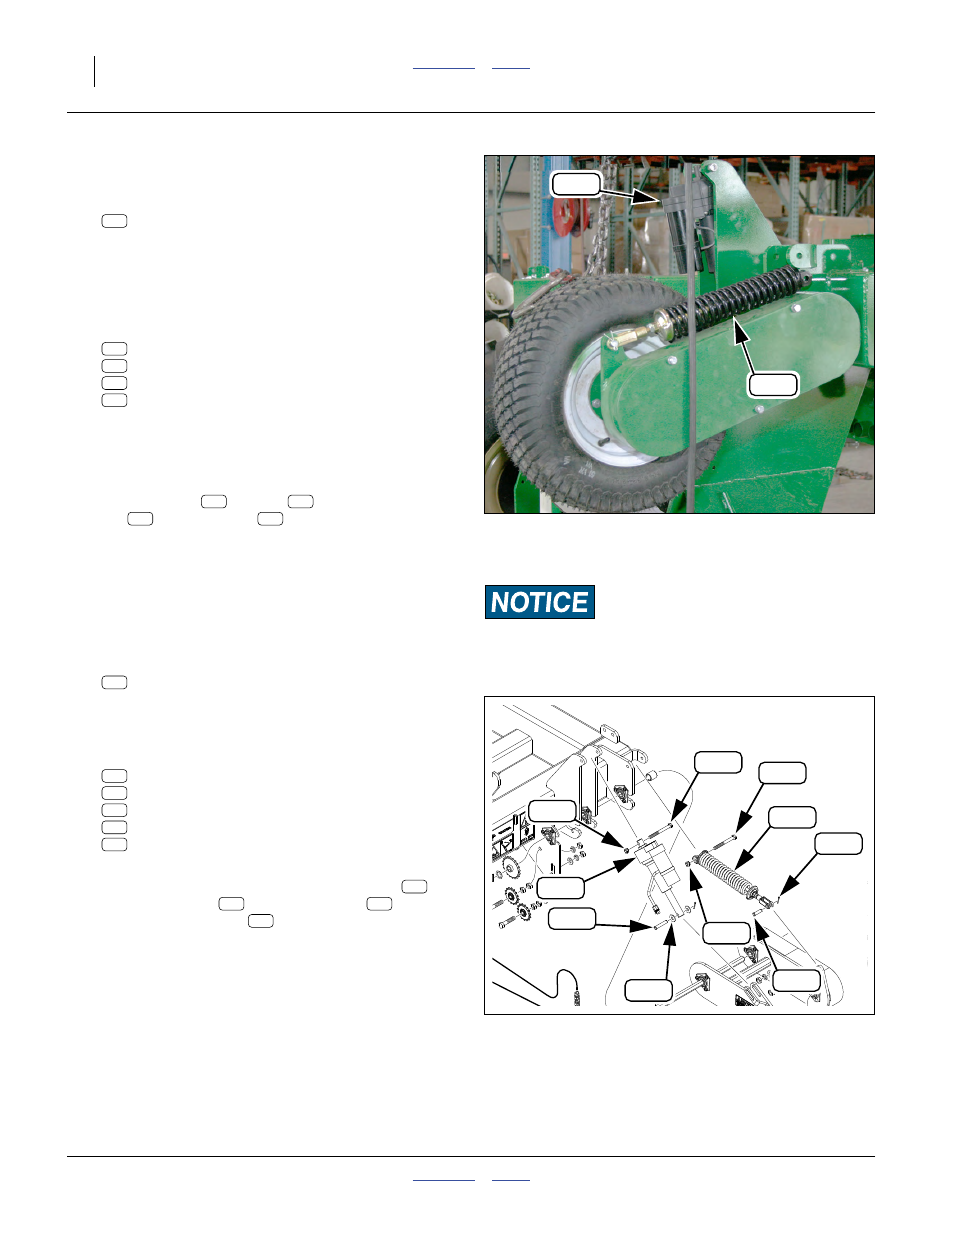
Install Contact Drive Spring
Refer to Figure 32 and Figure 33
76. Select one spring rod assembly:
121-717S NTA607HD CON WHL SPRNG ROD ASY
If the jam nut is loose, or there is any question about
the spring length/pre-compression setting, check
and secure it to the factory setting documented in
the Operator manual.
77. Remove or locate the end fasteners:
802-201C HHCS 1/2-13X4 3/4 GR5
803-147C NUT HEX NYLOCK 1/2-13
805-109C PIN COTTER 1/8 X 1 1/4 PLT
805-127C PIN CLEVIS 1/2 X 1 3/4
78. Adjust the contact drive position with the hoist until
spring ends align with lugs. Mount spring base end
up/front, on right set of lugs (on contact drive hous-
ing).
79. Insert the bolt
and pin
. Secure with
nut
and cotter pin
. Thread nut on as far as
bolt threads permit, or until nut snugs bolt head
against plate. Do not tighten to torque spec.
Install Drive Actuator
The function of the actuator is to retract the drive from
the transport wheel, against the spring force. It needs to
be retracted to allow installation of the transport wheel.
80. Select the actuator assembly:
833-523C LINEAR ACTUATOR /B TRACK 12V
Actuator installs with base end up/front, motor drive
on top, on left set of lugs (on contact drive plate).
81. Remove or locate the end fasteners:
802-045C HHCS 1/2-13X5 GR5
803-147C NUT HEX NYLOCK 1/2-13
804-017C WASHER FLAT 1/2 USS PLT
805-109C PIN COTTER 1/8 X 1 1/4 PLT
805-128C PIN CLEVIS 1/2 X 2 3/4
82. Raise drill with hoist, compressing spring, until
motor drive ends align with lugs. Insert bolt
at
top/front and pin
with one washer
at rod
end. Secure with nut
and second washer and
cotter pin. Thread nut on as far as bolt threads per-
mit, or until nut snugs bolt head against plate. Do
not tighten to torque spec.
83. Lower hoist.
Null4:
Figure 32
Raise Drive
Q0019
288
104
104
192
214
241
243
192
243
214
241
Null4:
Figure 33
Drive Spring and Actuator
31175
214
288
244
227
243
214
241
131
192
184
Do not install an extended actuator. The actuator is shipped in
the retracted position, and only retracts when electrically pow-
ered. In the unlikely event that actuator is not retracted, con-
tact the factory for assistance.
288
184
214
227
241
244
184
244
227
214