Removing/installing the him – Rockwell Automation 20B PowerFlex 700 AC Drives Vector Control (v4.001 and up) User Manual
Page 102
102
Rockwell Automation Publication 20B-UM002G-EN-P - July 2014
Appendix B
HIM Overview
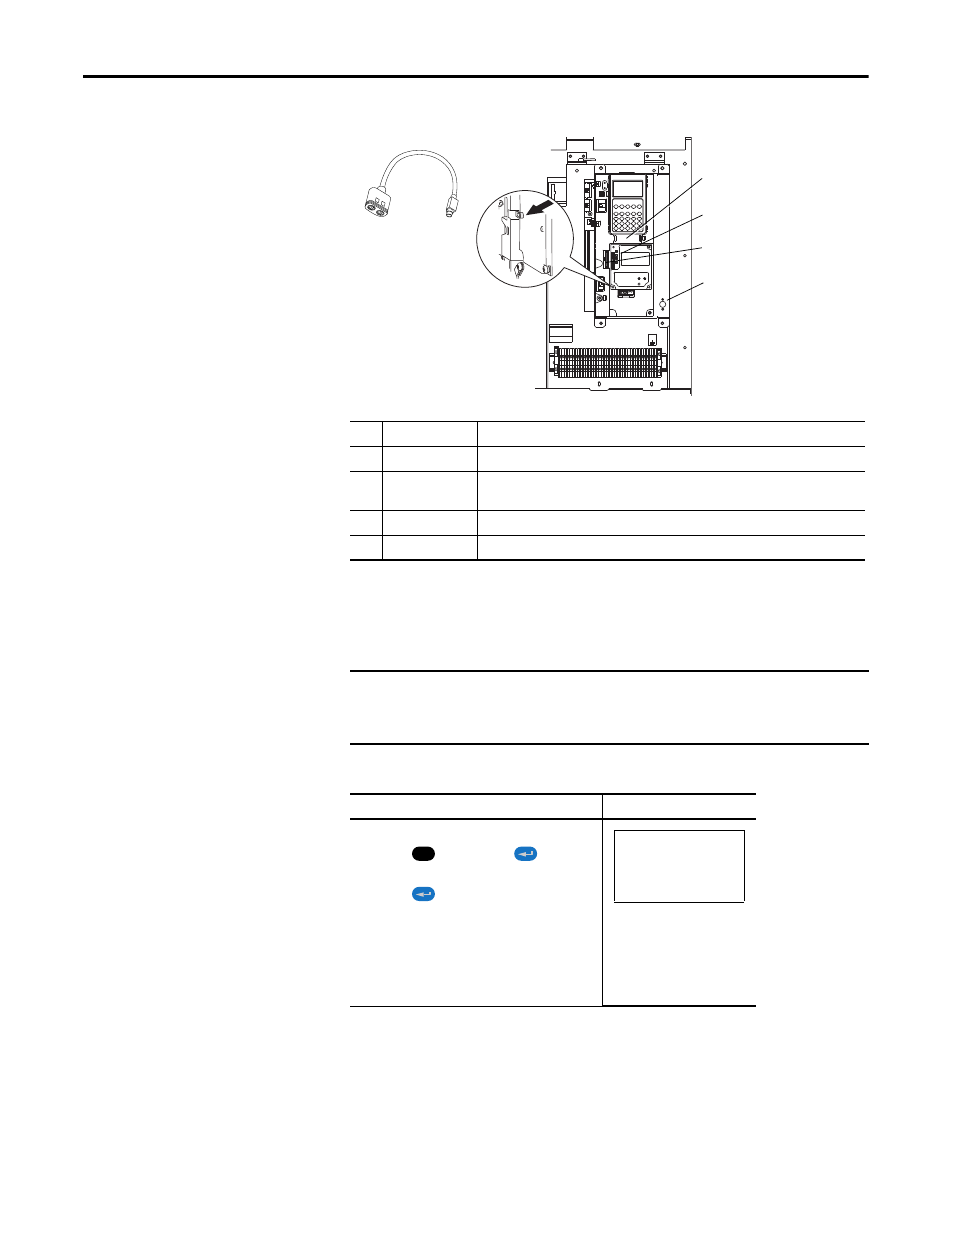
Figure 3 - Port Locations - Frames 7…10
Removing/Installing the HIM
The HIM can be removed or installed while the drive is powered.
No.
Connector
Description
1
DPI Port 1
HIM connection.
2
DPI Port 2
Cable connection for handheld and remote options. Located on side of chassis for Frame
7 IP20, NEMA/UL Type 1.
3
DPI Port 3 or 2
Splitter cable connected to DPI Port 2 provides additional port.
4
DPI Port 5
Cable connection for communications adapter.
TB11
TE
25 AMPERES RMS
MAXIMUM
2
1o
r3
Important:
Verify metal
ground tab is bent
90° and is under the
adapter before tightening
screw. After tightening the
screw, verify that continuity
exists between the head of the
screw and drive ground.
1
3
4
2
3
IMPORTANT
In the drive default configuration, HIM removal is only permissible in Auto
mode. If the HIM is removed while in Manual mode or the HIM is the only
remaining control device, a fault will occur.
Step
Example Display
To remove the HIM…
1. Press the
key and then the
(Enter) key.
The Remove HIM confirmation screen appears.
2. Press the
(Enter) key to confirm that you want
to remove the HIM.
3. Remove the HIM from the drive.
To install HIM…
1. Insert into drive or connect cable.
ALT
Remove Op Intrfc:
Press Enter to
Disconnect Op Intrfc?
(Port 1 Control)