Apple Motion 2 Tutorials User Manual
Page 52

52
Tutorial 1
The Motion Interface
4
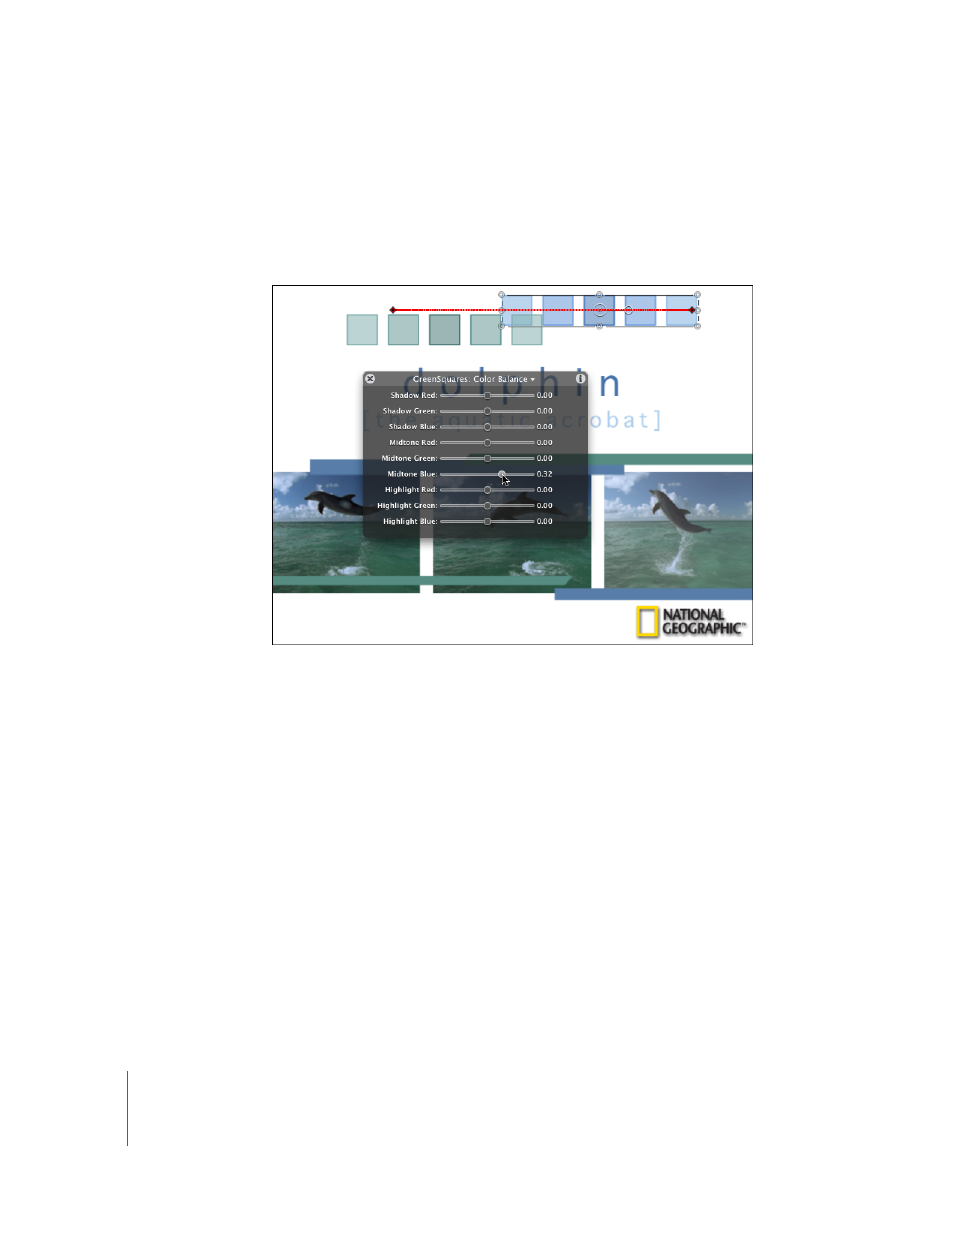
Drag the Color Balance filter to the GreenSquares object in the Canvas.
The filter is applied to the object and the Color Balance Dashboard appears.
5
Drag the Midtone Blue slider to approximately .32.
The boxes turn blue.
6
Play the project (press the Space bar).
Now the blue boxes and green boxes overlap creating an attractive effect.
The Final Touch
The National Geographic logo and the two sets of squares that you added all begin at
the first frame of the project, but unlike the rest of the elements, they do not fade in.
This can easily be remedied by applying a Fade In/Fade Out behavior to the graphics
layer.
Keep in mind that you can actively play back a project while applying and modifying
filters and behaviors. In this section, apply and adjust a behavior during playback.
To apply and modify a filter during playback:
1
If the project is not playing back, click the Play button.
2
In the Layers tab, select the graphics layer.
3
In the Toolbar, click the Add Behavior icon, then choose Basic Motion > Fade In/Fade Out.
- Numbers '09 (254 pages)
- Keynote '09 (247 pages)
- Pages '09 (279 pages)
- Boot Camp Mac OS X v10.6 Snow Leopard (18 pages)
- Boot Camp Mac OS X v10.6 Snow Leopard (19 pages)
- iWork '09 (372 pages)
- Mac OS X v10.6 Snow Leopard (7 pages)
- GarageBand '08 (102 pages)
- iDVD '08 (35 pages)
- GarageBand '09 (122 pages)
- iWeb (37 pages)
- iMovie '08 (50 pages)
- Boot Camp (Mac OS X v10.5 Leopard) (27 pages)
- Boot Camp (Mac OS X v10.5 Leopard) (25 pages)
- Mac OS X v10.5 Leopard (16 pages)
- Mac OS X (622 pages)
- Mac OS X Server (Version 10.6 Snow Leopard) (197 pages)
- Mac OS (42 pages)
- Mac OS X Server (Upgrading and Migrating For Version 10.4 or Later) (97 pages)
- iMovie HD (47 pages)
- iMovie HD (83 pages)
- MAC OS 7.6.1 (4 pages)
- Mac OS X Server (Extending Your Wiki Server For Version 10.5 Leopard) (45 pages)
- Mac OS X Server Ver 10.4 (35 pages)
- Mac OS X Server v10.6 (76 pages)
- Mac OS X Server v10.6 (97 pages)
- Macintosh Japanese Language Kit (30 pages)
- Xserve (Early 2008) DIY Procedure for Hard Drive (3 pages)
- Xserve (60 pages)
- Xserve (8 pages)
- GarageBand 3 (98 pages)
- Remote Desktop 3.1 (191 pages)
- Motion 5.1.1 (1090 pages)
- Workgroup Server 8150/110 (144 pages)
- Aperture (476 pages)
- Xserve Intel (Late 2006) DIY Procedure for Optical Drive Cable (7 pages)
- Xserve Intel (Late 2006) DIY Procedure for Optical Drive Cable (6 pages)
- Network Services Location Manager Network (8 pages)
- Macintosh System 7.5 (114 pages)
- Macintosh System 7.5 (65 pages)
- Macintosh System 7.5 (126 pages)
- DVD Studio Pro 4 (656 pages)
- Keynote '08 (204 pages)
- Xsan 2 (Second Edition) (11 pages)
- LiveType 2 (157 pages)
