Apple Motion 2 Tutorials User Manual
Page 33
Tutorial 1
The Motion Interface
33
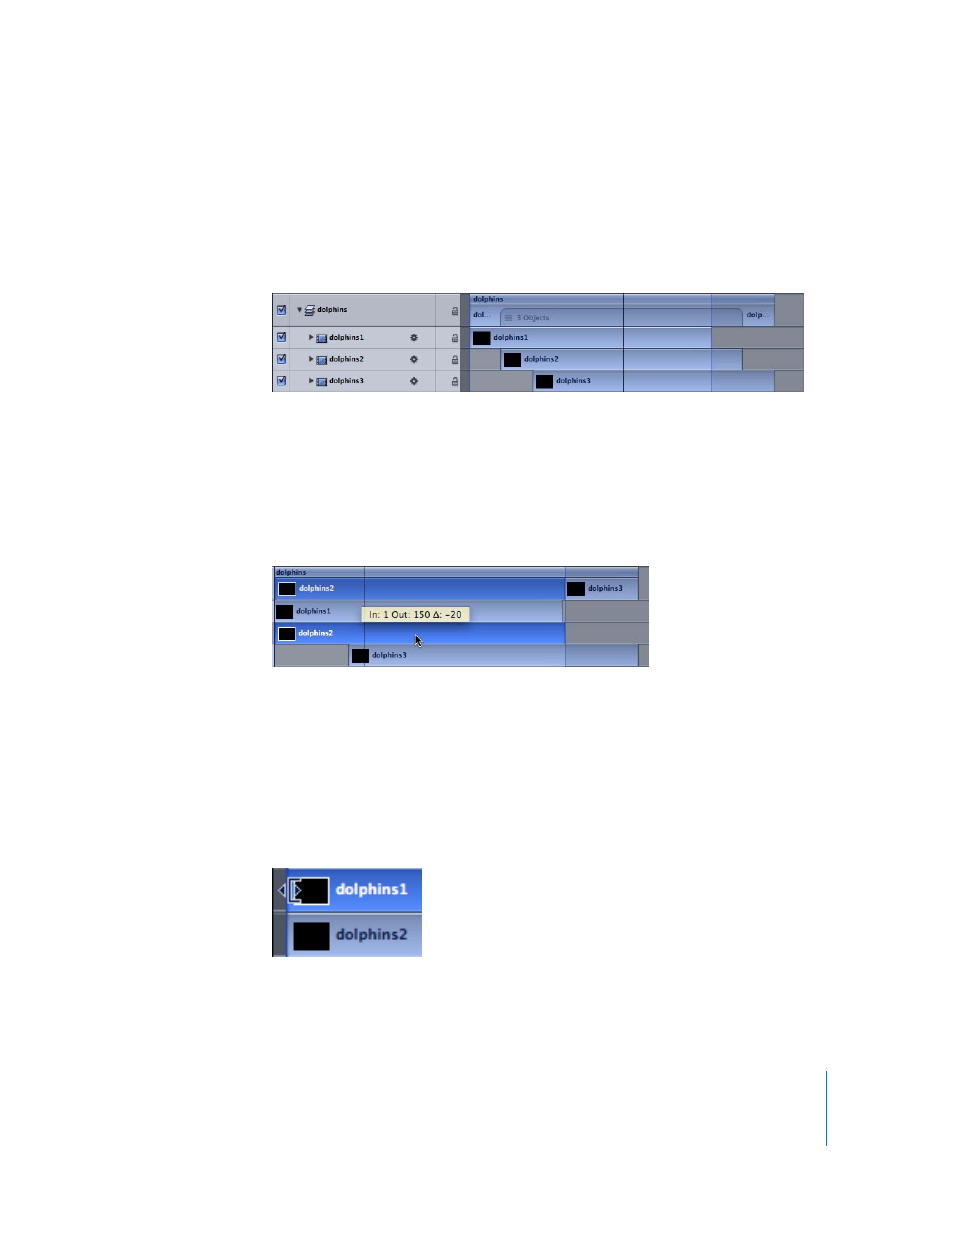
To modify objects in the Timeline:
1
In the Timeline Layer list, click the disclosure triangle for the dolphins layer.
The layer is expanded and the three clips are displayed. The three dolphin clips are
staggered so that each one begins 20 frames later in time. You may have to scroll down
to see all the layers.
Notice that the dolphins layer bar contains an image of a “stack” of items on it, which
indicates that the layer contains three objects.
2
Click in the center of the dolphins2 bar and drag to the left to align it with the
beginning of the sequence (frame 1).
As you drag, the new In and Out points are displayed at the pointer, as well as the delta
value (the small triangle that represents amount of change).
3
Play the project (press the Space bar).
Since they are aligned in time, both dolphin clips begin (and fade in) at the same time.
4
Position the pointer over the left edge of the dolphins1 bar.
The pointer changes to a Trim pointer. When you drag the right or left edge of an
object, you trim that object, removing frames from the beginning or end and
shortening its overall duration. Since Motion is nondestructive, this has no effect on the
original source clips on your drives.
5
Drag the left edge of dolphins1 to the right by 20 frames.
The number of frames is displayed in the delta section of the tooltip.