Caution warning – IAI America IX-NSN6016H User Manual
Page 110
102
1
1. Precautions for Use
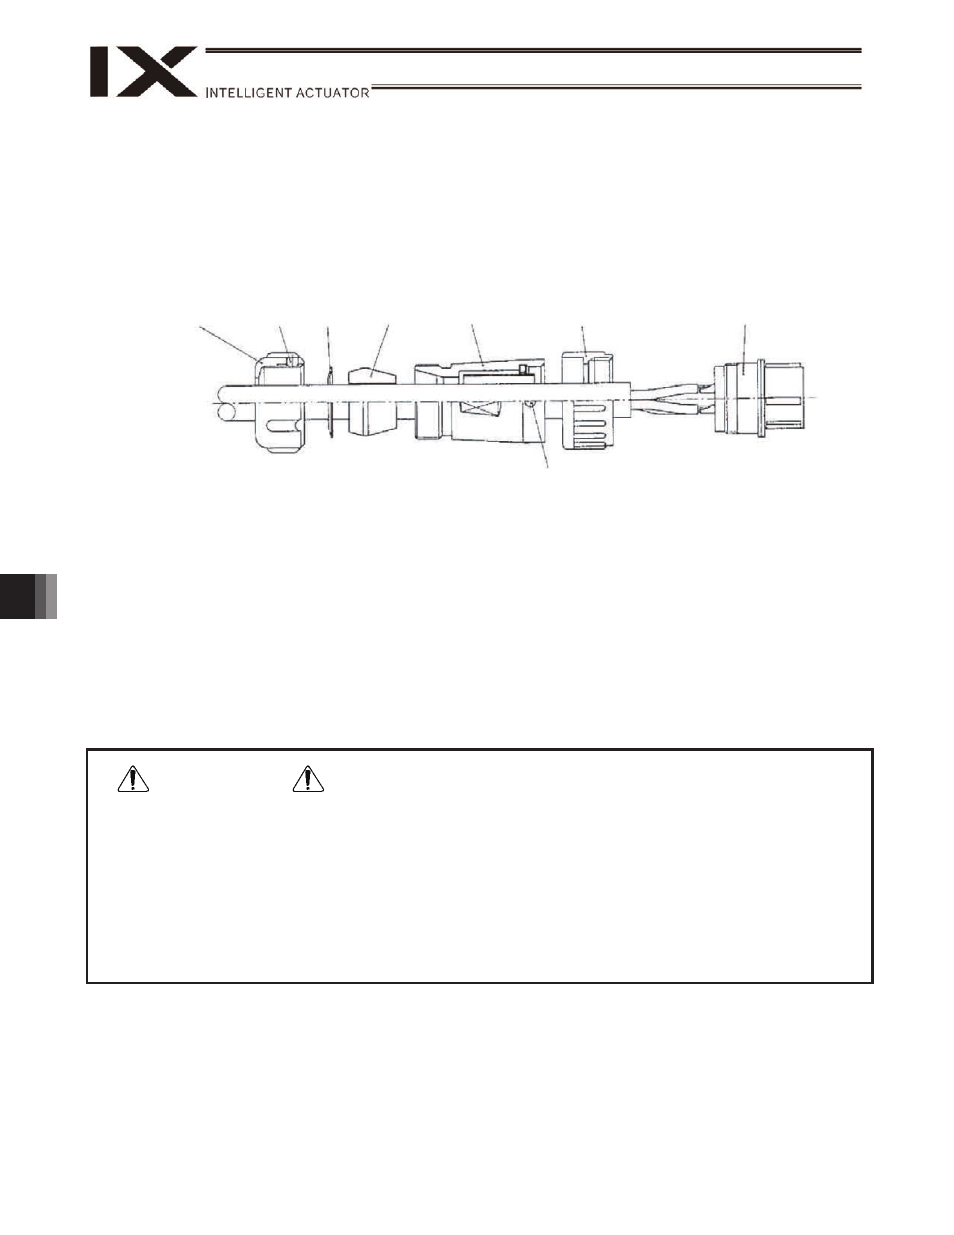
The user connector comes with a mating 24-pin plug (NJW-28-24-PM-18: Nanaboshi Electric Mfg. Co., Ltd.)
Solder and connect the wire provided by the customer to the user connector. Use a cable with shield whose
outer diameter is
16.1 to 18.0.
Connector pins 1 to 23 can be used. Pin 24 is connected to a shield wire.
Connector wiring method
[1] Disassemble the connector, guide the cable through, and solder the wires to the contacts.
[2] Use a tester, etc., to check if the specified pins are electrically continuous with the cable.
[3] Screw the barrel into the end bell and secure with setscrew A.
[4] Push the cable gasket and washer into the end bell and screw in the clamp nut by holding the end bell in
position.
[5] Move the cable back and forth and to the left and right to ensure smooth movement, tighten the clamp nut
again to the specified torque, and secure with screw B.
x Before commencing wiring/piping work, turn off the power to the controller and the power/air supplies to the
robot. Failure to do so may cause the robot to malfunction.
x Use cables and tubes within their specifications. Failure to do so may result in fire or short circuit due to an
overheated cable, or may cause air leaks.
x Connect the shielded cable to the hood. Otherwise, the robot may malfunction due to noise.
x If the user connector is not used, put the cap to seal the opening. If not, water and dust will enter.
x Tighten the connector to the specified torque.
x If the outer diameter is smaller than the one specified for the applicable cable, use tape, etc., to adjust the
outer diameter before installing.
Tightening
torque
1.5 to 2.0 N-m
Clamp nut
Tightening
torque
0.2 to 0.3 N-m
Setscrew B
Washer
Cable
gasket
Tightening
torque
1.5 to 2.0 N-m
End bell
Coupling nut
Barrel
Setscrew A
Tightening torque
0.2 to 0.3 N-m
Caution
Warning