Initial startup of the controller, Phoenix iii pulsar – GE Industrial Solutions Pulsar Plus Controller User Manual
Page 43
Pulsar Plus Controller Family
Issue 7 December 2011
43
Initial Startup of the Controller
Once all relevant installation procedures are performed as defined in respective system product manuals
and documentation, the system is ready to be powered up.
Initial Startup of the Controller
Step
Action
1
Verify all connections are as described previously before applying power.
2
If equipped, place all external battery disconnect switches into their ON positions prior to
applying power.
3
Apply power to the power system.
4
After approximately one minute, all LEDs on all components including rectifiers and converters,
the controller, LVD control boards, aux displays, and remote voltage monitor modules should be
green.
If this is not the case, initiate the “Clear Events” and “Uninstall Equipment” operations found
under MenuControl/Operations menu. Alarm conditions should clear. If all LEDs still aren’t
green, review the installation procedure and refer to the troubleshooting section. The controller
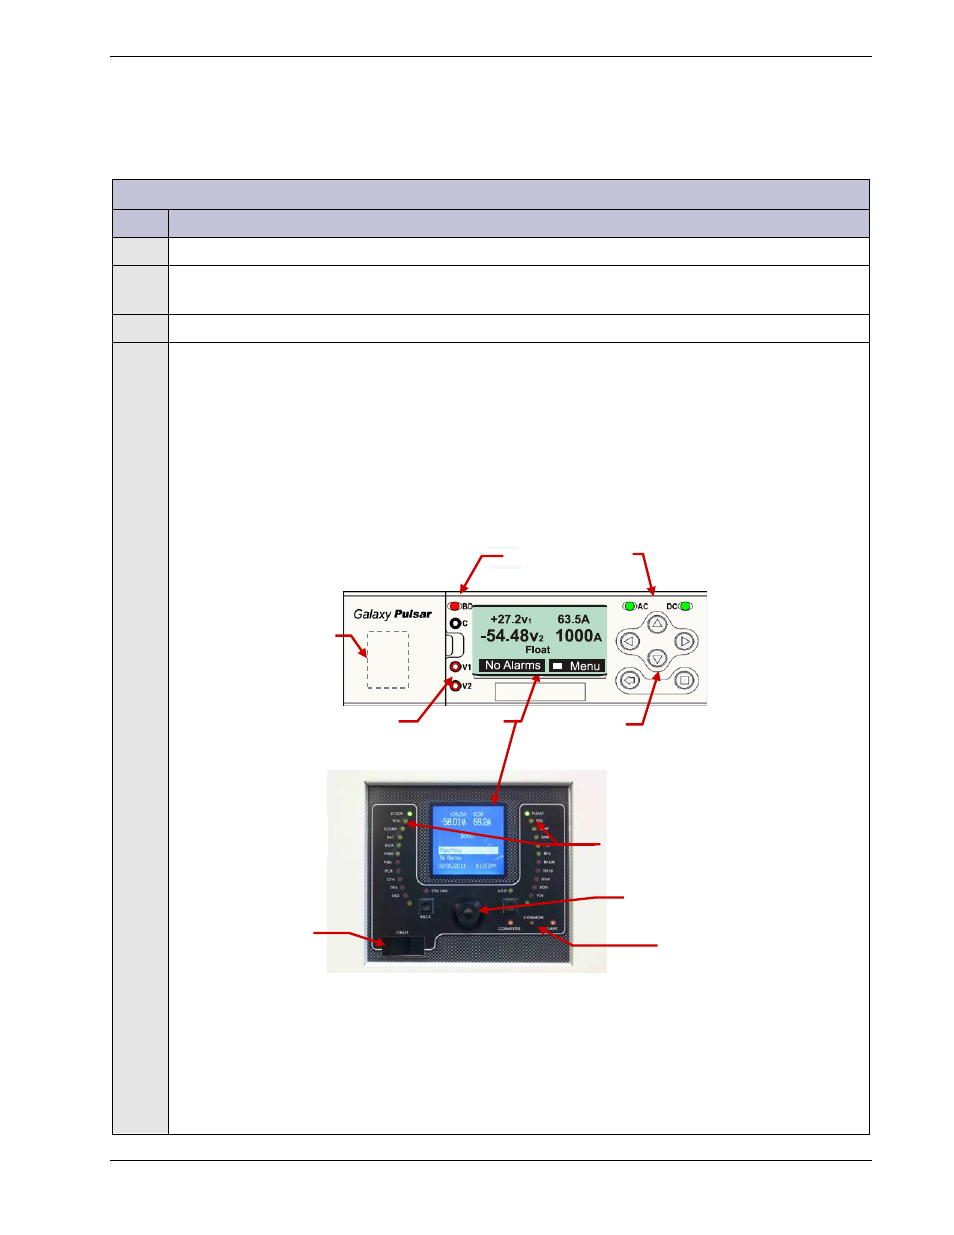
display will indicate “NO ALARMS”, system float voltage, total load current, and system operating
mode. LEDs and back-light will be green for no alarms.
Contrast can be adjusted for the site’s ambient condition by using the up and down arrow keys at
the default menu shown. Contrast adjust is also available at :
MenuConfigurationSystem Settings Display Contrast
Voltage
Test Jacks
Menu
Navigation
RS-232 and Ethernet
Ports to plug in a PC
to use Web Pages
Plant Status LEDs
LCD
Display
Voltage
Test Jacks
Menu
Navigation
Plant Status LEDs
RS-232 and Ethernet
Ports to plug in a PC
to use Web Pages
Phoenix III
Pulsar