Removing and reinstalling the cooling shroud – Lenovo ThinkServer RD650 User Manual
Page 86
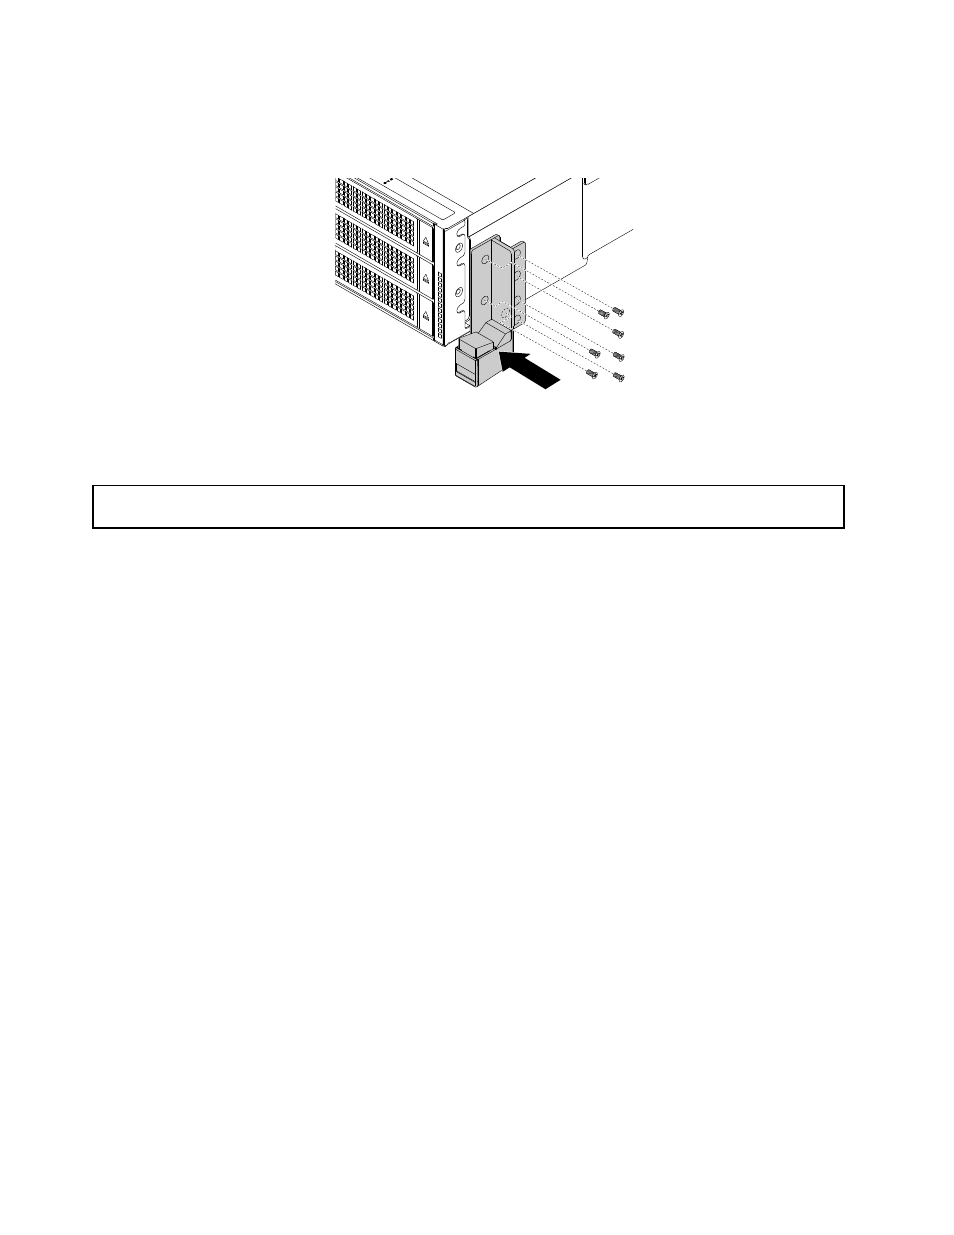
2. To reinstall the rack handles, align the screw holes in the rack handle with the corresponding holes in the
chassis. Install the screws to secure the rack handle on each side of the server.
Figure 41. Installing the rack handles
Removing and reinstalling the cooling shroud
Attention: Do not open your server or attempt any repair before reading and understanding “Safety information”
on page iii and “Guidelines” on page 67.
To access some of the server components on the system board, remove the cooling shroud first. To ensure
proper cooling and airflow, reinstall the cooling shroud before turning on the server.
Before you begin, print all the related instructions or ensure that you can view the PDF version on another
computer for reference.
To remove and reinstall the cooling shroud, do the following:
1. Remove all media from the drives and turn off all attached devices and the server. Then, disconnect all
power cords from electrical outlets and disconnect all cables that are connected to the server.
2. Prepare your server. See “Removing or extending the server from the rack cabinet” on page 69.
3. Remove the server cover. See “Removing the server cover” on page 69.
4. Remove the ThinkServer RAID Super Capacitor Module if one is installed on the cooling shroud. See
“Removing the ThinkServer RAID Super Capacitor Module” on page 133.
72
ThinkServer RD650 User Guide and Hardware Maintenance Manual