Installing or replacing the optical drive – Lenovo ThinkServer RD650 User Manual
Page 173
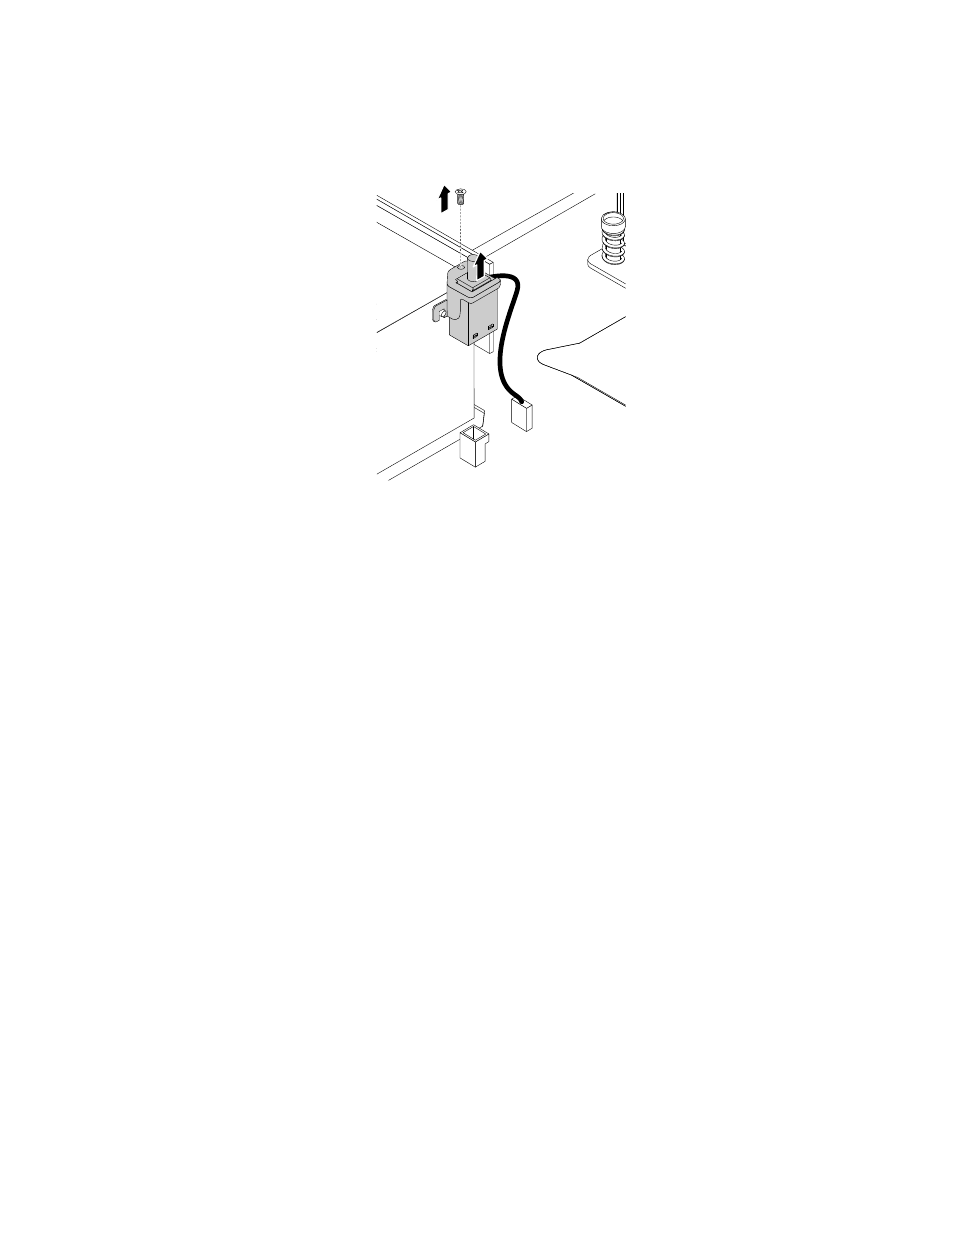
4. Locate the intrusion switch and disconnect the cable from the system board.
5. Remove the screw and lift up the intrusion switch from the chassis.
Figure 149. Removing the intrusion switch
6. If you are instructed to return the old intrusion switch, follow all packaging instructions and use any
packaging materials that are supplied to you for shipping.
What to do next:
• To work with another piece of hardware, go to the appropriate section.
• To complete the removal procedure, go to “Completing the parts replacement” on page 183.
Installing or replacing the optical drive
Note: This topic applies to server models with 2.5-inch-drive bays.
This topic contains the following information:
•
“Removing the drive partition” on page 160
•
“Installing the optical drive” on page 161
•
“Replacing the optical drive” on page 165
The EMI integrity and cooling of the server are protected by having all drive bays covered or occupied. When
you install the optical drive, save the removed optical drive dummy from the chassis. If you later remove the
drive, you will need the dummy to cover the drive bay.
Attention: An unoccupied drive bay without any other protection might impact the EMI integrity and cooling
of the server, which might result in overheating or component damage. To maintain the EMI integrity and
cooling of the server, install a new optical drive as soon as you remove the failing one or the optical drive
dummy.
CAUTION:
When laser products (such as CD-ROMs, DVD drives, fiber optic devices, or transmitters) are
installed, note the following:
.
159