Lenovo ThinkServer RD650 User Manual
Page 178
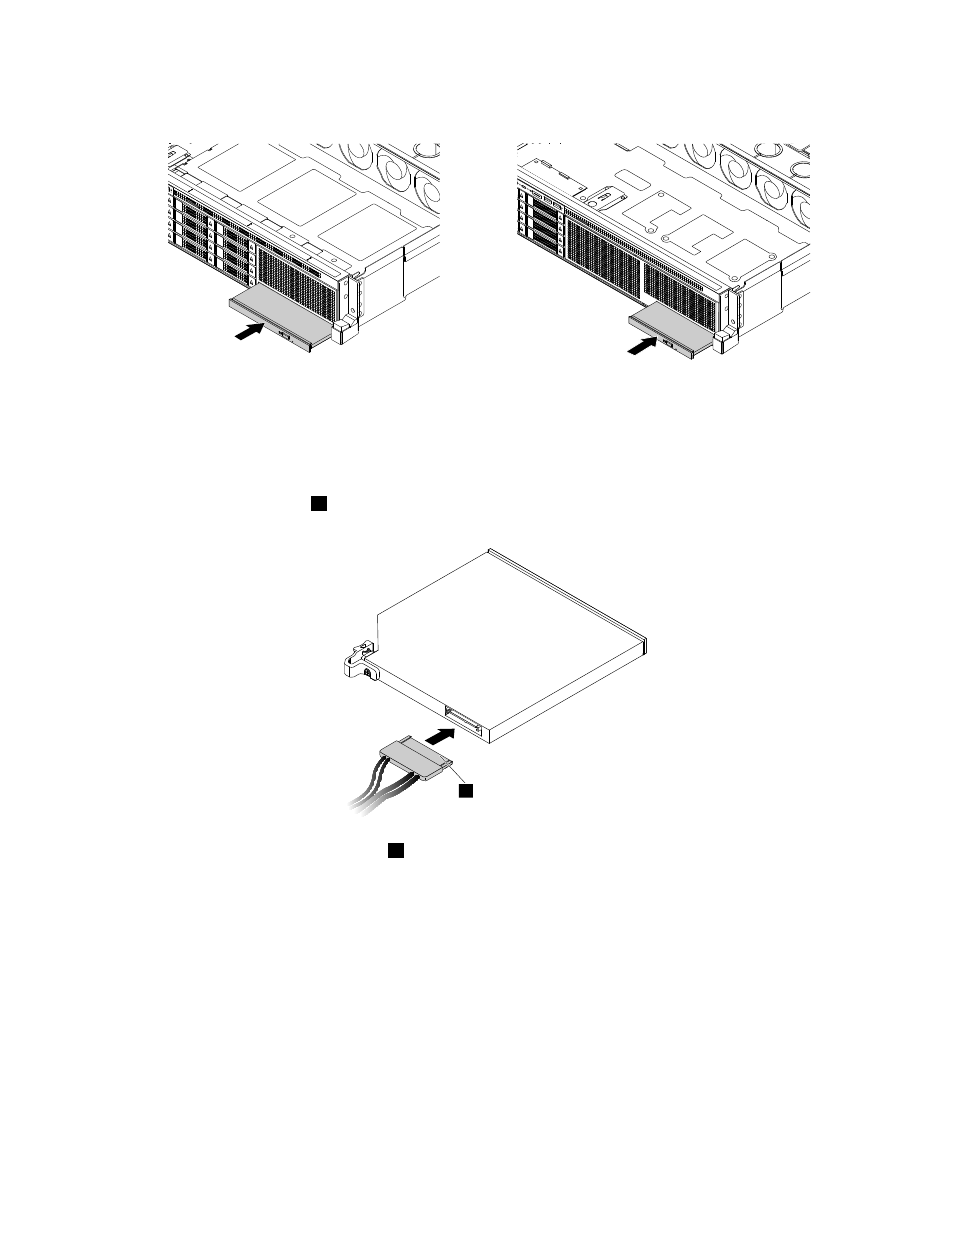
10. Slide the new optical drive into the optical drive bay from the front until it snaps into position.
Figure 157. Installing the optical drive
11. Do the following to connect the optical drive to your server:
a. Connect the connector
1
on one end of the cable to the rear of the optical drive.
1
Figure 158. Connecting the connector
1
on one end of the cable to the rear of the optical drive
b. Connect the 2-pin power connector on the other end of the cable to the 2-pin power connector on
the backplane. See “Backplane for up to eight 2.5-inch drives” on page 41.
c. Connect the SATA connector on the other end of the cable to the appropriate SATA connector on the
system board. See “System board components” on page 43.
12. Save the removed optical drive dummy in case that you later remove the drive and need the dummy
to cover the drive bay.
What to do next:
• To work with another piece of hardware, go to the appropriate section.
• To complete the installation, go to “Completing the parts replacement” on page 183.
164
ThinkServer RD650 User Guide and Hardware Maintenance Manual