Replacing the hot-swap-drive backplane – Lenovo ThinkServer RD650 User Manual
Page 157
7. Disconnect the cables from the rear backplane.
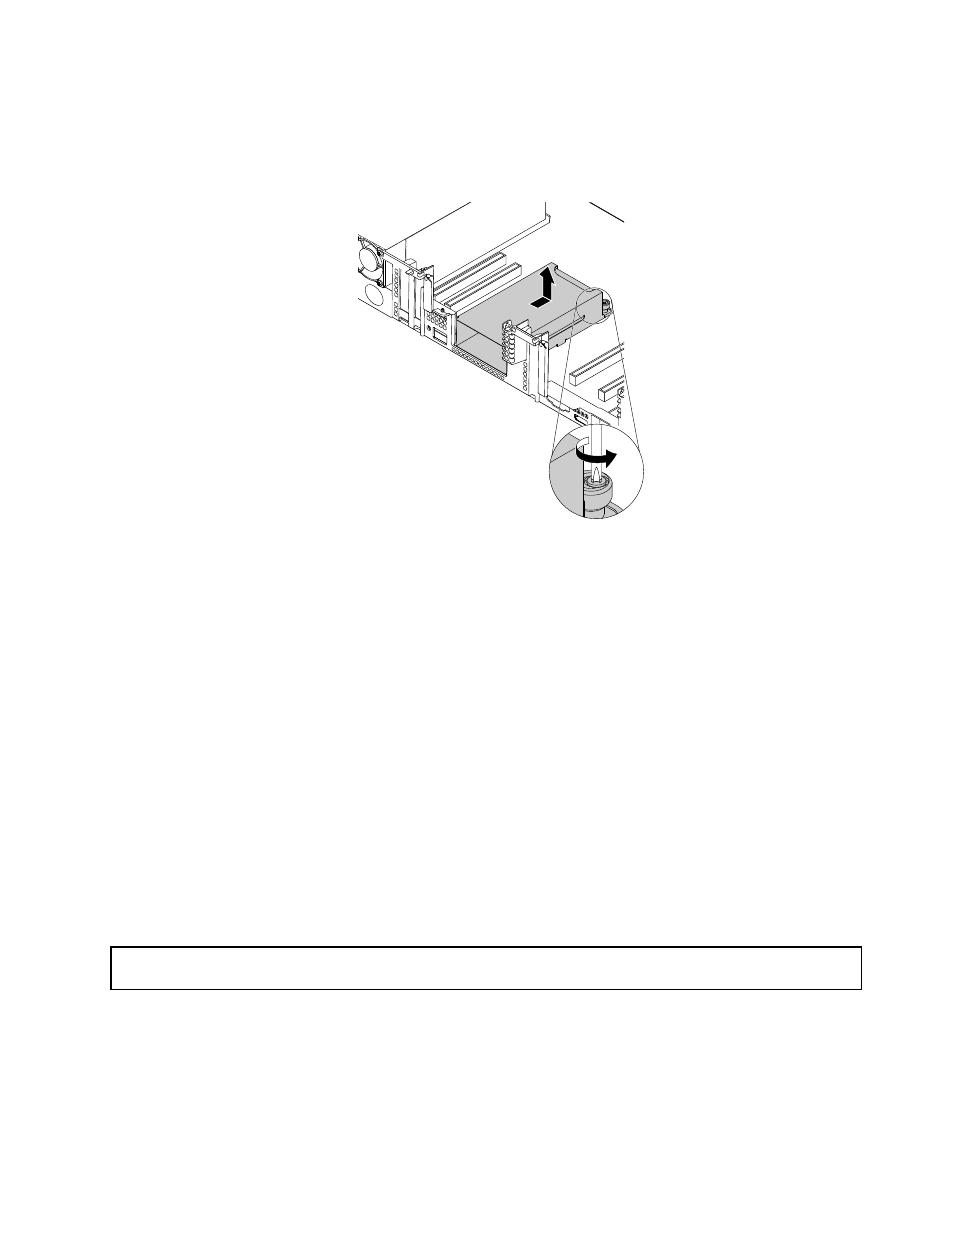
8. Loosen the screws that secure the assembly. Slide the assembly to the front of the server to disengage
it from the chassis. Then, lift the assembly from the system board.
Figure 126. Removing the rear backplane/cage assembly
9. If you are instructed to return the old assembly, follow all packaging instructions and use any packaging
materials that are supplied to you for shipping.
What to do next:
• To work with another piece of hardware, go to the appropriate section.
• To complete the removal procedure, go to “Completing the parts replacement” on page 183.
Replacing the hot-swap-drive backplane
This topic contains the following information:
•
“Replacing the front backplane” on page 143
•
“Replacing the front backplane for up to six 2.5-inch drives” on page 146
•
“Replacing the rear backplane” on page 150
Note: The hot-swap-drive backplane is sensitive to ESD. Ensure that you read and understand “Handling
static-sensitive devices” on page 68 first and carefully perform the operation.
Replacing the front backplane
Attention: Do not open your server or attempt any repair before reading and understanding “Safety information”
on page iii and “Guidelines” on page 67.
Before you begin, print all the related instructions or ensure that you can view the PDF version on another
computer for reference.
Note: The following procedure is based on the scenario that you want to replace the backplane for up to nine
3.5-inch drives. The procedure is similar if your server is installed with the following types of backplanes:
• Backplane for up to twelve 3.5-inch drives
.
143