Lenovo ThinkServer RD650 User Manual
Page 154
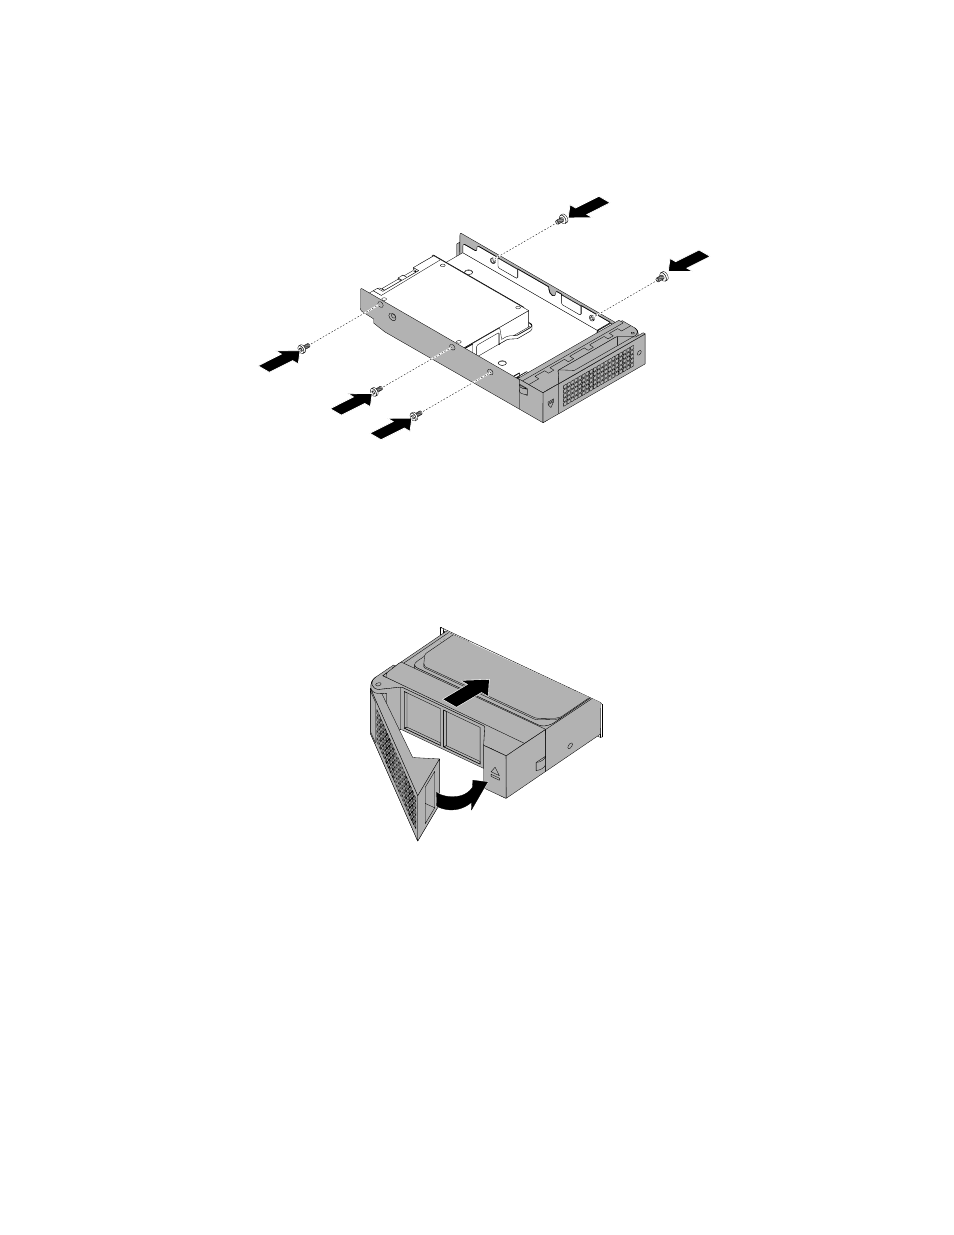
7. Position the drive adapter and the solid-state drive into the 3.5-inch drive bracket. Align the screw holes
in the drive adapter and the solid-state drive with the corresponding holes in the bracket. Then, install
the screws to secure the drive adapter and the solid-state drive into the bracket.
Figure 122. Installing the screws to secure the drive adapter and the solid-state drive to the bracket
8. Slide the bracket with the solid-state drive into the drive bay from the front until it snaps into position
and then completely close the handle.
Figure 123. Installing the bracket with the solid-state drive
9. Check the drive status LEDs to ensure that the solid-state drive is operating correctly. You might have to
restart the server for the newly installed solid-state drive to be recognized. See “Hot-swap-drive status
LEDs” on page 50. If the solid-state drive is faulty, reinstall or replace it until it is operating correctly.
10. Save the removed dummy tray in case that you later remove the solid-state drive and need a dummy
tray to cover the drive bay.
What to do next:
• To work with another piece of hardware, go to the appropriate section.
• To configure RAID, go to “Configuring RAID” on page 62.
• To complete the installation, go to “Completing the parts replacement” on page 183.
140
ThinkServer RD650 User Guide and Hardware Maintenance Manual