Lenovo ThinkServer RD650 User Manual
Page 125
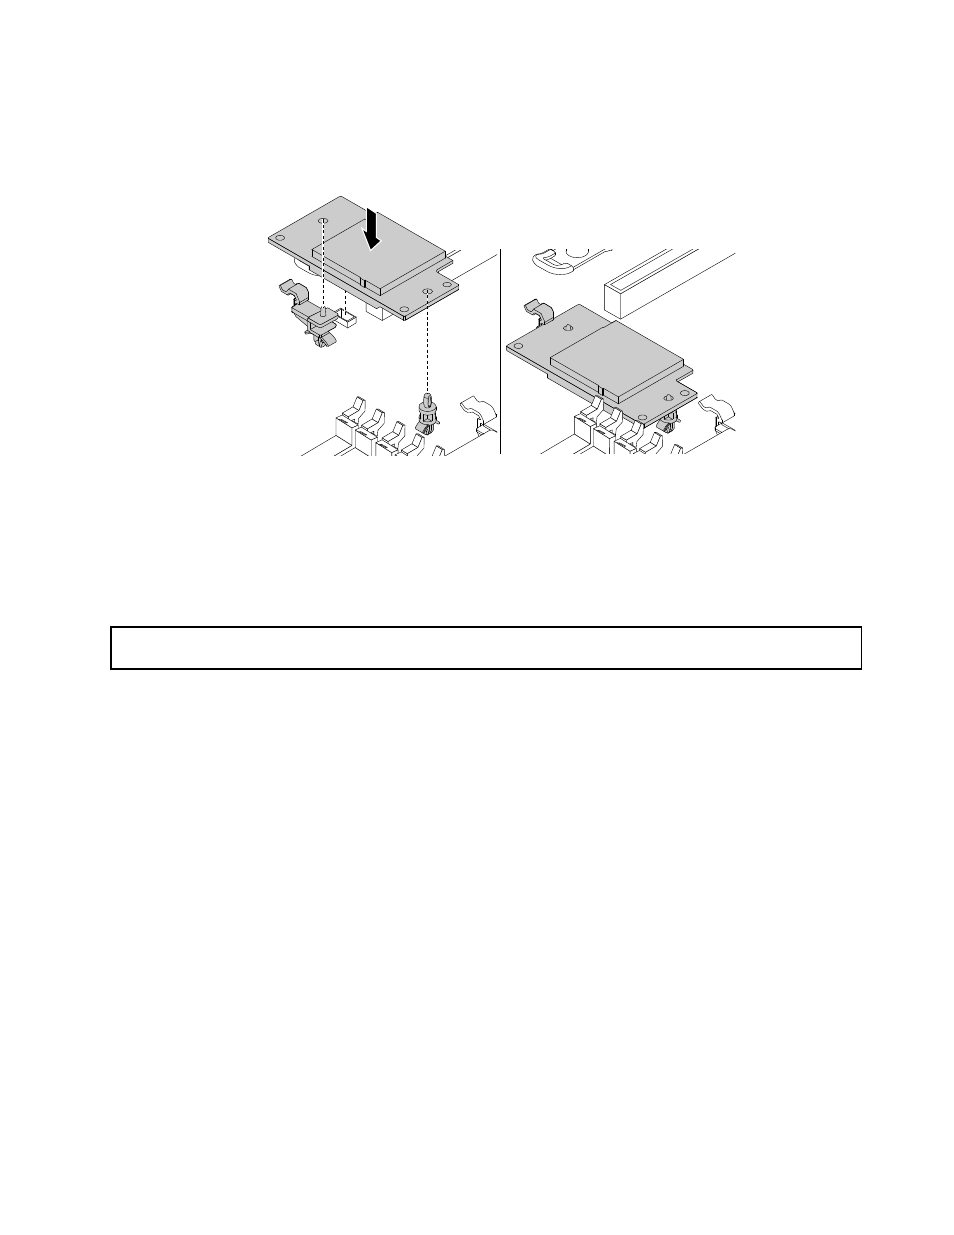
8. Position the SD module on the system board so that the plastic pins on the latch and on the system
board pass through the corresponding holes in the SD module. Then, press the SD module downward
so that it is connected to the SD module connector on the system board and is secured by the latch.
Figure 84. Installing the SD module
What to do next:
• To work with another piece of hardware, go to the appropriate section.
• To complete the installation, go to “Completing the parts replacement” on page 183.
Removing the SD module
Attention: Do not open your server or attempt any repair before reading and understanding “Safety information”
on page iii and “Guidelines” on page 67.
Before you begin, print all the related instructions or ensure that you can view the PDF version on another
computer for reference.
Notes:
• If you remove the SD module, you cannot install SD cards into your server for storage.
• Use any documentation that comes with the SD module and follow those instructions in addition to
the instructions in this topic.
To remove the SD module, do the following:
1. Remove all media from the drives and turn off all attached devices and the server. Then, disconnect all
power cords from electrical outlets and disconnect all cables that are connected to the server.
2. Prepare your server. See “Removing or extending the server from the rack cabinet” on page 69.
3. Remove the server cover. See “Removing the server cover” on page 69.
4. Remove the riser card assembly 2. See “Replacing the riser card” on page 85.
5. Locate the SD module. See “Server components” on page 28.
.
111