Source selection buttons – Grass Valley CRSC v.3.2 User Manual
Page 68
56
Remote Panels Page
Using the Remote Panels Page
Source Selection Buttons
To configure a button as a source button:
1 Click on the image of the particular button you want to configure.
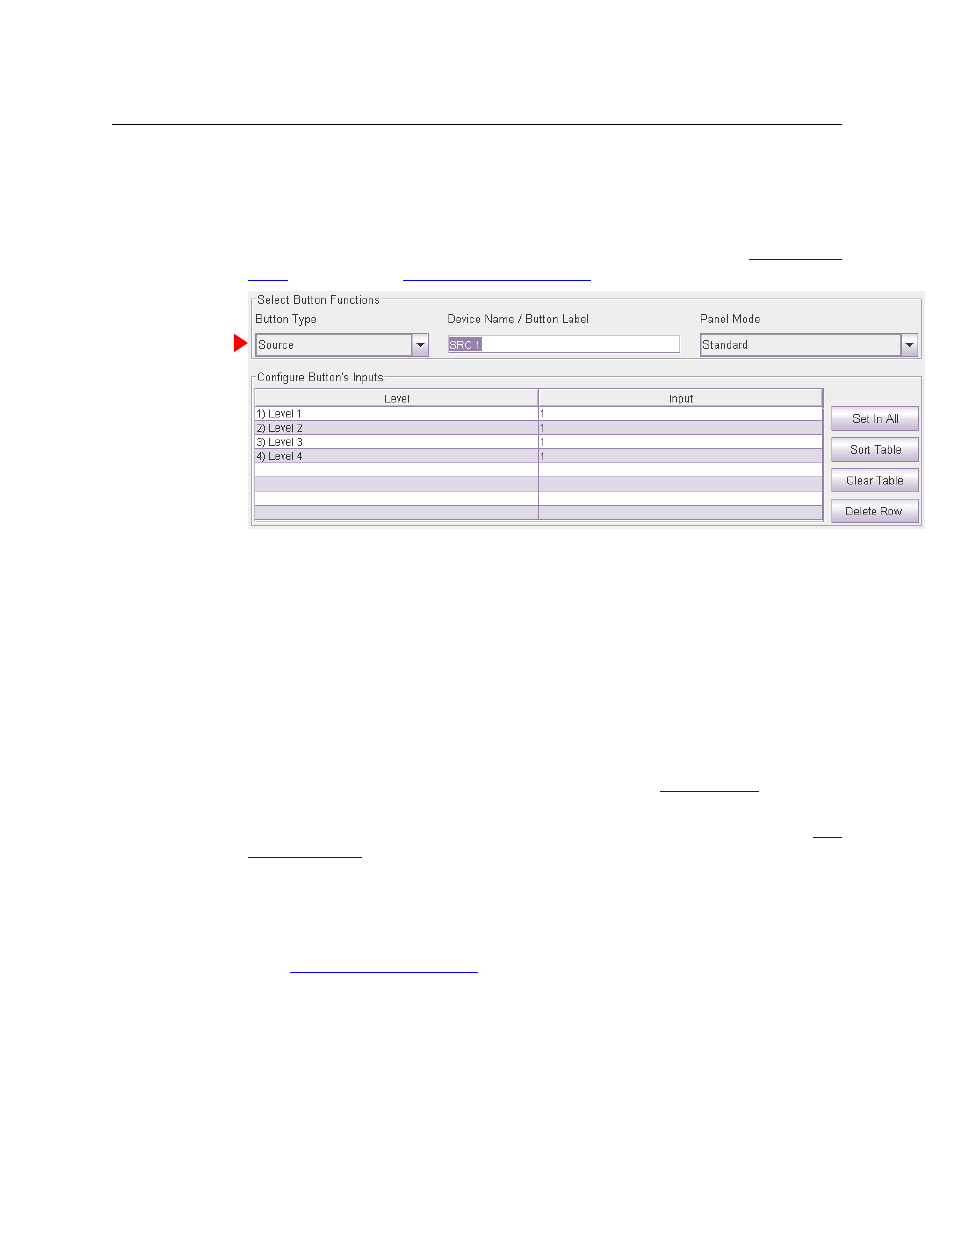
2 Choose ‘Source’ from the ‘Button Function’ drop-down list. The ‘Configure Button’s Inputs’
table appears. It has 8 rows. Each row can represent a level/input pair. (Refer to
Fig. 6-4: Source Button Fields
At the right are 4 buttons that serve as shortcuts:
•
‘Set in All’. If you have select a single row of the table, this button applies the input of that
row to all the other rows.
•
‘Sort Table’. This button reorders the entire table in ascending order of level numbers
(and not necessarily level name).
•
‘Clear Table’ erases the entire table.
•
‘Delete Row’ removes a single row (i.e., a single level) from the table.
3 Enter (level, input) pairs on rows of the table. Click on ‘Level’ field to select a level from drop-
down list. Click in the ‘Input’ field to enter an input number manually.
You can use the context menu to edit the destination table. See
for information.
Use drag-and-drop to transfer levels from the ‘Levels’ table to the destination table. See
on page 63 for information.
4 Optionally enter a mnemonic in the ‘Device Name / Button Label’ field. (Button mnemonics
are used only in the ‘Remote Panels’ page, but they can be helpful.)
The purpose of the table is to identify the input ports that compose the source.
The inputs you specify are in the range you specified as the “Controller Inputs” in the ‘Router Levels’
page. See
For example, suppose a 32×32 AES router is divided into 4 equal partitions:
Level A = inputs 1–8,
Level B = inputs 9–16,
Level C = inputs 17–24,
Level D = inputs 25–32 where each level starts counting at output 1.