Buttons – Grass Valley CRSC v.3.2 User Manual
Page 38
26
Ethernet Settings Page
Summary
Buttons
There are 4 buttons at the bottom of the page.
Click Refresh List at any time to cause the page to display the current state of the devices on the
network.
The Apply Updates button remains dimmed until you have made a change to a setting in the
page. When you have made changes, the software automatically checks the check box in the
rows you have change and the Apply Updates button becomes enabled. Click Apply Updates
to cause those changes to be applied.
You can also check or uncheck the check boxes manually.
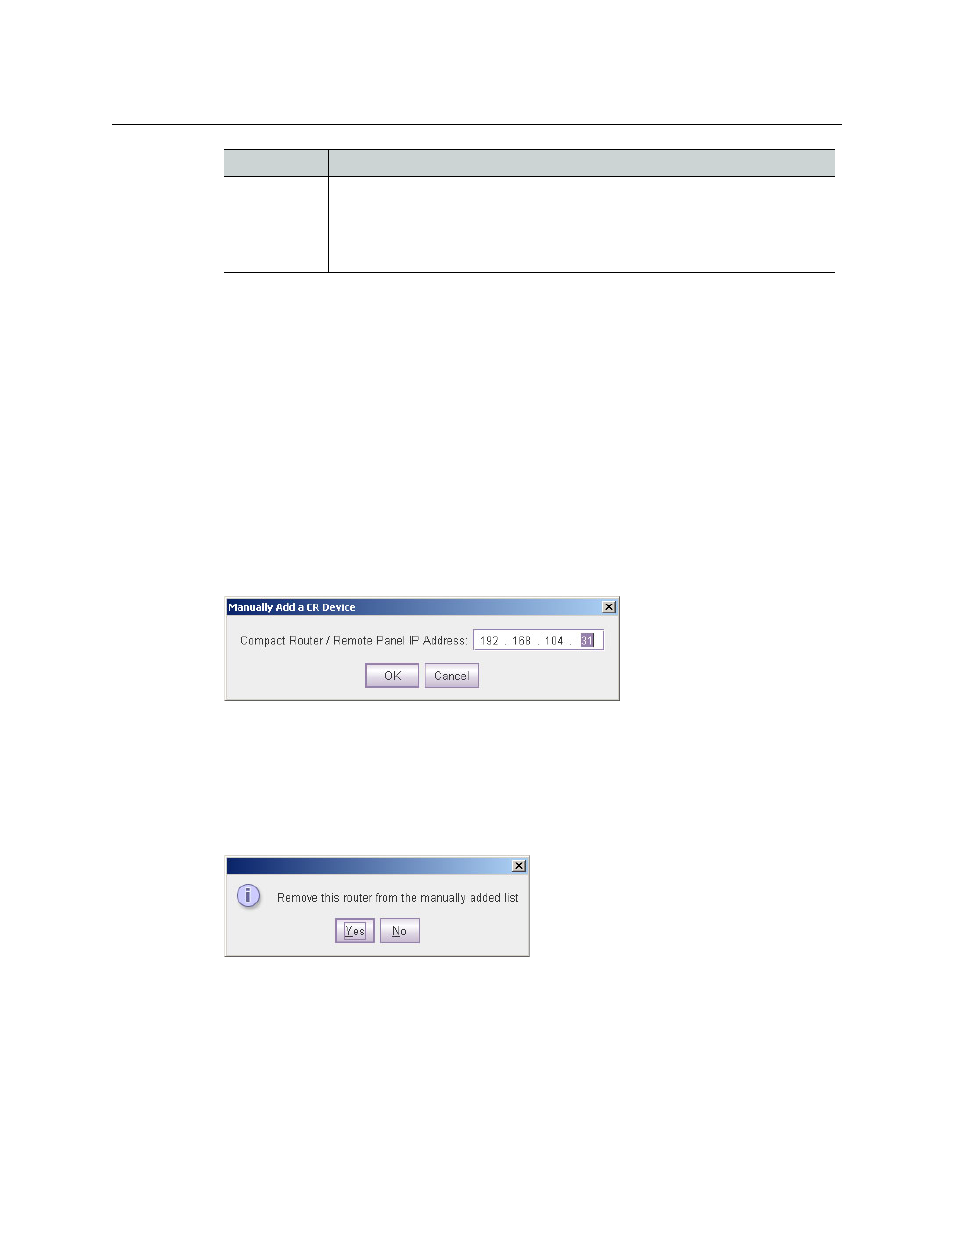
Use the Add CR Series Device . . . button to add a device is not discovered through normal
methods, for instance, when the router is detectable on through a network gateway. Such
devices might be those on a different network. When you click the button, a dialog appears in
which you may specify the IP address of the device:
Click OK to add the device or ‘Cancel’ if you do not want to add the device. Devices added this
way are said to be “manually” added.
Use the Remove CR Series Device . . . button to remove a manually added device (one that has
been added with the ‘Add CR Series Device . . .’ command.
First place a check mark in the table row of the device you want to remove. Then click the
button. A confirmation dialog appears:
Click OK to remove the device or ‘Cancel’ if you do not want to remove the device.
Identify CP
When you click ‘Identify CP’, the control panel listed mounted on the device listed on
that row identifies itself, physically, by displaying a moving pattern of button lights.
This feature is helpful if you forget which panel of possibly many panels is represented
by the particular IP address. The moving button lights continue indefinitely. To turn
off the pattern, either press any button on the panel or click ‘Identify CP’ again.
Column
Description