Destination selection buttons, Selecting a panel mode – Grass Valley CRSC v.3.2 User Manual
Page 64
52
Remote Panels Page
Using the Remote Panels Page
and the CP6401 — are exceptions. For these panels, the graphic has a button for the config-
ured destination, but the panels have no such button.)
As a reminder, the buttons of a CP1602-CQX are not configurable.
The ‘Destination Lock’ and ‘Panel Lock’ buttons (both red in the panel graphic) are not config-
urable for any panel.
Selecting a Panel Mode
In the ‘Panel Mode’ field, select a mode of operation from the drop-down list:
‘Standard’,
‘Enhanced
—
Hold’,
‘Enhanced
—
No Hold’.
For a description of each mode, see
The differences between the modes are difficult to understand until you see the panels in
operation in the different modes. We recommend that you spend some time experimenting.
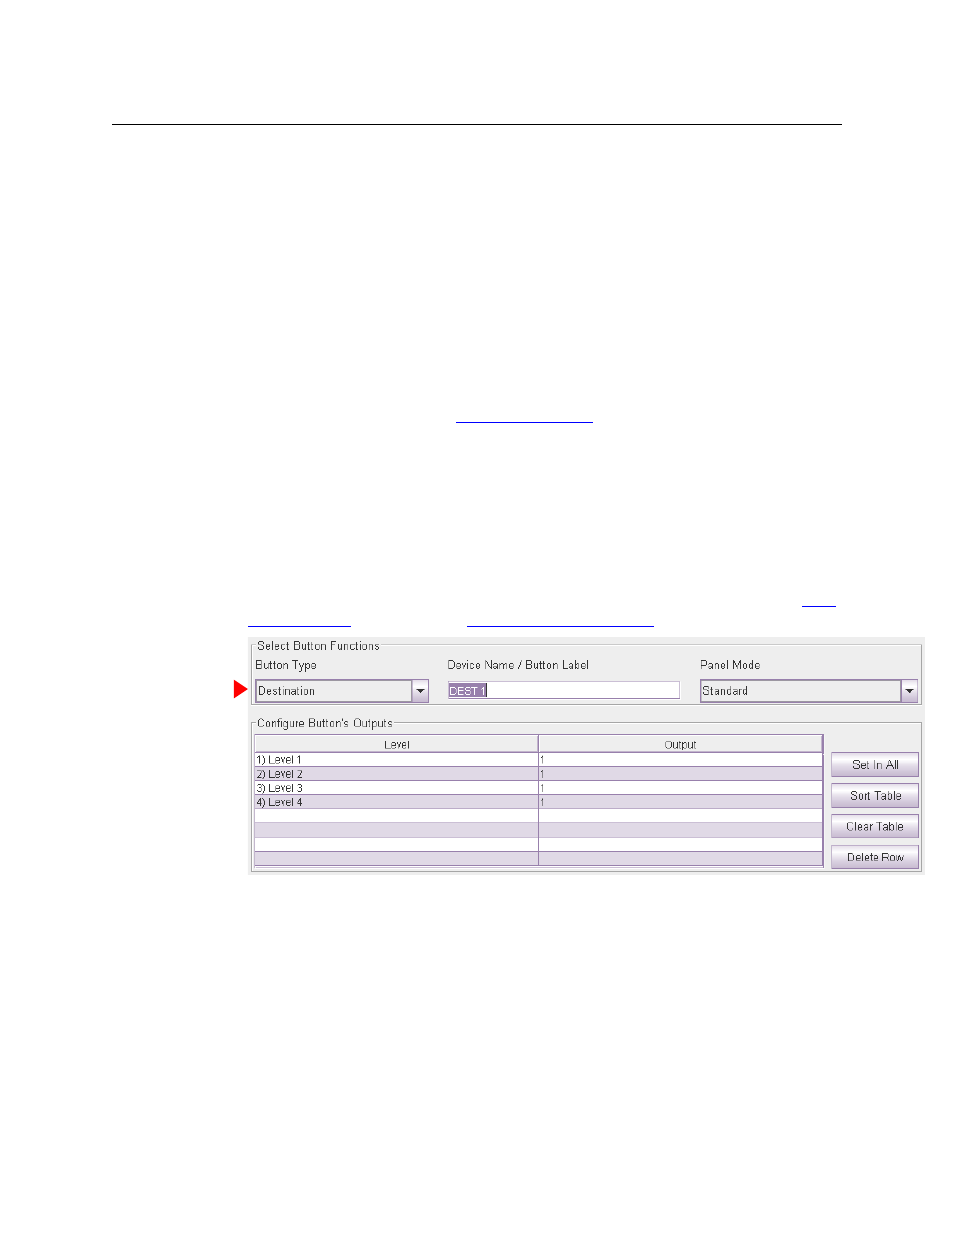
Destination Selection Buttons
To configure a button as a destination button:
1 Click on the image of the particular button you want to configure.
2 Choose ‘Destination’ from the ‘Button Function’ drop-down list. The ‘Configure Button’s Out-
puts’ table appears. It has 8 rows. Each row can represent a level/output pair. (Refer to
Fig. 6-2: Destination Button Fields
At the right are 4 buttons that serve as shortcuts:
•
‘Set in All’. If you have selected a single row of the table, this button applies the output of
that row to all the other rows.
•
‘Sort Table’. This button reorders the entire table in ascending order of level numbers
(and not necessarily level name).
•
‘Clear Table’ erases the entire table.
•
‘Delete Row’ removes selected rows (levels) from the table. (The button is disabled until
you have selected one or more rows.)