Installing crsc, How to create multiple subnets – Grass Valley CRSC v.3.2 User Manual
Page 28
16
Introduction
Installing CRSC
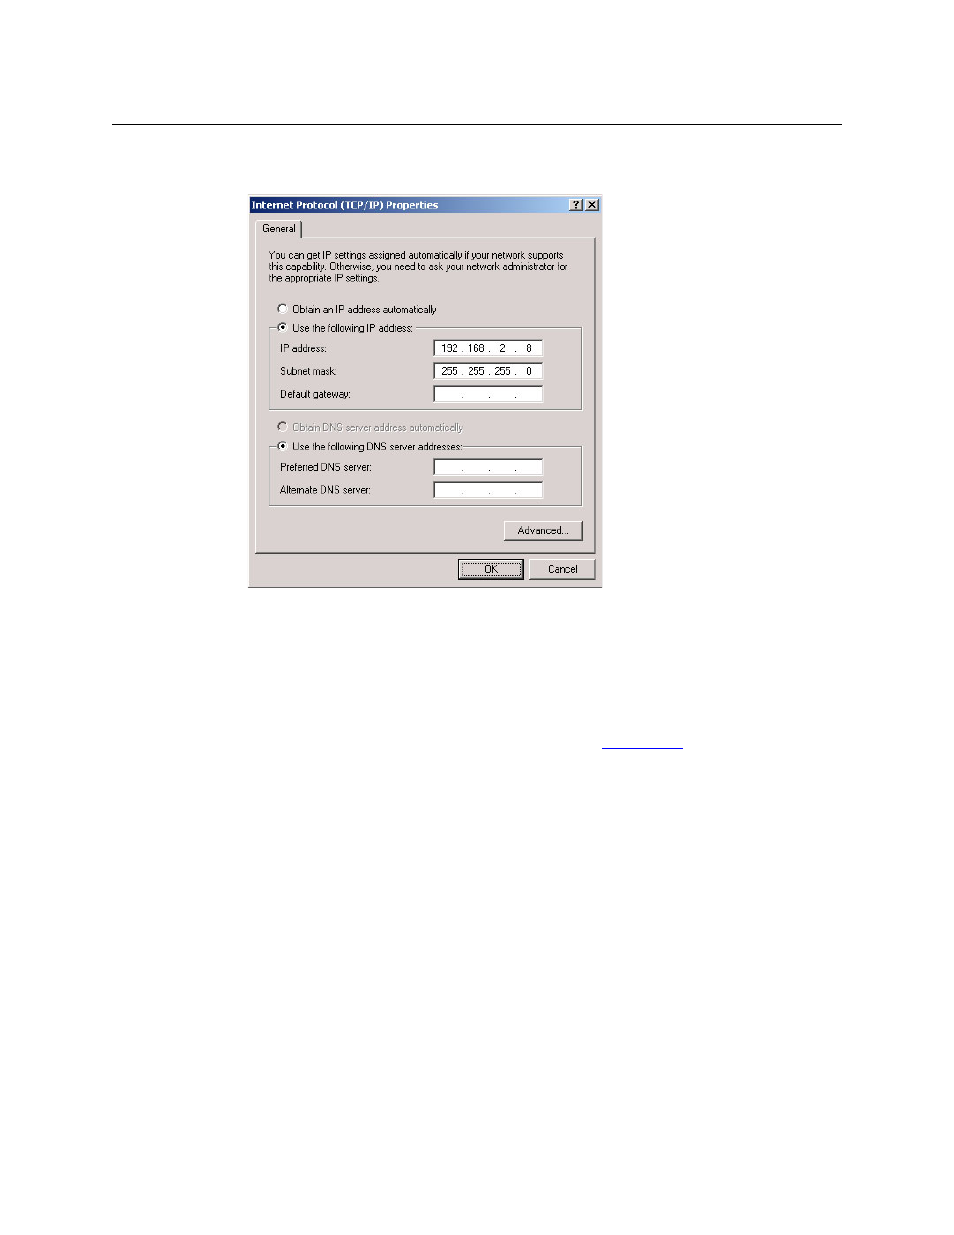
4 Select ‘Internet Protocol (TCP/IP)’ and click Properties. The ‘Internet Protocol (TCP/IP) Prop-
erties’ dialog box appears.
Fig. 1-8: Internet Protocol (TCP/IP) Properties Dialog Box
5 Select ‘Use the following IP address’ and enter the IP address for your PC. It is recommended
that you use the default subnet 192.168.2.xxx and the subnet mask 255.255.255.0.
Any unique IP address will work as long as it is on one of the subnets of your CRSC network.
The PC’s address on the subnet must not be the same as any of the frames (routers or remote
panels) on the subnet. It is recommended that you use Avoid addresses in the 50, 100 and
200 range. CRSC uses those as defaults. For details, see
6 Click OK to save your changes.
How to Create Multiple Subnets
1 Starting from step 4 in the preceding procedure, click
Advanced
.
2 In the ‘Advanced’ window, click Add and enter an IP address for your PC on each of the sub-
nets. Repeat this step for additional subnets.
3 After adding IP addresses for your subnets, click OK.
Installing CRSC
CRSC is available on the software and documentation CD (SB0033-xx) that ships with the equip-
ment. CRSC is a Java application and the installer installs a Java runtime support package.
You can also obtain the installer from Grass Valley customer service.
The installer creates a desktop shortcut for CRSC and makes an entry in Windows’ Start menu for
CRSC. The software installation process takes about one minute.