2 connecting up, Connecting optical cables, Connecting coaxial cables – Pioneer DV-939A User Manual
Page 28: Connecting analog audio cables, Connecting
Attention! The text in this document has been recognized automatically. To view the original document, you can use the "Original mode".
2
Connecting
U p
Important:
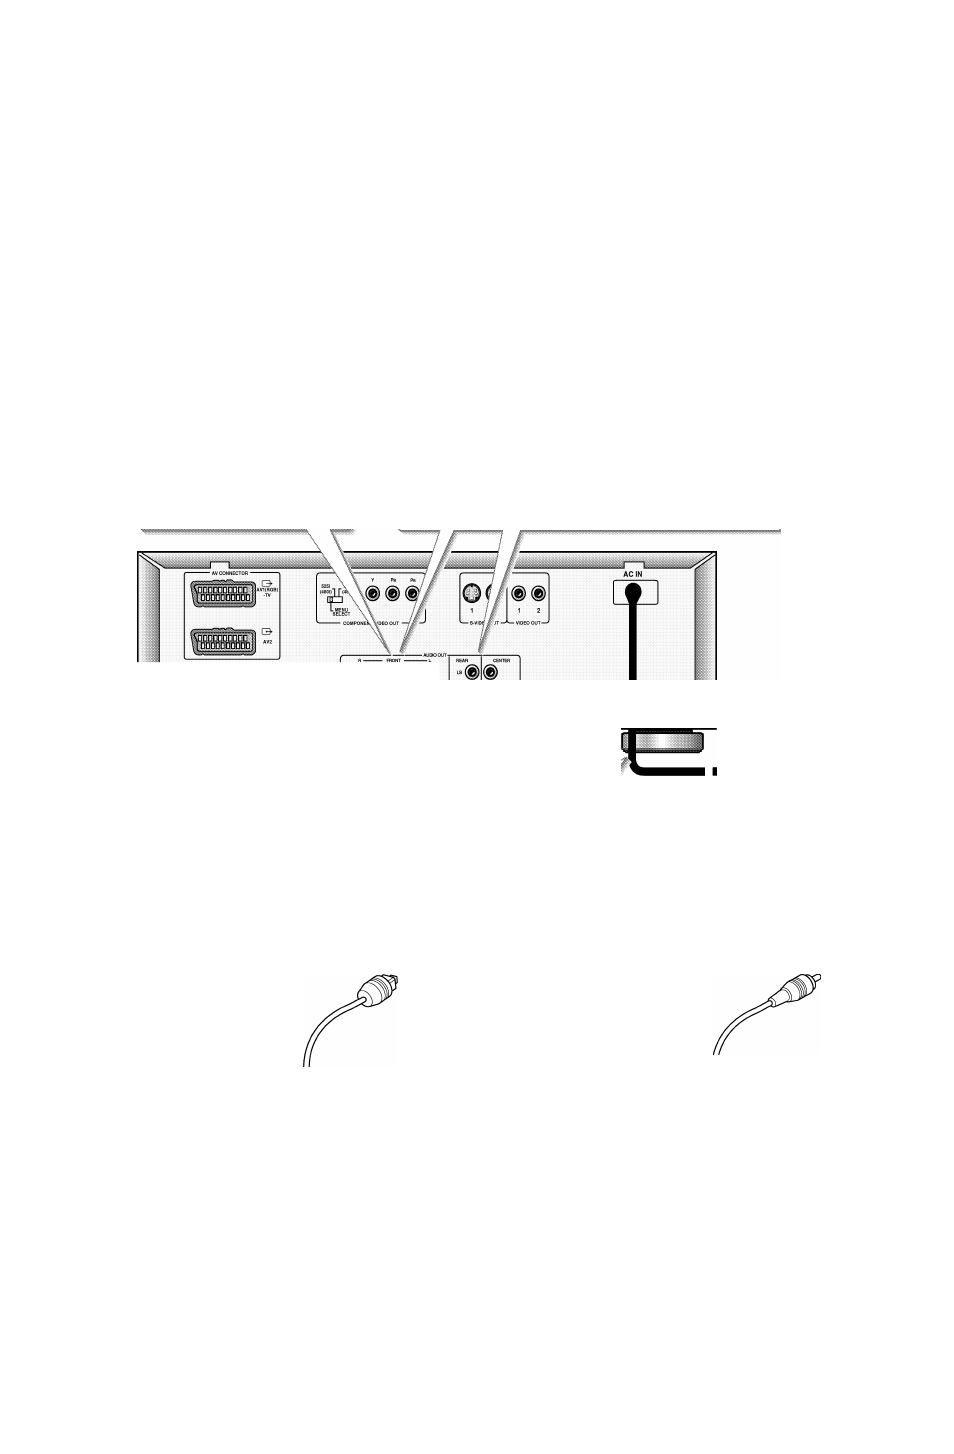
Before making or changing any rear panel connec
tions, make sure that all components are switched off and unplugged
from the wall outlet.
This player outputs multi-channel audio in both analog and digital
form. Check the manual for your amplifier/receiver to see what
equipment it is compatible with (especially which digital formats—
Dolby Digital, DTS, etc.—it can decode).
1
If your amplifier has stereo inputs
only, connect them here.
If your amplifier has 5.1 channel analog inputs, connect them
here.
Connect to the REAR (surround) LS (left)/RS (right), center and
subwoofer inputs if your amplifier has 5.1 channel analog inputs.
f ~ CONTROL
|o^ IN
- DIGITAL OUT SYSTEM-
Connect to the coaxial or optical input of your
amplifier, if it has digital inputs.
Connecting optical cables
Before plugging in an optical cord, pull
out the protective cover from the optical
jack.
Optical interconnects only plug in one
way, so make sure the plug is correctly
lined up with the jack before inserting.
You should hear it click into position
when fully inserted.
OPT
Plug into a standard AC wall
outlet.
yj
COAX
Connecting coaxial cables
Use an interconnect with a pin-type
(also called RCA or phono) plug on
each end to connect up digital coaxial-
type jacks. Make sure that the plug is
pushed fully home.
Connecting analog audio cables
Be sure to fully insert each plug for the best connection. The plugs
and jacks are colour-coded to make connection easier.