2 connecting up, Connecting scart and s-video cables, S-video or composite video – Pioneer DV-939A User Manual
Page 24: Setting the tv system switch, Setting the component video switch, Connecting
Attention! The text in this document has been recognized automatically. To view the original document, you can use the "Original mode".
2
Connecting
U p
Important:
Before making or changing any rear panel connec
tions, make sure that all components are switched off and unplugged
from the wall outlet.
This player outputs video in a number of different ways. Choose the
one most suitable for your system using the guide below.
1
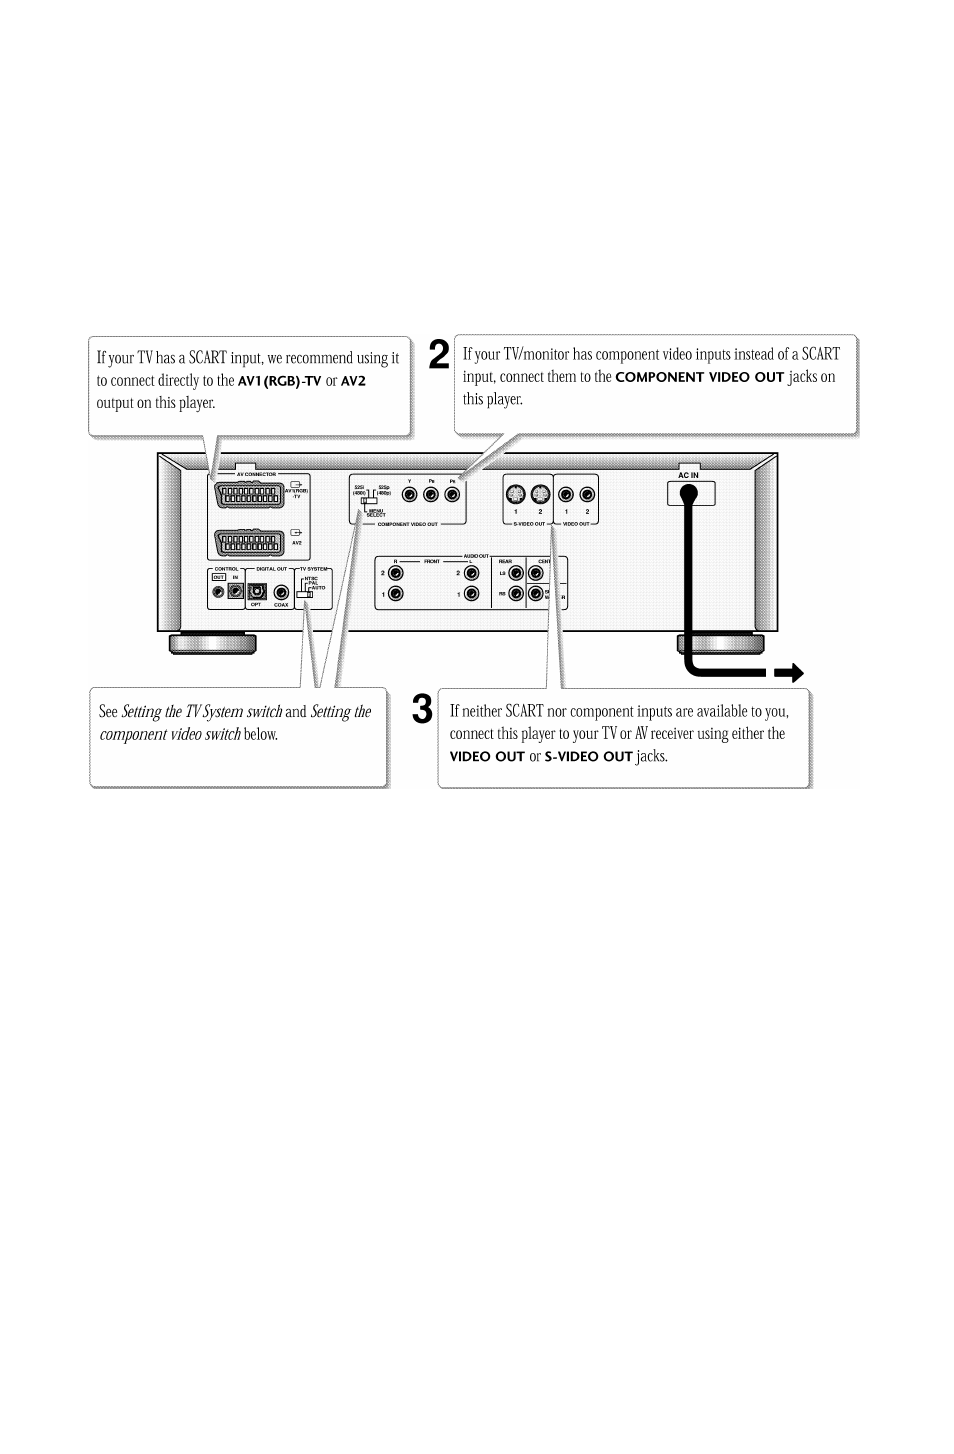
Connecting SCART and S-Video cables
SCART and S-Video cables will only plug in one way, so make sure the
plug is correctly lined up with the jack before inserting. Be sure to
fully insert for a good connection.
Note:
The
AVI (RGB)-TV
connector can output composite, S-
Video or RGB component video; the
AV2
SCART connector only
outputs composite video. If you connect just one TV use the
AVI
(RGB)-TV
connector. You can select the type of video output by
changing the
Video Out
setting in the
Setup Menu (page
94).
S-Video or composite video?
S-Video should give a better picture, so if you have an S-Video input,
use it. S-Video cables are available from any good audio/visual dealer.
Setting the TV System switch
Set the
TV
system
switch to match the TV system in your country
or region. If you have a multi-system TV that can display both PAL
and NTSC signals, set this switch to
AUTO. This will allow you to
watch both PAL and NTSC Video CDs and DVD discs.
This system can convert NTSC to PAL, so setting this switch to
pal
will enable you to watch any PAL or NTSC disc.
This system can also convert PAL to NTSC, but only for Video CDs, so
setting this switch to
NTSC will limit you to NTSC DVD discs.
Setting the component video switch
You only need to set this switch if you ’re using an NTSC TV/
monitor connected via the component video outputs of this player.
This player can output NTSC video as a standard interlaced signal
(the
525i(480i)
setting), or as a non-interlaced, or progressive
scan signal (the
525p(480p)
setting). Generally, however, you
should leave it set to
MENU, which makes this setting switchable
from the on-screen Setup menu. Switch manually if you have chosen
a setting from the Setup menu that is incompatible with your
television/monitor and therefore can’t see any picture.