3 calibration function, 3 calibration function -42, Calibration function -42 – KEYENCE IB Series User Manual
Page 94: Calibration function

4-42
IB-E
4
Set
ting V
a
rious
F
unct
ions
4-3
Calibration Function
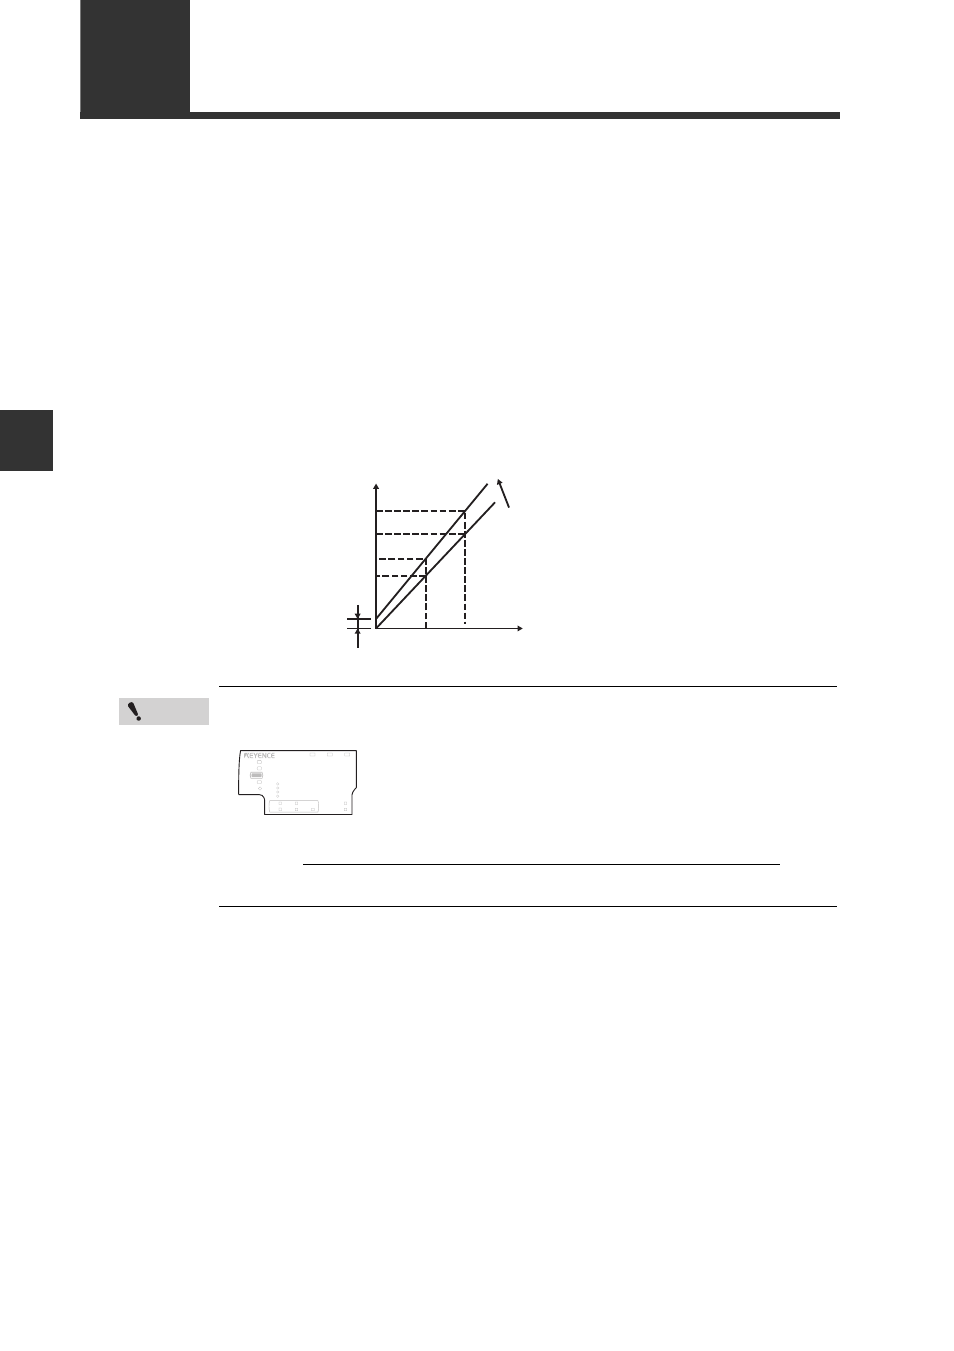
When there is a difference between the internal measurement value (R.V.) and the actual
dimension of the object, the value can be calibrated.
There are two types of the calibration function are available: Measured correction and
logical correction.
Measured correction
The zero point (offset) and tilt are both corrected. After measuring two different-sized
master workpieces and inputting the calibrated value, calibration takes place to match that
input value.
Logical correction
The zero point (offset) and tilt are both corrected. The values before and after calibration
are input, and calibration takes place according to those values.
Point
If the following conditions are not satisfied, the screen below is
displayed when the setting is complete. Make the setting again.
Calibration
R.V. before calibration (2)
R.V. before calibration (1)
Offset value A
R.V. you wish to display (2)
[
5'V]
R.V. you wish to display (1)
[
5'V]
'TT
LASER
BANK
0
1
2
3
HI
GO
LO
R.V. ANALOG
HI SHIFT
ZERO SHIFT
TIMING
LO
ALIGNMENT
5'6
HOLD CALC CHECK
0.5
≤
(R.V. you wish to display (2) ) - (R.V. you wish to display (1))
(R.V. before calibration (2)) - (R.V. before calibration (1))
≤ 2
