MacDon CA25 OM User Manual
Page 130
SECTION 8. MAINTENANCE AND SERVICING
169593
128
Revision B
8.8.4 Auger Tine Replacement
CA25 Combine Adapters are fitted with tines to
accommodate a wide variety and sizes of
combines.
Some conditions may require the removal or
addition of tines for optimal feeding of the crop.
In addition, tines that become worn or damaged
should be replaced.
To simplify the procedure, detach header from
combine.
Refer to Section 7.3 HEADER ATTACHMENT/
DETACHMENT.
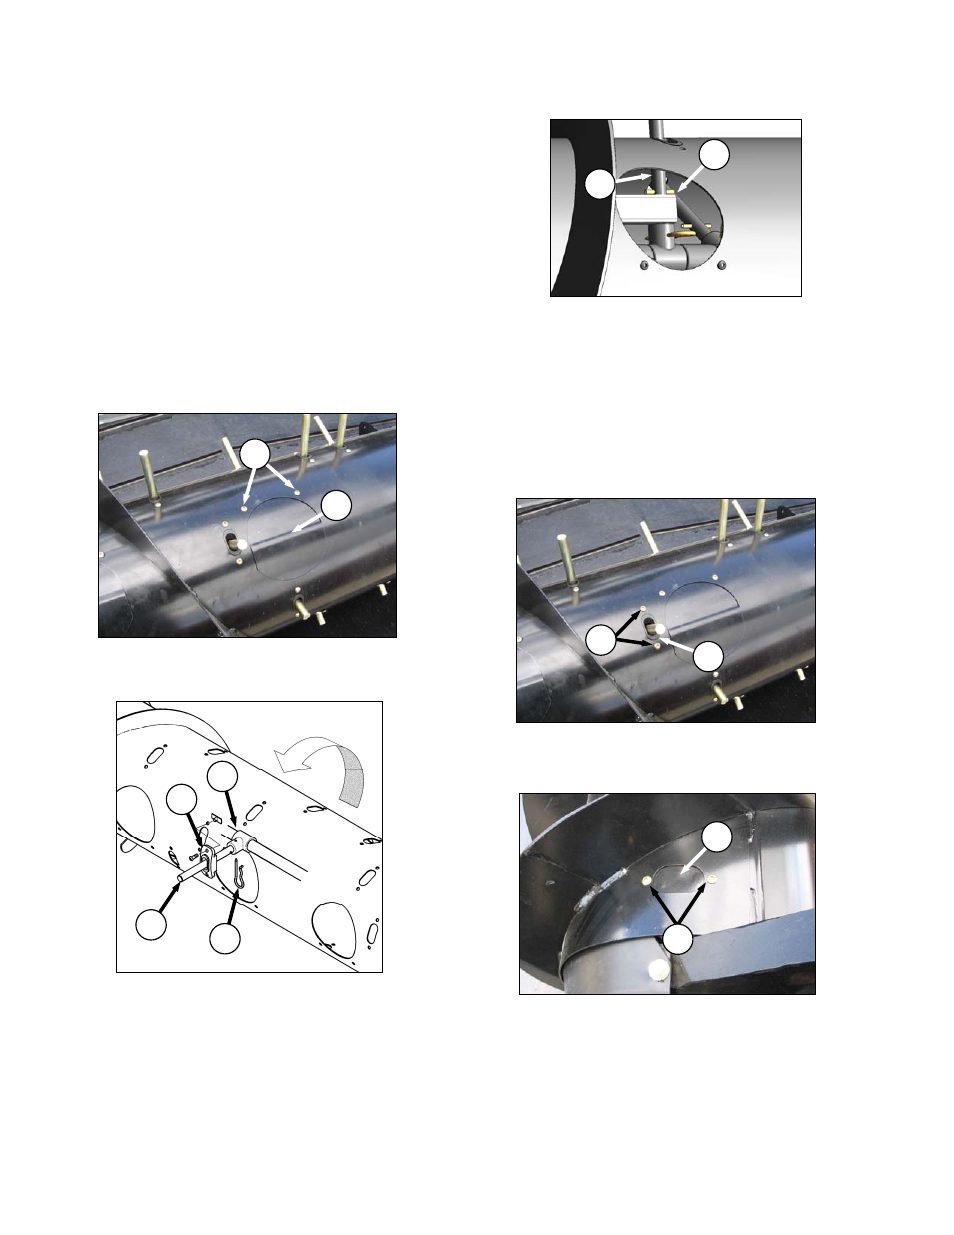
8.8.4.1 Tine
Removal
a. Remove screws (A), and remove access cover
(B).
b. From inside the auger, remove hairpin (C), and
pull tine (D) out of bushing (E).
c. From inside the auger, swivel tine away from
bushing, pull from plastic guide (F), and remove
from auger.
NOTE
If the sixth tine (D) opposite drive side
is being replaced, it also must be
slipped off drive tube (G). This
particular tine cannot be removed for
normal operation.
d. If tine is not re-installed, proceed to next step.
Otherwise, proceed to Section 8.8.4.2 Tine
Installation.
e. Remove screws (H) securing plastic guide (F)
to auger, and remove guide from inside auger.
f. Position cover (J) from inside auger over hole,
and secure with screws (K). Coat screws with
Loctite
®
#243 (or equivalent), and torque to
75 in·lbf (8.5 N·m).
F
E
D
C
B
A
F
H
J
K
G
D