5 powering up, Powering up procedure, Front panel overview – West Control Solutions Pro-EC44 User Manual
Page 36: Display, Powering up
Pro-EC44 2-Loop Graphical Profile Controller & Recorder
Pro-EC44 Product Manual - 59540-1 October 2013
Page 29
5 Powering Up
CAUTION:
Ensure safe wiring practices have been followed. When powering
up for the first time, disconnect the output connections. The instrument
must be powered from a supply according to the wiring label on the side of
the unit. The supply will be either 100 to 240V AC, or 24/48V AC/DC
powered. Check carefully the supply voltage and connections before
applying power
Powering Up Procedure
At power up, a self-test procedure is automatically started, during which a splash screen is
displayed and the LED indicators are lit. At the first power up from new, a Setup Wizard runs
to assist configuration of basic applications (refer to the Setup Wizard section on page 43).
At all other times, the instrument returns to the normal operation mode once the self-test
procedure is complete.
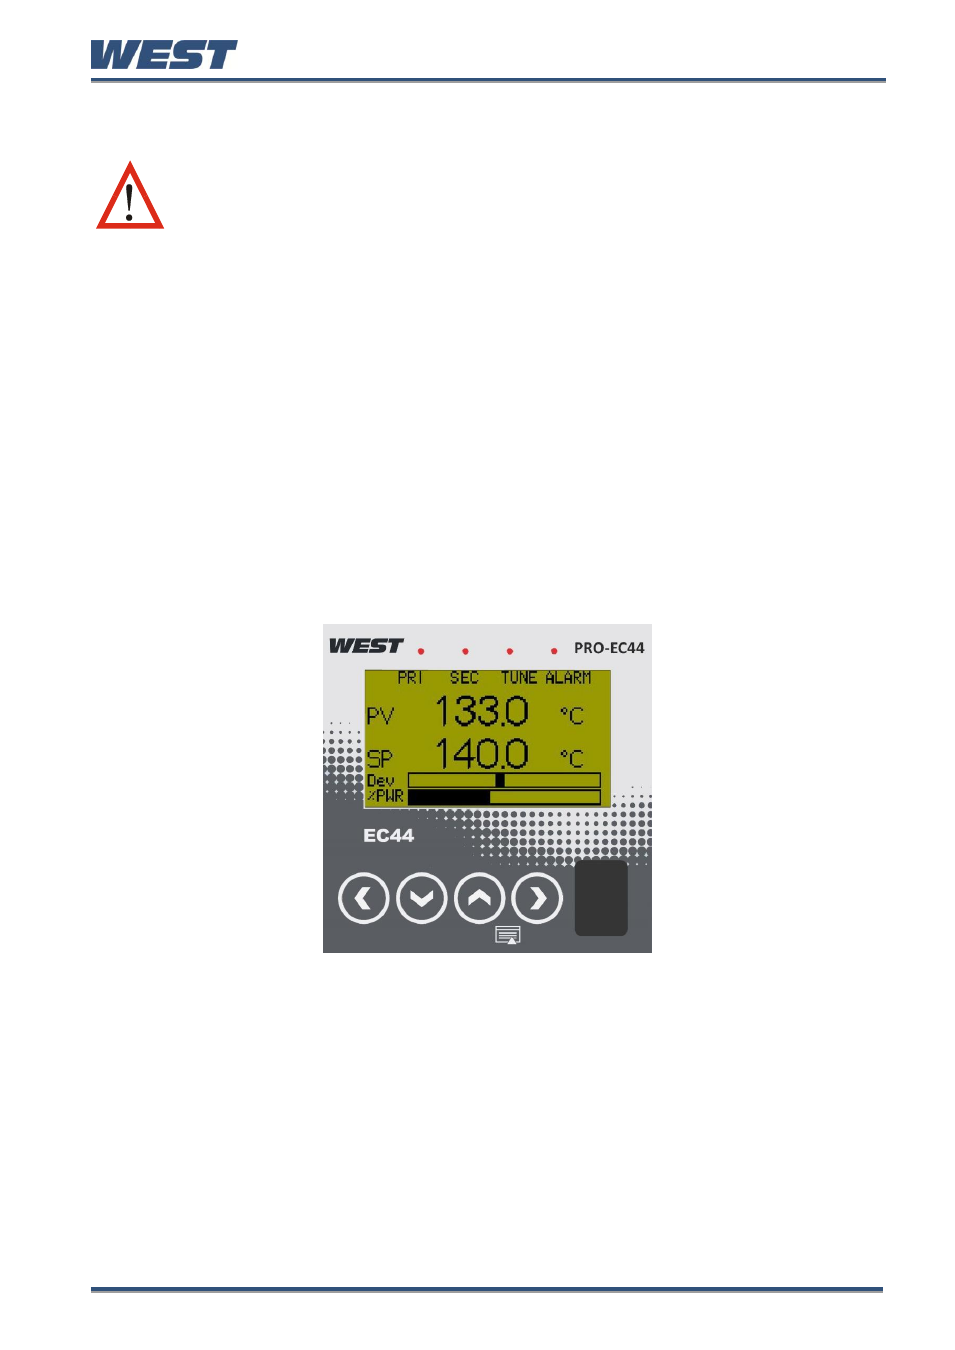
Front Panel Overview
The illustration below shows an instrument fitted with the optional USB socket located to the
right of the four keypad buttons. Clean the front panel by washing with warm soapy water
and dry immediately. If the USB option is fitted, close the port cover before cleaning.
Figure 43.
A Typical Front Panel
Display
The instrument has a 160 x 80 pixel monochrome graphical display with dual colour
(red/green) backlight. The main display typically shows the process variables, setpoints,
power / deviation bar graphs or graphical trends during normal operation. There are recorder
and profile status screen. The top line of the display has labels for the 4 LED indicators. If
desired, the backlight colour can be changed to indicate the presence of an active alarm or
latched output. Refer to the Display Configuration section - page 59