Operation and setup, cont’d – Extron Electronics ISM 824 User Manual
Page 70
Operation and Setup, cont’d
ISM 824 Integration Scaling Multiswitcher • Operation and Setup
3-38
Select Output submenu
This submenu allows selection of any installed ISM digital outputs to be configured
using further submenus. To select an output to configure, do the following:
1
.
From the top level (Output Card configuration) menu, press Next to enter
the first submenu level (Select Output). The last selected scaler board output
button and its associated input button lights green, and the LCD indicates the
selected output.
2
.
If configuration of another output is desired, press that output button to select
it. The LCD shows the new selection, and the corresponding buttons light.
3
. Proceed to the rest of the submenus to configure the selected output.
Input Setup submenu
This submenu allows configuration of the input tied to the selected output.
Depending on the source format, selection and/or adjustment of the aspect ratio,
horizontal and vertical start position, total pixel and pixel phase values, and the
number of horizontal and vertical active pixels is made by doing the following:
1
.
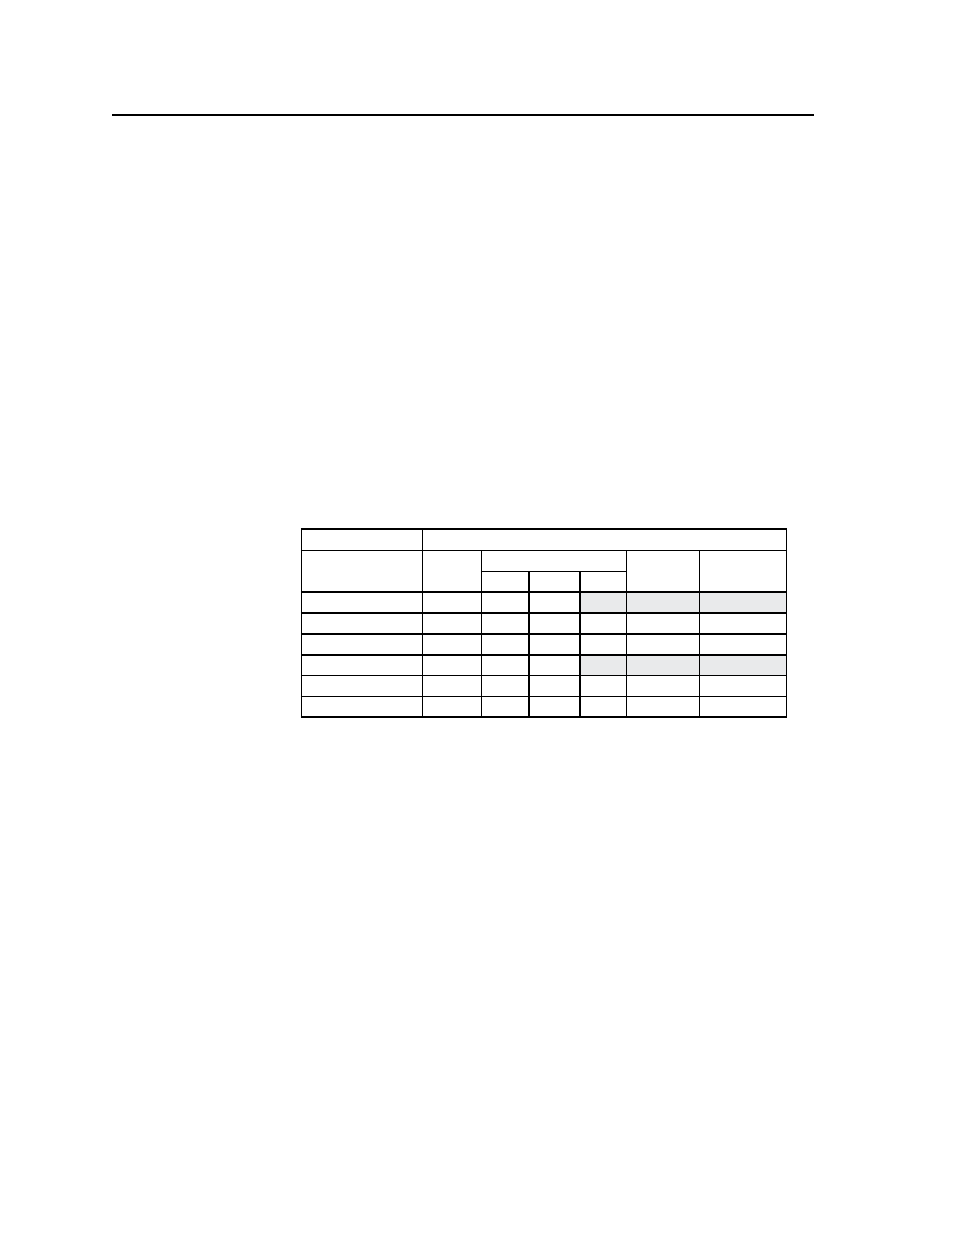
From the Select Output menu, press Next. The submenu series, Input
Setup, becomes active. See the table below for source format and associated
configuration possibilities.
Adjustment
Source Format
RGB
Y, R-Y, B-Y
S-Video
Composite
HD
Prog
Inter
Total Pixels
X
X
X
Active Pixels
X
X
X
X
X
X
Active Lines
X
X
X
X
X
X
Phase
X
X
X
H Start
X
X
X
X
X
X
V Start
X
X
X
X
X
X
Figure 3-49 — Source format and configuration table
2
.
Press Next to bring up the submenu to select the Aspect ratio.
Rotate either front panel encoder to select between a 4:3 or 16:9 aspect ratio.
3
.
Press Next to go to the next submenu, Horizontal and Vertical Start. This
submenu allows the user to adjust the image H and V pixel starting point.
Rotate the left front panel encoder (
[
) to adjust the H value, and rotate the
right encoder (
{
) to adjust the V value. The default for both is 128.
4
.
Press Next to go to the next submenu, Total Pixels and Phase value. This
submenu allows the user to adjust the number of pixels and the pixel phase.
Pixel phase is the timing of the scaler’s sampling.
Rotate the left front panel encoder (
[
) to adjust the total pixel value, and
rotate the right encoder (
{
) to adjust the pixel phase value.
5
.
Press Next to go to the next submenu, H and V Active pixels. This submenu
allows the user to adjust the number of active pixels.
Rotate the left front panel encoder (
[
) to adjust the H pixel value, and rotate
the right encoder (
{
) to adjust the V line value.
6
.
Press Next to return to the Input Setup menu.
7
.
Press Menu to go to the next submenu (Output Config).