Ism 824 menu system, Auto image menu, Chapter 3, “operation and setup”, “ism 824 – Extron Electronics ISM 824 User Manual
Page 61: Menu system, Section, E menu -29, Ism 824 menu system, See the, Ism 824 menu system” section, In this chapter
3-29
ISM 824 Integration Scaling Multiswitcher • Operation and Setup
ISM 824 Menu System
The ISM 824 has a six level menu system. Access to each level and sub-level is
made by using the menu control buttons.
•
Menu button — The Menu button enters and moves through the main menu
” in this chapter for details.
•
Next button — The Next button steps through the submenus in the ISM menu
system or exits the menu system. See
in this
chapter for details.
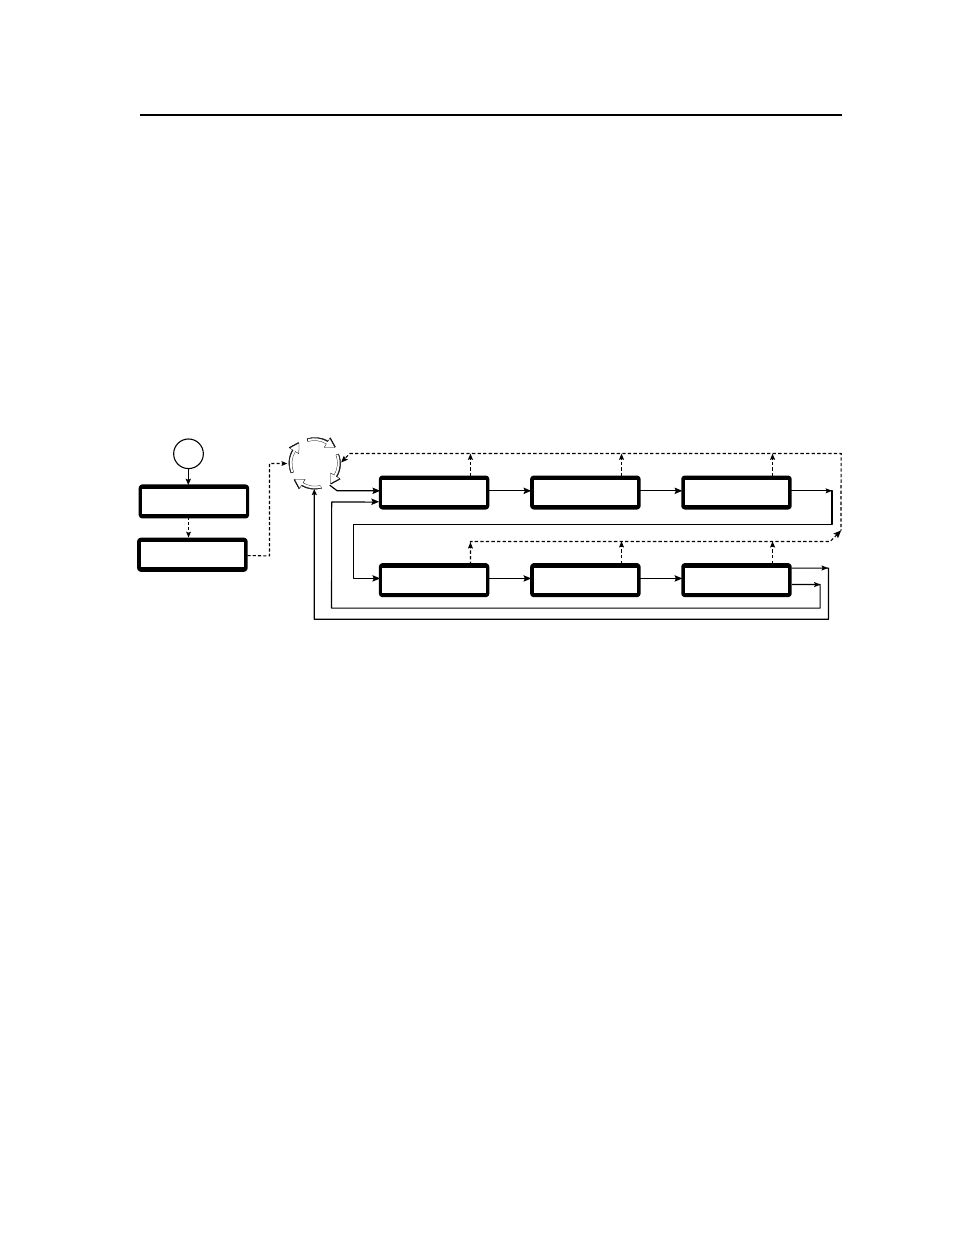
Each level has separate submenus, which are accessed by pressing the Next button.
At any point within a submenu, pressing the Menu button takes the user back up
a sub-level. Repeated pressing of the Menu button eventually takes the user out to
the top level menus. The top level menu flow is shown in figure 3-41. Individual
menu sub level access and operation is discussed in detail below.
Default
Cycle
Menu
Next
Menu
Menu
30 sec.
Input
Configuration
Output Card
Configuration
Auto
Image
Menu
Menu
30 sec.
30 sec.
30 sec.
System Reset
Menu
Menu
Menu
30 sec.
30 sec.
3
sec.
ISM 824
Version n.nn
1
sec.
Power
on
Extron
Electronics
4-5
sec.
View Comm
Settings
Press NEXT
to Exit
Figure 3-41 — ISM 824 Top level menu flow
Auto Image menu
This is the first menu level, and is reached by pressing the Menu button once when
the unit is in default display cycle. This menu allows the user to apply auto image
features to applicable outputs.
Useful for where a variety of input sources might be used, the ISM 824 auto image
feature automatically sizes and centers the selected input to fill the screen every
time a new input signal is detected. This is done regardless of whether that input
frequency has been detected before, to overcome problems occurring on signals
having the same H and V frequencies, but different active video timing.
N
Auto image is not available for all outputs. When auto image is selected,
only those output buttons for scaler/scan converter boards having auto image
capability and an active input signal flash green.
To set up auto image for an output board, do the following:
1
.
From the default cycle, press the Menu button once to select the auto image
menu (see figure 3-42).