Adding ties to existing ties, Adding ties to existing ties, Iew ti – Extron Electronics ISM 824 User Manual
Page 41
3-9
ISM 824 Integration Scaling Multiswitcher • Operation and Setup
Adding ties to existing ties
An audio tie can be added to an existing video tie, likewise a video tie can be added
to an existing audio tie.
An example of adding an audio tie to an existing set of video ties
In the following example audio is added to existing video ties. In this example,
input 2 is already tied to outputs 3 and 4 as video only and to output 1 as video and
audio (see figure 3-7). Audio (such as a sound track) from input 8 is to be added to
outputs 3 and 4.
N
This example assumes that there are no other existing ties for input 8.
1
.
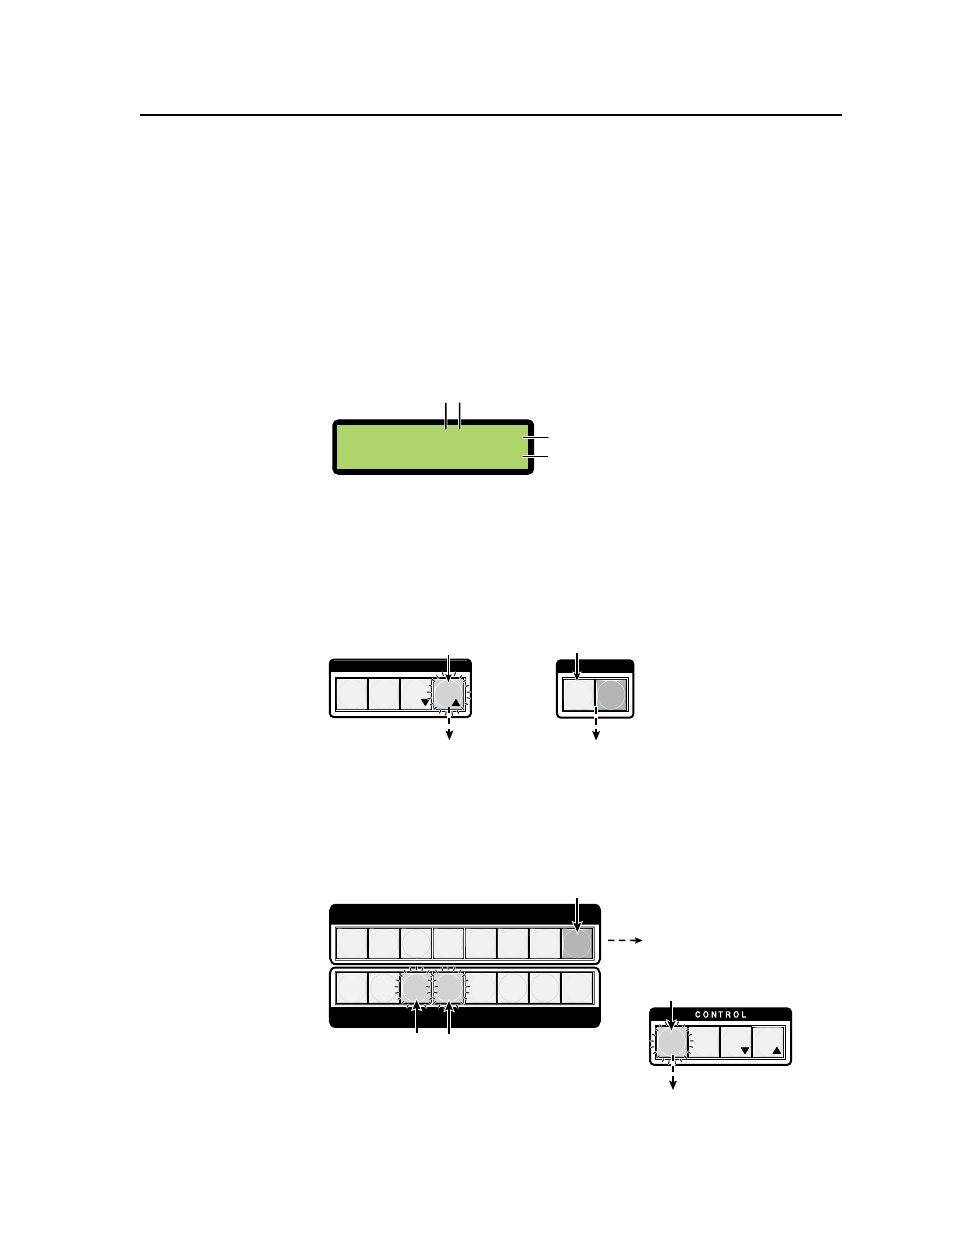
Press View (lights red) and check the existing ties on the LCD screen (see
figure 3-7).
V
iew
Ti
es
V
=2322-33-
A
=23---33-
Output 1 is tied to input 2 as video and audio
Outputs 2, 6, and 7 are tied to input 3 as video and audio
Outputs 3 and 4 are tied to input 2 as video only
Video
Audio
Video ties only
Figure 3-7 — Example LCD readout before adding audio ties
2
.
Press and release the Esc button (see figure 3-8). The View button
extinguishes and the LCD goes to default display mode.
Step 2.
Press the Esc button to clear
all selections.
The Video button extinguishes, and
the Audio button remains lit
red .
Step 3.
Press the Video button.
I / O
C O N T R O L
PRESET
ENTER
ESC
VIEW
The Esc button flashes
green once.
VIDEO AUDIO
Figure 3-8 — Clear all pending selections, then deselect Video
3
.
If lit, deselect (press) the green Video button. This extinguishes it, leaving
audio (lit red) only for this tie. (see figure 3-8).
4
.
Press and release the input 8 button (see figure 3-9). The button lights red.
PRESET
ENTER
ESC
VIEW
1 2 3 4 5 6 7 8
1 2 3 4 5 6 7 8
OUTPUTS
INPUTS
The Enter button blinks
green to indicate
the need to confirm the change.
After pressing Enter all lights extinguish.
Step 4.
Press and release the Input 8 button.
Step 6.
Press Enter.
The input button lights
red
to indicate that
audio outputs
can be tied this input.
The output buttons blink
red to indicate that audio
can be tied to these outputs.
Step 5.
Press and release the outputs 3 and 4 buttons.
Figure 3-9 — Select the input, then the outputs, then press Enter