Yamaha AW2400 User Manual
Page 80
AW2400 Owner’s Manual
Bounce (ping-pong) recording procedure
Mixdo
wn and bounce oper
ations
80
8
4
If you want to add an effect return channel
as a bounce-source, press the [SEL] key of
that effect return channel.
In the same way as for PLAY TRACK in step 3, you
can repeatedly press the [SEL] key to select the bus to
which the signal is sent.
5
In the RECORD TRACK area, select a
bounce-destination track, move the cursor
to the
symbol for that track, and press
the [ENTER] key.
You can select up to four bounce-destination tracks.
The odd-numbered tracks can be connected to Bus1 L
or Bus2 L, and the even-numbered tracks can be con-
nected to Bus1 R or Bus2 R. The [SEL] key will blink
red, indicates that the corresponding track is selected
as the bounce-destination.
In the same way as for the PLAY TRACK, you can
repeatedly press the [ENTER] key to select the signal
of the desired input bus.
For example if you move the cursor to the
symbol
for RECORD TRACK 1 and repeatedly press the
[ENTER] key, the screen will change as follows.
6
Raise the [STEREO] fader and the faders of
the track channel(s) you selected as the
bounce-destination to the 0 dB position.
7
Press the RTZ [
] key to rewind the song.
Then hold down the REC [
●] key and press
the PLAY [
] key.
The song will begin playing back, and will be
recorded on the bounce-destination track(s).
8
While you record the song, raise the faders
of the bounce-source track channels and
effect return channels to an appropriate
level. Adjust the pan, EQ, and dynamics of
each channel as necessary.
9
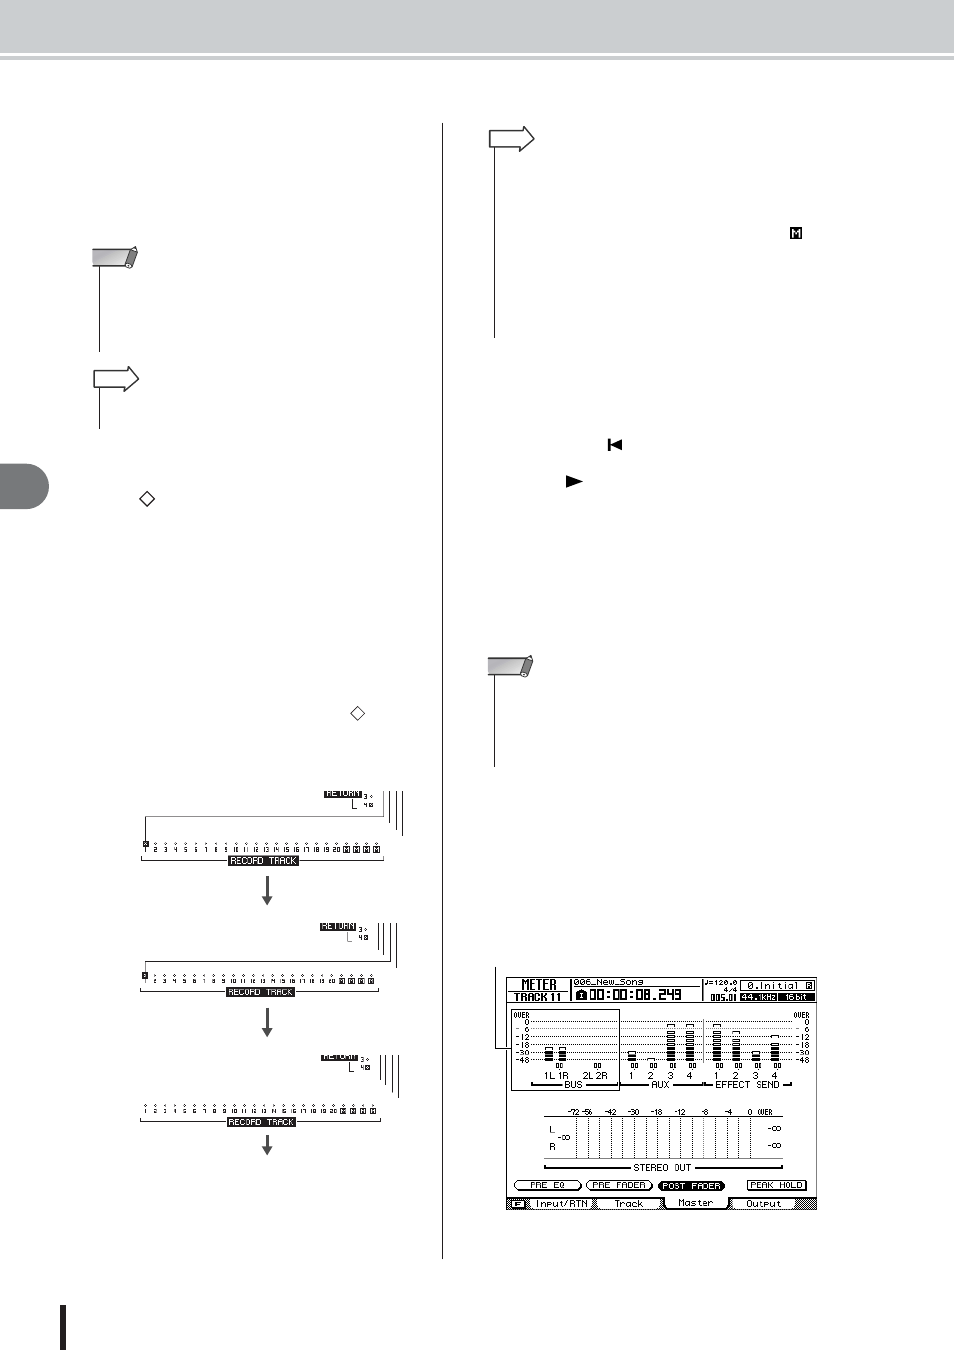
To check the level that is being output from
Bus 1/Bus 2 to the bounce-destination
tracks, press the [METER] key and then the
[F3] key.
The METER screen Master page will appear.
Here you can check the output levels for Bus 1 and
Bus 2.
• If you are using an effect via an effect bus, the bounce opera-
tion will not include the effect sound unless you add the signal
of the corresponding effect return channel to the bounce-des-
tination bus. For details, refer to “Applying Effects via Send
and Return” (
NOTE
• To control the effect return channels, make the Layer section
[IN 1-8] key (or [IN 9-16] key) light.
HINT
C
No connection
B
Connected to BUS2 L
A
Connected to BUS1 L
To
A
• You can also select a track by repeatedly pressing the [SEL]
key of a track channel.
• If you move the cursor to the SAFE button and press the
[ENTER] key, all connections will be cancelled.
• The track numbers of muted tracks will be displayed as
(mute), but you can still record to muted tracks.
• If an unpaired track is selected as a recording-destination, the
pan of the corresponding track channels will be set to the cen-
ter. If two paired tracks are selected, the pan of the corre-
sponding odd-numbered/even-numbered track channels will
be spread to left and right respectively.
HINT
• The bounce-destination faders and pans will not affect the
content that is recorded.
• When Auto Punch-in/out is engaged, you can monitor the
bounce source track channels during playback even when not
recording.
NOTE
Bus 1 and Bus 2 output levels