Punch-in/out, Manual punch-in/out – Yamaha AW2400 User Manual
Page 69
Punch-in/out
69
AW2400 Owner’s Manual
Ov
erdub
bing
7
If you make a mistake while overdubbing, you can re-record just the region in which you made
the mistake. This process is called “punch-in/out.”
Punch-in/out can be performed either as “manual punch-in/out” in which you switch between
recording and playback manually, or as “auto punch-in/out” in which recording and playback will
switch automatically when you reach the locations you specify beforehand.
Here’s how to perform punch-in/out using the keys of the
transport section or a foot switch.
1
If you want to perform punch-in/out using a
foot switch, connect a separately sold foot
switch (Yamaha FC5 or equivalent) to the
rear panel FOOT SW jack.
2
Call the RECORD screen Direct page, and
make sure that your instrument/mic is
assigned to the track on which you want to
punch-in.
3
Locate to a point earlier than where you
want to punch-in.
For details on Locate operation, refer to “Move To a
Specified Location” on page 87.
You may find it convenient to register a marker at a
location one or two measures earlier than the point at
which you want to punch-in, so you can quickly return
to that point. (For details on registering a marker
4
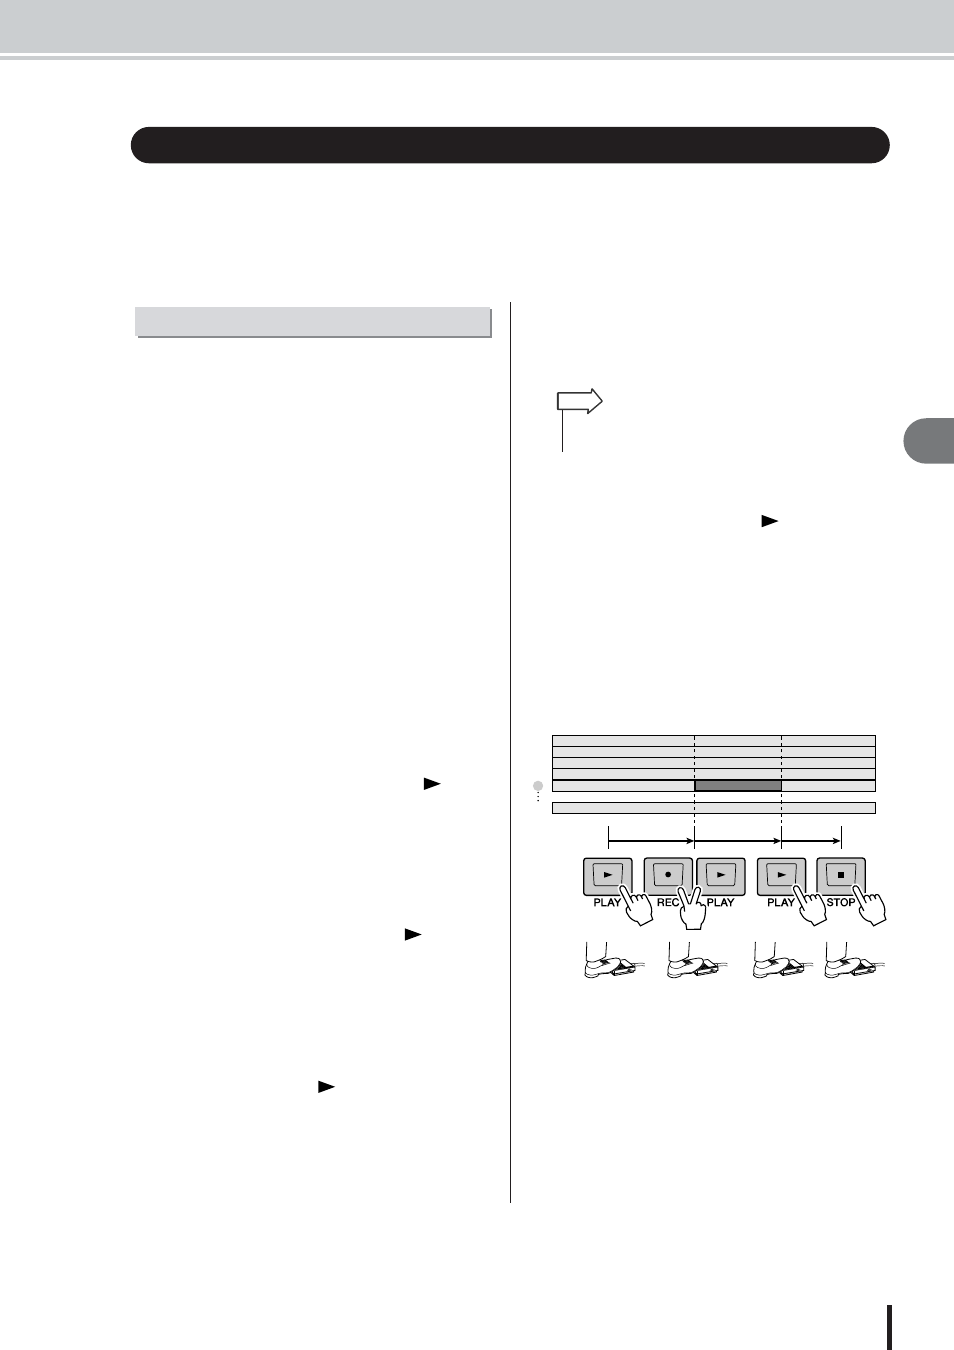
Press the Transport section PLAY [
] key.
(Alternatively, press the foot switch.)
The song will begin playing. At this time, the track
playback sound of the recording-destination track
channel will be sent to the stereo bus, so you will not
be able to monitor the input signal.
5
At the point where you want to begin
recording, hold down the PLAY [
] key
and press the REC [
●] key (or press the
foot switch once again), and begin playing
your instrument.
The recording-destination track will switch from play-
back to recording (“punch-in”).
6
At the point where you want to stop record-
ing, press the PLAY [
] key (or press the
foot switch).
The recording-destination track will switch from
recording back to playback (“punch-out”).
7
To stop playback, press the STOP [
■] key
(or press the foot switch).
The [UNDO/REDO] key in the data entry / control
section will light.
8
To listen to the newly-recorded content,
locate to a point just before the punch-in
point, and press the PLAY [
] key.
9
If you are satisfied with the newly-recorded
content, save the song. (For details on sav-
ing
If you decide to re-do the recording, press the [UNDO/
REDO] key to cancel the recording, and repeat steps
3–7.
The following diagram shows the manual punch-in/out
procedure.
Punch-in/out
Manual punch-in/out
• If no track has been enabled for recording, the foot switch will
alternate between Play and Stop operations.
HINT
3
2
1
4
5
24
play
play
record
punch-in
punch-out