Setting a center line as datum – HEIDENHAIN TNC 128 (77184x-02) User Manual
Page 308
Manual operation and setup
11.7
Datum setting with 3-D touch probe (Touch Probe Functions
software option 17)
11
308
TNC 128 | User's Manual HEIDENHAIN Conversational Programming | 5/2014
Setting the datum in the intersection of multiple holes:
Preposition the touch probe approximately in the
center of the hole
Hole is to be probed automatically: Define by soft
key
To probe the workpiece, press the machine
START button. The touch probe probes the circle
automatically.
Repeat the probing procedure for the remaining
elements
Terminate the probing procedure and switch to the
evaluation menu: Press the
EVALUATE soft key
Datum: In the menu window, enter both
coordinates of the circle center, confirm with the
SET DATUM soft key, or write the values to a table
(see "Writing measured values from the touch
probe cycles in a datum table", page 298, or see
"Writing measured values from the touch probe
cycles in the preset table", page 299)
Terminate the probing function: Press the
END soft
key
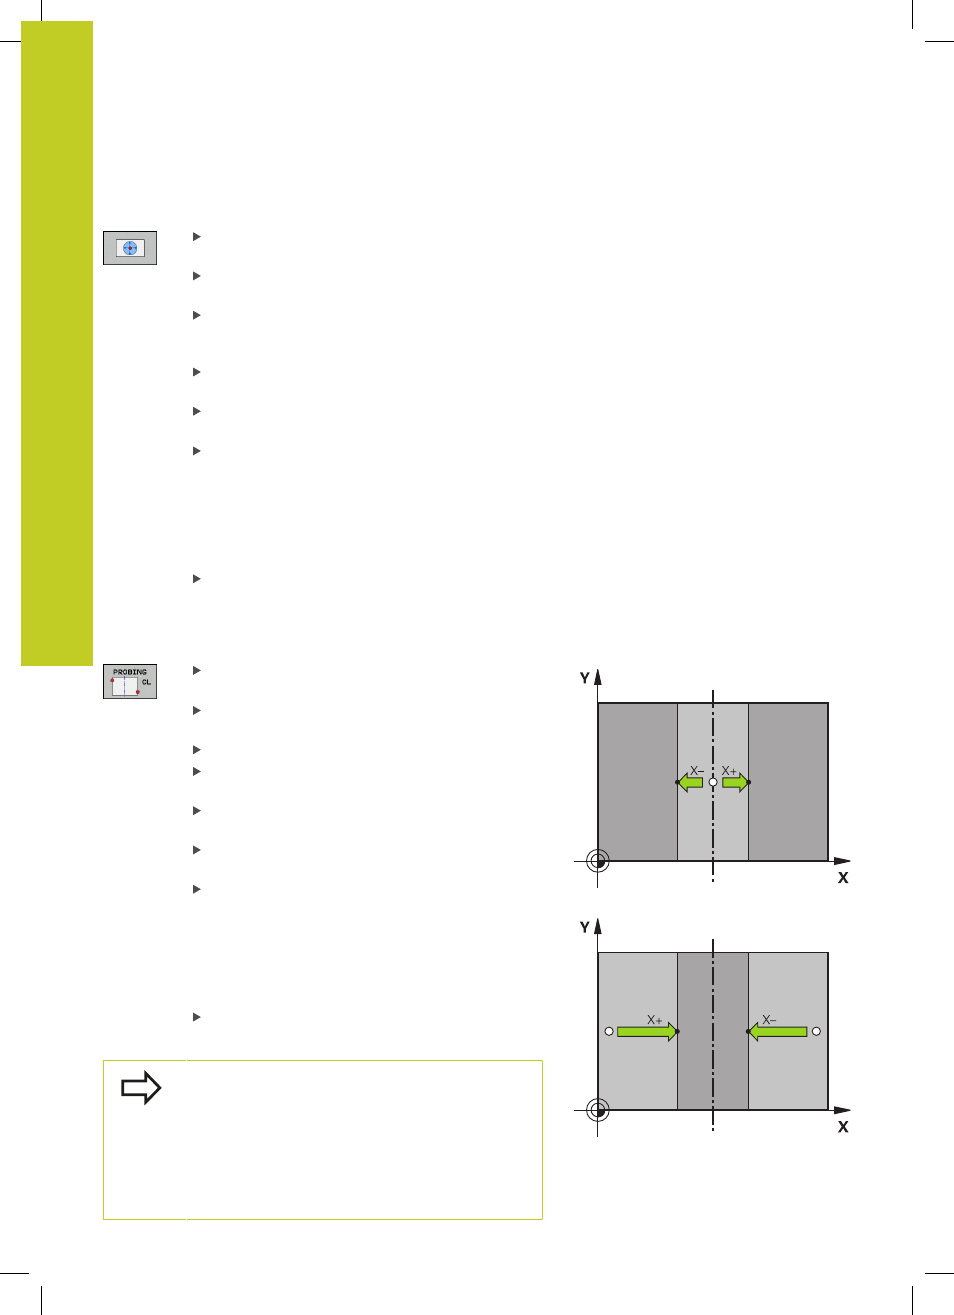
Setting a center line as datum
Select the probing function: Press the
PROBING
CL soft key
Position the touch probe at a position near the first
touch point
Select the probing direction by soft key
Start the probing procedure: Press the NC Start
button
Position the touch probe at a position near the
second touch point
Start the probing procedure: Press the NC Start
button
Datum: Enter the coordinate of the datum in the
menu window, confirm with the
SET DATUM soft
key, or write the value to a table (see "Writing
measured values from the touch probe cycles in a
datum table", page 298, or see "Writing measured
values from the touch probe cycles in the preset
table", page 299.
Terminate the probing function: Press the
END soft
key
After you have measured the second touch point,
you can use the evaluation menu to change the
direction of the centerline. You can choose by soft
key whether the datum or zero point should be set
in the reference axis, minor axis or tool axis. This can
be necessary if, for example, you would like to save
the measured position in the reference and minor
axis.